
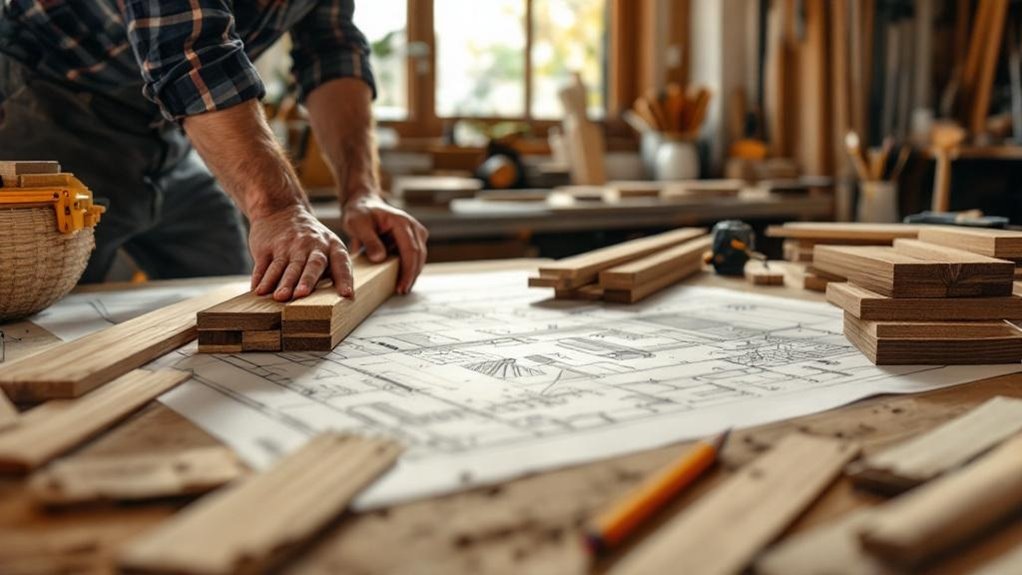
You’ll maximize productivity and safety by mapping your workflow strategically. A deliberate layout reduces unnecessary movement, minimizes accident risks, and keeps tools within arm’s reach. You’ll organize distinct zones—cutting, assembly, finishing—that support logical material progression. Proper positioning near dust collection systems maintains a clean, focused environment. Positioning electrical outlets, lighting, and ventilation early prevents costly mistakes. Your layout should evolve with your growing skills and ambitions, creating an efficient foundation that transforms how you work.
Key Takeaways
- Layout planning reduces unnecessary movement and interruptions, enhancing productivity and maintaining workflow momentum throughout projects.
- Strategic tool positioning and organized workspace zones minimize accident risks while ensuring safe, efficient operations.
- Proper dust collection system placement and clutter-free layouts create healthier working environments and prevent slip hazards.
- Ergonomic workstation arrangement with appropriate bench heights prevents strain injuries and supports prolonged, comfortable work sessions.
- Thoughtful measurement planning prevents material waste, project delays, and costly mistakes from poor organization and accessibility issues.
Map Your Workflow: The Foundation of Layout Planning
When you’re establishing a woodworking shop, mapping your workflow becomes the cornerstone of efficient layout planning. You’ll enhance productivity by reducing unnecessary movement between workstations and tools.
Start by identifying your primary tasks: cutting, assembly, and finishing. Next, arrange your tools and machines in a logical sequence that mirrors these operations. This strategic placement minimizes wasted steps and creates smooth connections between stations.
Arrange tools in logical sequence to mirror your primary tasks—cutting, assembly, and finishing—minimizing wasted steps between stations.
Consider how materials flow through your shop. You’ll want raw materials entering at one point and finished pieces exiting at another. Position frequently used tools within arm’s reach to eliminate time-consuming searches.
Your layout planning should reflect your specific workflow patterns. By thoughtfully positioning each element, you’ll establish a foundation that supports both current projects and future expansion.
Keep Tools Positioned to Prevent Accidents
Strategic tool positioning directly reduces accident risk in your woodworking shop. You’ll minimize unnecessary movements by placing frequently used equipment within arm’s reach, preventing awkward reaches that compromise safety and control.
Organize your workspace into designated zones—cutting, assembly, and finishing areas—that naturally support your workflow. This intentional arrangement decreases the likelihood of mishaps by ensuring you’re never searching for tools mid-project.
Clear pathways and clutter-free layouts aren’t luxuries; they’re essential safety features. You maintain accessible exits and quick escape routes during emergencies when your shop remains organized.
Regular assessments of your tool organization prevent misplacement and improper use. By continuously evaluating positioning, you create an efficient environment where every tool serves its purpose safely and strategically.
Arrange Machines for Dust Control: A Layout Priority
Position your dust-producing machines—primarily saws and sanders—directly adjacent to your dust collection system to maximize airflow efficiency and minimize airborne particles throughout your shop.
Cluster frequently used tools together to streamline workflow while maintaining proximity to dust collection for effective debris management.
Centralize dust collection stations to simplify setup and promote consistent cleanup, essential for maintaining a healthy work environment.
Plan dust collection pipes to serve additional tools, ensuring all machines contribute to a cleaner workspace.
This organized approach to work areas reduces the risk of slip hazards from accumulated sawdust and debris on your floor.
Create Three Core Zones: Rough Mill, Assembly, Finishing
To maximize your workshop’s efficiency and safety, you’ll want to organize your space into three distinct operational zones—Rough Mill, Assembly, and Finishing—each serving a specific purpose in your woodworking project.
Position your Rough Mill zone near the entrance to streamline initial lumber processing and minimize handling time. Centralize your Assembly zone to reduce movement between cutting, fitting, and joining operations.
Locate your Finishing zone away from dust-producing machines, ensuring proper ventilation for clean, contamination-free results. This strategic layout planning directly reduces the risk of accidents by separating tasks involving different tools.
Clearly defined zones optimize space utilization, enhance workflow efficiency, and improve overall productivity. Your methodical approach to zone creation establishes a foundation for safer, more organized woodworking operations that consistently deliver superior project outcomes.
Design Your Storage by Tool Access Frequency
As you’ll discover when organizing your workshop, the frequency with which you use each tool should dictate where you store it. Position your most-used tools—saws, drills, and chisels—within arm’s reach of your workstations to minimize unnecessary movement and streamline your workflow. This strategic placement directly boosts efficiency by eliminating time wasted searching for essential equipment.
For tools you access less frequently, implement vertical storage solutions that maximize floor space without sacrificing accessibility. Keep these items at eye level or within easy reach on wall-mounted systems.
Regularly assess your storage arrangement based on actual usage patterns. Your organization system should evolve with your changing project demands, ensuring your workspace remains optimized for focused craftsmanship and peak productivity.
Why Ergonomic Layout Prevents Fatigue and Injury
While organizing your tools by access frequency sets the foundation for an efficient workshop, the physical setup of your space plays an equally essential role in your long-term health and productivity.
An ergonomic layout facilitates natural body movements and minimizes awkward postures, helping you reduce the risk of strain injuries during extended woodworking tasks. Proper bench height and strategic tool placement prevent unnecessary bending or reaching, enhancing both comfort and efficiency.
Adjustable workstations and anti-fatigue mats enable you to maintain comfortable positions throughout prolonged standing sessions, decreasing fatigue from repetitive motion. Additionally, ample maneuvering space around tools and machines promotes safer operation while reducing accidents from cramped conditions.
Effective organization minimizes unnecessary movements, allowing you to focus on tasks without exhaustion from excessive walking or bending.
Run Power, Light, and Ventilation Before Building
How many woodworking workshops have you seen compromised by inadequate lighting or tangled extension cords snaking across the floor?
You’ll prevent this chaos by running power, light, and ventilation systems before constructing your space. Install electrical outlets strategically throughout your layout to eliminate dangerous extension cords and enhance tool accessibility.
Install strategic electrical outlets throughout your shop layout to eliminate dangerous extension cords and enhance tool accessibility.
Combine natural and artificial lighting to reduce eye strain during detailed work. Implement effective ventilation systems—dust collection and air exchange setups—to maintain a healthy environment by eliminating airborne particles.
Planning these utilities upfront optimizes your overall shop layout, allowing flexible workstation and tool placement. You’ll gain both efficiency and safety, creating a professional woodworking environment that supports your craft without workflow disruptions.
Adapt Your Layout as Your Skills and Projects Grow
Your woodworking shop shouldn’t remain static once you’ve built it—you’ll want to evolve your layout alongside your developing skills and expanding project ambitions. As you advance, you’ll need to accommodate specialized machinery and create designated zones for cutting, assembling, and finishing.
This strategic layout adaptation streamlines your workflow and enables successful project completion with greater precision.
Regularly reassess your workspace based on personal preferences and experiences gained from each build. Implement modular storage solutions that flex with your changing needs, ensuring your setup supports continued learning.
From Joinery to Assembly: Organize Your Bench Setup
You’ll streamline your joinery and assembly work by organizing tools according to their function, positioning each station to support logical workflow progression.
Arrange your benches so that materials move naturally from cutting zones through assembly areas, minimizing unnecessary movement and interruptions.
Create dedicated assembly stations equipped with your clamping and fastening tools within arm’s reach, allowing you to maintain momentum as you shift between joinery tasks.
Organizing Tools By Function
A functional bench setup divides your workspace into distinct zones, each dedicated to a specific phase of woodworking—joinery, cutting, assembly, and finishing. By organizing tools by function, you’ll create a streamlined workflow that maximizes efficiency while saving time on unnecessary searching.
Position your joinery tools in one area, cutting implements in another, assembly equipment nearby, and finishing supplies at the end of your bench. This strategic arrangement guarantees essential tools remain within arm’s reach during each project phase.
You’ll minimize clutter and maintain focus on your work. Moreover, organizing tools by function reduces the risk of accidents. Having appropriate tools readily available prevents you from improvising with unsuitable equipment, which commonly causes injuries.
Your methodical approach transforms your workspace into a safe, productive environment.
Positioning Benches For Workflow
Strategic bench positioning transforms how you move through each woodworking phase. You’ll enhance workflow efficiency by situating your workbench near the joinery area, minimizing unnecessary movement between tasks. This deliberate layout planning streamlines your process from cutting to assembly.
Design your assembly space generously—you need room to maneuver around larger projects and access tools without obstruction. Consider deploying mobile workbenches to adapt your setup based on project requirements, giving you flexibility when your workflow demands shift.
Establish clear pathways connecting your joinery, assembly, and finishing zones. This prevents clutter accumulation and maintains a safe, productive environment.
Strategic positioning reduces wasted motion, letting you focus entirely on craftsmanship rather than logistics.
Creating Efficient Assembly Stations
Transform your assembly area into a purposeful workspace by establishing dedicated stations that accommodate joinery tasks while keeping tools and workpieces within arm’s reach. You’ll streamline your efficient workflow by designating specific zones for cutting, assembling, and finishing operations.
Mobile workbenches and collapsible tables give you flexibility to adapt your setup based on project demands. Implement vertical storage solutions to eliminate clutter and maintain organization throughout your assembly stations.
Strategic lighting and ergonomic features enhance visibility and reduce fatigue, directly improving accuracy in detail work. This methodical approach to workspace organization minimizes unnecessary movement and distractions.
Five Layout Mistakes That Waste Time and Materials
You’ll undermine your efficiency when you fail to plan measurements before cutting, leaving you scrambling to recalculate and adjust materials mid-project.
Inadequate tool positioning forces you to traverse your shop repeatedly, draining energy and breaking your workflow’s rhythm.
Skipping a thorough material assessment means you’ll discover shortages or unsuitable stock only after you’ve committed time and resources to construction.
Poor Measurement Planning
Five critical measurement errors can derail your woodworking project before you’ve even cut your first piece.
You’ll waste expensive materials and time if you don’t establish consistent measurement tools and practices from the start. Parallax errors—caused by improper eye alignment or poor lighting—skew your readings and compromise accurate cuts. Instead of relying solely on measuring devices, mark pieces directly from one another to reduce calculation mistakes.
Inconsistent measurement practices introduce cumulative errors that compound throughout your project. You’ll find that wasted materials add up quickly when miscalculations force rework.
Standardize your measuring approach, verify your tools’ accuracy, and account for lighting conditions. These methodical steps guarantee reliable measurements and protect your valuable wood stock from preventable loss.
Inadequate Tool Positioning
A disorganized workshop layout forces you to waste precious time traversing between workstations instead of executing cuts and joinery. When you don’t position your most-used tools strategically, you’ll inevitably lose momentum and productivity.
Clustering frequently used tools together minimizes unnecessary movement, allowing you to maintain focus on your project. Conversely, poor tool positioning creates clutter and accessibility issues that directly contribute to cut errors. You’ll struggle to reach properly aligned equipment, compromising accuracy and material integrity.
A well-planned layout designates specific zones for cutting, assembly, and finishing stages. This methodical approach guarantees smooth workflow shifts and dramatically reduces costly mistakes.
Skipping Material Assessment
| Assessment Factor | Consequence |
|---|---|
| Grain direction | Aesthetic compromises |
| Material flaws | Structural integrity loss |
| Wood suitability | Inappropriate material selection |
| Dimension accuracy | Miscalculations and re-cuts |
Your layout plan must account for each wood type’s unique properties and limitations. By thoroughly examining material dimensions, grain patterns, and potential defects before cutting, you’ll eliminate avoidable delays, prevent over-purchasing, and optimize your resource allocation. This methodical approach transforms material assessment from optional to indispensable, directly impacting both timeline efficiency and project success.
Frequently Asked Questions
Why Is Layout Planning Important?
You’ll enhance your workflow efficiency, minimize injury risks, and maximize your workspace when you strategically arrange tools and workstations. You’ll complete projects faster with better organization and quality results.
What Is the 5’7″ Rule in Woodworking?
You’ll organize your workshop like a master conductor orchestrates an instrument. The 5’7″ Rule keeps your most-used tools within arm’s reach, eliminating wasted movement and sharpening your focus on craftsmanship.
Do You Really Need a Planer for Woodworking?
You don’t absolutely need a planer, but you’ll find it invaluable for achieving uniform thickness and smooth surfaces efficiently. You’ll save considerable time and effort compared to manual sanding, greatly improving your finished product’s quality.
How Does Proper Planning Help You When Making a Woodworking Project?
You’ll hit the ground running when you plan thoroughly. You’ll streamline your workflow, estimate materials accurately, create precise cut lists, identify safety hazards, and collaborate effectively with experienced woodworkers.
Conclusion
You’ll visualize your shop transforming from chaotic clutter into a precision instrument. Picture wood flowing seamlessly from rough stock through milling, assembly, and finishing—each station perfectly positioned. You’re eliminating wasted steps, preventing accidents before they happen, and breathing cleaner air. Your hands move deliberately, your tools wait exactly where you need them. You’ve engineered efficiency into every corner. That’s not just organization; that’s mastery. You’re building your ideal workspace.