
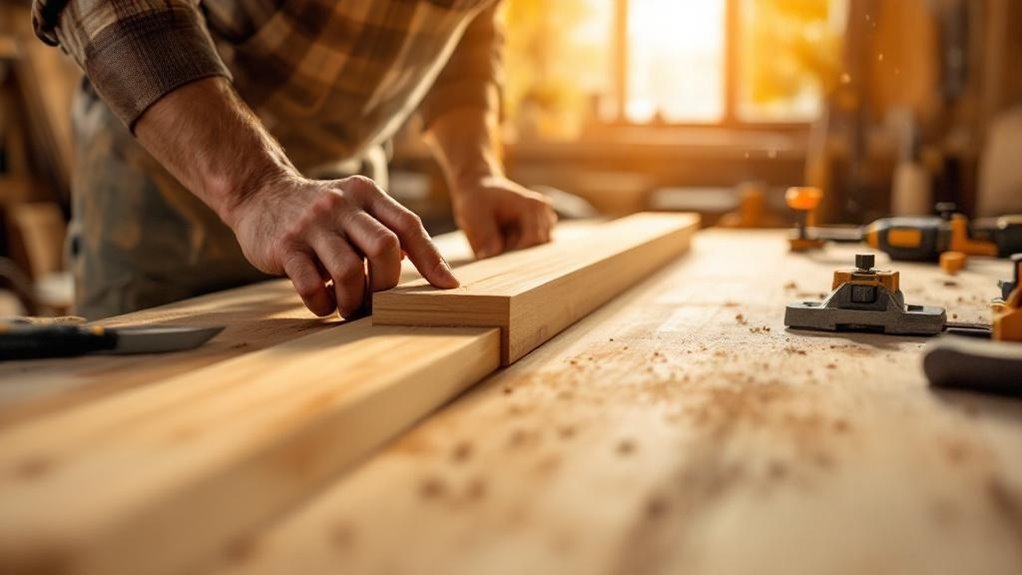
You’ll master woodworking assembly by preparing materials thoroughly before you start. Measure, cut, and sand every component to exact dimensions, then organize pieces in assembly sequence. Choose appropriate joinery techniques—mortise and tenon for strength, pocket holes for discretion—and use dowels for reinforcement. Verify squareness continuously with a carpenter’s square, dry-fit parts first, and avoid over-tightening fasteners. This systematic approach transforms complex projects into manageable steps that prevent costly errors and guarantee success.
Key Takeaways
- Organize all components by type and assembly sequence in separate zones to prevent mistakes and streamline workflow efficiency.
- Sand all wood edges and surfaces before assembly to ensure smooth joints and reduce finishing time significantly.
- Use a carpenter’s square and equal diagonal measurements throughout assembly to verify squareness and catch alignment errors early.
- Dry-fit parts before permanent joining to identify and correct discrepancies without wasting materials or time on fixes.
- Pre-drill holes to prevent wood splitting and avoid over-tightening fasteners, which can damage components and compromise structural integrity.
Prepare All Materials Before Assembly Starts
Before you begin assembling your woodworking project, you’ll want to gather all required materials—wood pieces, screws, and hardware—according to your project plans. This foundational step guarantees a smooth, uninterrupted assembly process.
Next, measure and cut all wood components in advance, organizing them by size and type. This systematic approach streamlines your workflow and eliminates confusion during construction, making Easy DIY projects manageable.
Measure and cut wood components in advance, organizing by size and type to streamline workflow and eliminate construction confusion.
Prepare your workspace thoroughly: guarantee adequate lighting, clear surfaces, and sufficient space for handling materials comfortably. Position all necessary tools—drills, saws, measuring devices—within arm’s reach to prevent workflow interruptions.
Finally, verify each component against your assembly instructions before starting. This verification confirms compatibility and prevents costly misalignments during construction.
Cut and Sand Every Piece to Exact Dimensions
Precision begins the moment you pick up your measuring tape. You’ll want to cut and sand every piece with exacting care, as even minor errors compound during assembly. Use a miter saw for clean, precise cuts that match your exact dimensions. Afterward, sand all edges and surfaces to eliminate rough spots that prevent smooth joints.
| Tool | Purpose | Benefit |
|---|---|---|
| Miter Saw | Precise crosscuts | Exact dimensions |
| Square | Angle verification | Accurate alignment |
| Measuring Tape | Dimension checking | Error prevention |
Maintain your tools consistently to guarantee dimensional accuracy across multiple pieces. For any beginner woodworking project, verification using a square and measuring tape during both cutting and sanding processes proves invaluable. This methodical approach assures superior assembly quality and considerably reduces gaps and misalignment.
Lay Out Your Components in Assembly Order
You’ll organize your components by the exact assembly sequence, laying out each piece in the order you’ll join them together.
Group similar component types—legs, tops, support beams—in separate zones to minimize searching and maximize efficiency during construction.
This visual roadmap lets you verify proper alignment and fit before you begin fastening, preventing costly mistakes and rework.
Organize By Assembly Sequence
Laying out all components on a flat surface before assembly guarantees you’ve got everything you need and sets the foundation for an organized process. You’ll streamline your DIY project by arranging pieces in the exact sequence you’ll use them.
Group similar items together—legs, panels, supports—then arrange them according to your project plans. This visualization prevents backtracking and keeps momentum flowing throughout assembly.
| Assembly Stage | Component Type | Quantity | Status |
|---|---|---|---|
| Foundation | Legs & Base | 4 | ☐ |
| Structure | Panels & Frames | 6 | ☐ |
| Support | Braces & Joinery | 8 | ☐ |
| Hardware | Screws & Fasteners | 24 | ☐ |
Track each component using a checklist as you progress. Store small parts in labeled containers for instant access. This methodical approach eliminates confusion and guarantees nothing gets overlooked during your assembly process.
Group Similar Component Types
Before you drive a single fastener, organize all components by type—legs, panels, frames, braces, and hardware—then arrange them in the exact sequence your project demands. This systematic approach transforms easy woodworking projects into manageable tasks.
Group similar components together to streamline your workflow. When organizing components by category, you’ll quickly locate pieces without hunting through scattered materials.
Store small parts like screws and dowels in labeled bins to prevent misplacement. Grouping pieces that require identical tools enhances efficiency further.
You’ll minimize tool-switching time and maintain momentum throughout assembly. Keep your instructions nearby when similar components cluster together, allowing you to reference specifications rapidly and follow the correct sequence.
This methodical preparation eliminates confusion and accelerates your entire project.
Create A Visual Roadmap
With your components organized by type, it’s time to arrange them in the exact sequence your assembly demands.
Lay out each piece in the order you’ll use it, creating a visual roadmap that transforms your DIY project from confusing to straightforward. This systematic arrangement lets you spot missing items or tools before you begin, preventing frustrating interruptions.
Reference your instruction diagrams closely as you position parts. Label complex components with markers to clarify their placement in your sequence. This easy method eliminates guesswork during construction.
Your visual roadmap serves as a physical guide throughout assembly. You’ll reduce errors, work more efficiently, and maintain momentum.
You’re fundamentally pre-visualizing the entire build process, which sharpens your focus and streamlines execution. This deliberate preparation transforms woodworking assembly from potentially overwhelming into manageable, predictable steps.
Choose the Right Joinery Technique for Your Project
You’ll need to evaluate common joinery methods—mortise and tenon, dado joints, and butt joints—based on your project’s structural demands and aesthetic goals.
Each technique offers distinct advantages: mortise and tenon joints provide superior strength for frames and tables, dado joints enable precise shelf placement in cabinets, and butt joints suit quick assemblies when reinforced with glue or fasteners.
Matching the right joinery method to your specific wood type and project requirements guarantees both durability and a professionally finished result.
Common Joinery Methods
The foundation of any woodworking project rests on selecting the right joinery technique for your specific application.
You’ll find that butt joints suit beginner projects due to their simplicity, though they require reinforcement for durability.
Mitre joints deliver clean aesthetics for frames and trim work through 45-degree cuts.
Dado joints provide superior strength for shelves and cabinets by creating grooves that accept matching pieces.
Mortise and tenon joints represent traditional joinery techniques offering exceptional strength for furniture and door frames.
Pocket hole joints deliver discrete, robust connections ideal for flat-panel constructions like cabinets.
Each joinery technique serves distinct purposes.
You must evaluate your project’s structural demands, aesthetic requirements, and skill level to determine the most appropriate method.
Matching the right technique guarantees both longevity and professional results.
Matching Techniques To Wood
Selecting the ideal joinery technique requires understanding how different wood species interact with various connection methods.
You’ll want to take into account your wood’s grain direction and density, as these properties directly affect joint performance and longevity.
For structural applications demanding maximum strength, you’ll find that mortise and tenon joints excel. They resist pulling forces exceptionally well, making them ideal for furniture frames and load-bearing components.
Conversely, if you’re working with softer woods or need quick assembly, pocket hole joinery offers straightforward attachment without complex cuts.
Your choice of joinery technique should align with both your wood’s characteristics and your project’s functional requirements.
Dense hardwoods withstand complex joinery like dovetails, while softer species benefit from simpler methods. This thoughtful matching guarantees your finished project remains structurally sound throughout its lifespan.
Use Dowels to Reinforce Wood-to-Wood Connections
Several factors make dowels an excellent choice for strengthening wood-to-wood joints beyond what glue alone can provide.
You’ll find that dowels, typically ranging from 1/4 inch to 1/2 inch in diameter, create substantial mechanical joints that greatly increase stability and alignment between pieces.
To execute this technique effectively, you’ll need essential woodworking tools: a doweling jig and a dowel center finder.
The jig guarantees precise hole drilling at correct angles and depths, while the center finder marks corresponding holes accurately on each piece, eliminating misalignment risks.
Apply wood glue inside drilled holes and on the dowels themselves before assembly.
This combination of mechanical strength and adhesive bonding creates an exceptionally robust connection that withstands stress and time.
Master Pocket Hole Joinery for Speed
Pocket hole joinery transforms assembly by drilling angled holes into one wood piece, then driving screws through them into an adjoining piece—creating strong, invisible joints that drastically cut assembly time.
A pocket hole jig guides your drill bit at precise angles, ensuring consistent results across every connection. You’ll need minimal tools: a drill, driving screws, and the jig itself, making this technique ideal for DIY Wooden projects.
This method accelerates larger undertakings like cabinets and furniture where numerous connections demand speed. The versatility of pocket hole joinery accommodates various materials and thicknesses, seamlessly integrating into diverse woodworking applications.
Whether you’re a beginner or experienced builder, this joinery technique delivers reliable, professional-quality results that maximize efficiency without compromising structural integrity or aesthetics.
Apply Glue Strategically for Maximum Bond Strength
While pocket hole joinery creates speed, you’ll maximize your assembly’s durability by applying glue strategically to every critical joint.
Start by preparing clean, flat surfaces—dirt and debris compromise adhesion and weaken bonds.
Clean, flat surfaces are essential—dirt and debris compromise adhesion and weaken your joints.
Apply glue in a thin, even layer rather than excessive amounts. More glue doesn’t strengthen joints; it only creates squeeze-out that mars your finish.
For maximum bond strength, maintain consistent pressure using clamps throughout the drying process. This prevents movement that could compromise the connection.
Timing matters greatly. Check your glue’s open time before assembly begins—you need sufficient working time without rushing.
Clean excess glue immediately with a damp cloth; dried residue becomes stubborn and difficult to remove.
Clamp Your Pieces Securely While Glue Dries
Once you’ve applied glue to your joints, you’ll need to secure your pieces with clamps to prevent movement during the drying process.
Select appropriate clamps—bar clamps or pipe clamps work well for various project shapes and sizes—and apply even pressure across all glued joints.
Place scrap wood pads between the clamp jaws and your workpiece to distribute pressure evenly and protect surfaces from damage.
Consult the manufacturer’s instructions, as drying times vary greatly depending on your adhesive. Leave clamps in place for the recommended duration, typically thirty minutes to twenty-four hours, allowing the glue to dry fully and reach maximum strength.
Removing clamps prematurely compromises joint integrity, so patience during this stage is essential for successful assembly.
Check Assembly Progress for Square Alignment
How do you guarantee your assembly remains perfectly square throughout the building process? You’ll check alignment regularly using a carpenter’s square at each corner, verifying right angles before proceeding. Measure diagonal distances between opposite corners—they must be equal for true squareness.
This methodical approach makes projects easy to build and prevents costly mistakes later.
Don’t wait until completion to verify your work. Recheck squareness at various assembly stages, catching issues early when adjustments are simpler.
Your clamps hold components in position while you inspect and correct misalignment before securing with screws or glue. This systematic verification process assures structural integrity and professional results, transforming what could be frustrating into a straightforward assembly experience.
Use Reference Marks to Guide Precise Placement
You’ll mark your layout lines with precision by using a square and measuring tape to establish consistent reference points on both ends of each workpiece.
Before you assemble components, you’ll align them against these marks to verify that joints, fasteners, and angles match your design specifications.
This methodical approach prevents placement errors from compounding during assembly, eliminating costly rework and material waste.
Marking Layout Lines Accurately
Accurate layout lines form the foundation of successful woodworking assembly, and they’re only as good as the tools and techniques you’ll employ. You’ll start by using a square to draw straight layout lines on your material, ensuring precision in your measurements.
Always measure twice before marking—this critical practice prevents costly mistakes and guarantees accuracy.
When marking layout lines, you’ll use a sharp pencil or marking knife for defined lines that enable cleaner cuts and superior fit during assembly. Reference marks and dots indicate exactly where cuts occur and where features like joints or holes belong, providing clear visual guidance throughout your project.
Mark on the waste side of your material to avoid confusion, protecting your final piece’s correct dimensions. This methodical approach transforms marking from guesswork into reliable precision.
Aligning Components Before Assembly
Once your layout lines are marked with precision, the next step demands equal attention: aligning your components so they fit together exactly as planned. You’ll employ reference marks—pencil lines or center dots—to guide placement across all pieces, ensuring uniformity throughout your project.
To align components effectively:
- Use clamps to hold pieces temporarily while you verify alignment against your reference marks before permanent fastening.
- Apply a square or level to confirm vertical and horizontal accuracy during assembly.
- Measure and mark each component carefully, recognizing that minor misalignments compound into significant final defects.
This methodical approach prevents costly mistakes. Take your time during this phase. Consistent reference marks across all pieces maintain structural integrity and aesthetic quality.
Avoiding Placement Errors Systematically
How do you prevent the small misalignments that undermine even well-planned projects?
You’ll establish a systematic approach using reference marks as your assembly guide. Mark each component with precise indicators using a pencil and straight edge, ensuring accuracy at every stage. Label parts methodically so you can track placement without confusion.
Before assembly, verify that your reference marks align with your measurements—this critical step eliminates costly placement errors. By double-checking marks against specifications, you’ll catch discrepancies before they compound.
This disciplined method transforms assembly from guesswork into a controlled process, guaranteeing components fit exactly as designed. Your final product will reflect both structural integrity and visual precision that rushed work simply can’t achieve.
Double-Check Measurements Before You Commit
Precision in woodworking starts with reliable measurements before you make your first cut. You’ll prevent costly errors by establishing a systematic verification process that confirms accuracy throughout your project.
Implement these essential practices:
Use quality measuring tools, mark dimensions clearly, re-check measurements multiple times, and compare against project plans before assembly.
- Use quality measuring tools like tape measures or squares to capture exact dimensions, then mark them clearly with a sharp pencil or fine-point marker on wood surfaces.
- Re-check all measurements multiple times, particularly when shifting between project sections or working with complex pieces that demand exacting tolerances.
- Compare your recorded measurements against your project plans to verify proper alignment and fit before assembly begins.
Digital calipers prove invaluable for small, intricate components where standard tools lack precision.
This methodical approach guarantees your woodworking projects achieve professional-quality results and minimizes material waste from measurement mistakes.
Sand Between Assembly Stages for Cleaner Results
You’ll want to time your sanding work strategically throughout the assembly process, addressing surfaces before you glue components together rather than attempting to sand around already-joined parts.
Timing Your Sanding Work
Strategic sanding between assembly stages fundamentally transforms your woodworking results.
You’ll achieve superior finishes by timing your sanding work effectively, ensuring surfaces are properly prepared before applying stains or sealants.
Consider these critical timing strategies:
- Access surfaces early: Sand components before full assembly to reach difficult areas and prevent damage to joints and delicate elements.
- Progress through grits systematically: Start with coarser sandpaper (80 or 120 grit), then advance to finer grits (220 or 320) as you move through assembly stages.
- Minimize debris accumulation: Sanding during assembly rather than after completion considerably reduces dust and creates cleaner, more professional results.
Well-prepared surfaces contribute directly to finish adhesion and project success.
Achieving Smooth Surface Finishes
Sanding between assembly stages doesn’t just prepare surfaces for finishing—it’s what transforms good woodworking into excellent work. You’ll eliminate minor imperfections that become glaringly obvious once you apply stain or paint.
Progress through increasingly finer grits, starting with 80-grit and advancing to 220-grit, to achieve professional-quality results.
Sand all visible surfaces and those you’ll glue together. Smoother surfaces enhance adhesion, reducing bubbles and defects in your finish. This methodical approach saves considerable time during finishing stages by minimizing touch-ups and refinishing work.
The investment in thorough sanding pays dividends. You’ll achieve superior surface quality, guarantee better finish application, and produce woodworking projects that showcase genuine craftsmanship.
Don’t skip this critical step.
Build Major Sections First, Then Join Them Together
Constructing your project’s major components separately—such as table legs and tabletops or cabinet sides and shelves—streamlines assembly and makes handling considerably easier.
This modular approach proves especially valuable when building outdoor furniture or large pieces.
Follow these essential steps:
- Pre-drill holes for screws in both major sections and joints to create tighter fits and prevent wood splitting during assembly.
- Use wood glue combined with screws or dowels for enhanced strength and durability, ensuring your project withstands regular use.
- Employ clamps to hold sections together while glue dries, maintaining alignment and stability throughout the joining process.
After connecting sections, verify level and square alignment before fully securing everything.
This methodical approach prevents structural issues and delivers a professional final appearance.
Five Assembly Mistakes That Destroy Projects
While careful planning and proper joining techniques set the foundation for quality woodworking, assembly mistakes can quickly unravel all your preparation. You’ll encounter different types of errors that compromise your project’s integrity.
Skipping measurements and layout plans causes misalignment and poor fit. You must verify adequate clamping supports glue-ups, preventing joint shifting and structural weakness.
Pre-drilling screw holes protects against wood splitting, especially in hardwoods. Over-tightening fasteners strips holes and weakens connections, so you should apply moderate, consistent pressure.
You must confirm to dry-fit parts before permanently joining them, catching errors before wasting materials and time.
These five mistakes destroy projects quickly. Avoiding them through methodical planning and careful execution guarantees durability and professional results.
Why Assembly Planning Prevents Costly Errors
Assembly planning transforms your woodworking process by breaking down complex projects into manageable components and sequential steps.
When you visualize your assembly sequence upfront, you’ll identify potential issues before they become expensive problems.
Here’s how assembly planning prevents costly errors:
- Early problem detection: Mapping out your build sequence reveals design conflicts and structural concerns, saving materials and time
- Organized workflow: You’ll arrange tools and materials systematically, reducing mistakes from disorganization or missing components
- Confident execution: Step-by-step instructions eliminate uncertainty, allowing you to work methodically without costly rework
Projects with FREE from errors require this foundational work. Your detailed planning investment pays dividends immediately.
You’ll complete projects successfully while building genuine confidence in your woodworking abilities.
Assembly planning isn’t optional—it’s essential for preventing the mistakes that destroy projects and your budget.
Troubleshoot Problems Before Moving to Finishing
Before you apply any finish, you’ll want to systematically troubleshoot your assembled project to catch problems while they’re still easily correctable.
Check all joints and connections for tightness, ensuring stability throughout your piece. Inspect the wood surface for scratches, dents, or other imperfections requiring sanding or filling before finishing begins.
Test fit all assembled parts to identify misalignments or gaps you can adjust easily without glue or fasteners.
Verify that moving components like drawers and doors operate smoothly and align properly.
If you’re combining multiple wood types, confirm finish compatibility beforehand, as different woods may need specific preparations for even, attractive results.
This methodical approach prevents costly rework after finishing.
When to Call a Woodworking Expert for Help
Even with careful troubleshooting, you’ll sometimes encounter challenges that extend beyond your current skill set or resources. Recognizing when to call a woodworking expert guarantees your project succeeds without costly mistakes.
Consider consulting a professional when you face:
- Complex joinery techniques like dovetails or mortise and tenon joints requiring specialized tools you don’t possess.
- Structural projects such as cabinets and storage units or bed frames where safety and durability demand expert assembly.
- Precision demands you can’t confidently meet, risking material waste and misaligned components.
Additionally, if you’re working with high-value materials, facing tight deadlines, or tackling unique designs requiring advanced finishing techniques, expert guidance accelerates your results.
Rather than struggle through unfamiliar territory, learn how to make informed decisions about outsourcing specific tasks. This approach preserves both your materials and your timeline while assuring professional-quality outcomes.
Frequently Asked Questions
How Long Should I Wait for Glue to Cure Before Removing Clamps?
You’ll typically wait 24 hours before removing clamps, though you should check your glue’s instructions since some formulas cure faster. You shouldn’t rush this step—premature removal risks weakening your joints and ruining your project.
What’s the Best Way to Disassemble a Project if I Make a Mistake?
You’ll need superhuman patience to carefully disassemble your catastrophically glued joints. Use a chisel at precise angles, apply heat methodically, and tap gently. You’ll systematically remove clamps, separate components, and meticulously clean dried adhesive residue completely.
How Do I Prevent Wood From Splitting When Driving Screws?
You’ll prevent wood splitting by drilling pilot holes slightly smaller than your screw diameter before driving screws. You should also use screws with tapered shanks, apply steady pressure, and avoid driving screws near wood edges.
Should I Finish Wood Before or After Assembly?
You’ll want to finish wood after assembly. Imagine wrestling with clamps around wet stain—you’ll avoid that mess. Finishing after assembly guarantees you’ll coat all surfaces evenly, seal joints properly, and achieve a professional, unified appearance throughout your project.
What Tools Are Essential for Checking if Assemblies Are Truly Square?
You’ll need a framing square, combination square, and measuring tape to verify your assemblies are square. You can also use diagonal measurements—they’ll match if your assembly’s truly square.
Conclusion
You’re now armed with the knowledge to tackle your woodworking projects smoothly. By preparing materials meticulously, mastering proper joinery, and planning strategically, you’ll build like a well-oiled machine. Don’t skip the troubleshooting phase—it’s your safety net against costly mistakes. Remember, assembly’s the backbone of quality craftsmanship. You’ve got this. When complexity overwhelms you, seeking expert guidance isn’t weakness; it’s wisdom.