
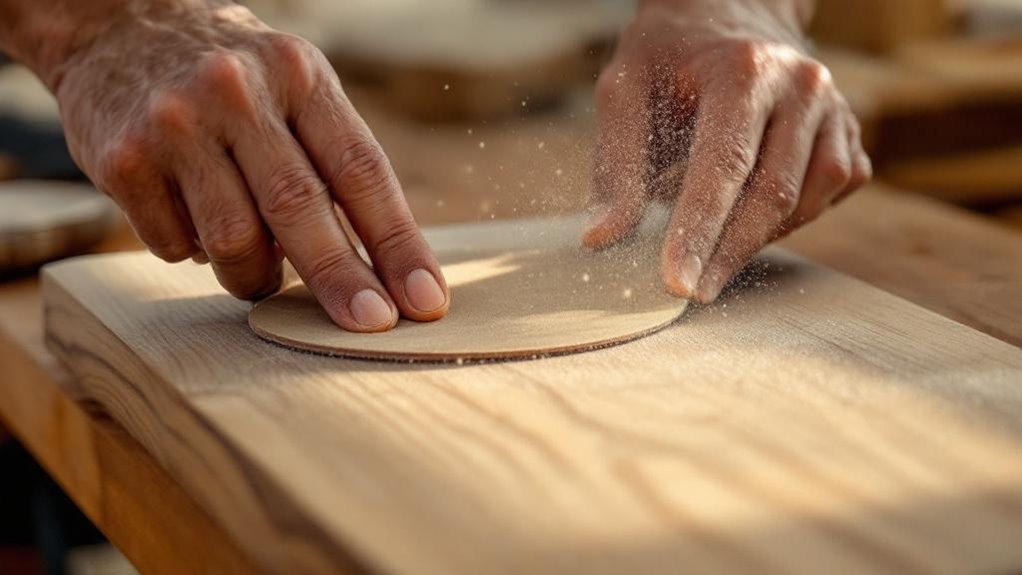
You’ll sand wood evenly by mastering grain direction first—use your thumbnail to find it, then always sand with the grain. Start with appropriate grit for your wood type, progressing methodically through coarser to finer stages. Set up a sanding block using firm materials like hardwood, maintaining consistent, moderate pressure with long sweeping strokes. Use angled lighting to spot uneven areas and replace dull sandpaper immediately. Finish with 180–220 grit, then wipe with a tack cloth before finishing. There’s more technique to perfect those subtle details.
Key Takeaways
- Determine wood grain direction using a thumbnail, then always sand with the grain to prevent scratches and uneven surfaces.
- Use a sanding block slightly narrower than sandpaper to apply even pressure with long, sweeping strokes along the grain.
- Progress methodically through grit stages from coarse to fine, skipping stages compromises final results and surface evenness.
- Position angled light at 45 degrees to identify uneven areas, dips, and high spots during the sanding process.
- Replace dull sandpaper immediately and use finer grits with flexible sponges for blending transitions and avoiding over-sanded zones.
Choose Between Dry-Sanding and Wet-Sanding
Since you’re after consistent results, you’ll want to decide between dry-sanding and wet-sanding before you begin.
Dry-sanding gives you better control and lets you see your progress clearly on the wood surface, helping you achieve an even finish. If you’re working with this method, zinc-stearated abrasives reduce clogging and boost effectiveness.
Dry-sanding offers superior control and clear visibility of your progress, ensuring an even finish with zinc-stearated abrasives that reduce clogging.
Wet-sanding, however, minimizes dust and prevents gumming, making it your better choice for finer finishing work.
You’ll want silicone-carbide sandpaper for wet-sanding since it works effectively on both wood and non-wood surfaces. Remember to regularly clean residue during wet-sanding to avoid accidentally cutting through finishes and maintain that smooth surface you’re aiming for.
Select the Right Sandpaper Grit for Your Project
You’ll need to match your sandpaper grit to both your wood type and your project’s finish requirements, progressing through coarser grits first before moving to finer ones.
Different wood species and surface conditions demand different starting points—softer woods might begin at 120 grit while harder woods benefit from 150 grit with aluminum oxide paper.
Grit Sizes And Applications
The foundation of even sanding rests on matching your sandpaper’s grit size to your project’s specific needs.
You’ll start your sanding process with coarse grits (40-60) to strip old finishes and tackle rough surfaces through heavy material removal. Next, progress to medium grits (80-150) for smoothing and eliminating significant scratches across your workpiece.
As you near completion, switch to fine-grit sandpaper (180-220) for that silky-smooth surface ideal before applying finishes. For between-coat sanding or final light touches, very fine grits (240-320) enhance smoothness without over-sanding.
By systematically advancing through grit sizes, you’ll achieve an evenly finished surface.
Remember: skipping grit stages compromises your final result, so follow this methodical progression throughout your sanding process.
Matching Grit To Wood Type
Matching your sandpaper grit to your wood type is essential for achieving an even, quality finish without damaging the material.
For hardwoods, you’ll want to start with 120 grit aluminum oxide sandpaper, which efficiently removes material while minimizing wood damage.
Softwoods benefit from garnet sandpaper, particularly finer grits like 150 or 180 for final sanding that produces a smoother result.
If you’re working with delicate woods or existing finishes, you’ll find that 240 or 320 grit prevents scratches and delivers a polished surface.
For final touches on already-sanded surfaces, use extra fine grit sandpaper (400+) to achieve a silky texture without excessive material removal.
Always test your chosen grit on a scrap piece first to verify the desired finish.
Progression Through Grit Levels
Once you’ve selected the appropriate grit for your wood type, you’ll want to follow a systematic progression through grit levels to achieve an even, professional finish. Start coarse, then work progressively finer—this method prevents uneven surfaces and guarantees peak results.
| Grit Level | Grit Range | Purpose |
|---|---|---|
| Coarse | 40-60 | Remove rough spots and material quickly |
| Medium | 80-150 | Smooth surfaces and eliminate coarse scratches |
| Fine | 180-220 | Create silky surfaces for finishing |
| Very Fine | 240-320 | Enhance finish between coats |
During hand sanding, monitor your progress carefully. After each grit progression, wipe the wood with a damp cloth to reveal imperfections. This final light sanding step guarantees uniform results before applying your finish, ensuring a professional appearance.
Master Wood Grain Direction Before You Start
Before you sand, run your thumbnail across the wood to identify the grain direction—you’ll feel it catch on ridges when you’re moving the right way.
Sanding against the grain creates visible scratches and dulls your finish, so understanding your wood’s pattern flow is essential to achieving smooth, professional results.
Once you’ve mastered this simple test, you’ll know exactly which direction to move your sandpaper for ideal outcomes.
The Thumbnail Direction Test
Run your thumbnail across the wood surface to reveal the grain’s direction—this simple tactile test’ll catch on ridges when you’re moving against the grain and glide smoothly when you’re moving with it.
This thumbnail test determines your sanding direction before you begin working. When your thumbnail catches, you’ve identified the against-grain direction. Reverse course immediately. Sanding against the grain creates visible scratches and tears the wood fibers, compromising your final result.
Conversely, when your thumbnail glides without resistance, you’re moving with the grain—your ideal sanding path. Practicing this technique takes seconds but delivers significant benefits.
You’ll achieve a smoother finish, prevent surface damage, and bring out the wood’s natural beauty. For detailed woodworking projects especially, this preliminary test saves considerable time and frustration while ensuring superior results.
Identifying Grain Pattern Flow
Your thumbnail’s tactile feedback gives you a starting point, but you’ll need to see the grain pattern itself to sand effectively across the entire board.
Look along the wood’s length to identify where the grain runs consistently. The pattern typically flows in one primary direction, though some boards have competing grain directions that require strategic planning.
Light sanding reveals the wood grain direction more clearly, helping you visualize the surface before committing to full sanding.
Once you’ve identified the wood grain direction, you’ll know which way to move your sander. Whether you’re using power tools or hand sanding, always move with the grain flow.
This approach prevents scratches, protects the wood’s integrity, and guarantees a smoother finish that showcases the wood’s natural beauty effectively.
Sanding Against Grain Consequences
When you sand against the grain, you’re fundamentally forcing the abrasive surface to work opposite the wood’s natural fiber direction, which creates visible scratches that penetrate the surface rather than following it.
| Sanding Direction | Result |
|---|---|
| With the grain | Smooth, professional finish |
| Against the grain | Visible scratches and damage |
| Diagonal to grain | Uneven texture |
| Mixed directions | Compromised appearance |
| Consistent with grain | Natural beauty enhanced |
Different types of sanding tools require particular attention to grain direction. Use a light touch when working with the grain to avoid over-sanding. These scratches from improper technique won’t disappear under finishes, permanently compromising your wood’s appearance. Always verify grain direction before selecting your sanding tools and approach. Consistent grain-aligned sanding prevents costly mistakes and delivers professional results.
Set Up Your Sanding Block for Maximum Control
Getting the right sanding block setup makes all the difference in achieving even results across your wood surface. Start by choosing a sanding block that’s slightly narrower than your sandpaper—this gives you comfortable gripping and better maneuverability.
Select firm materials like hardwood or MDF to maintain consistent contact and prevent uneven pressure from distorting your work.
For specialized applications, create a custom-shaped block by gluing sandpaper directly to thick, flat wood. This approach gives you peak control and versatility for various surfaces.
For curves and intricate areas, switch to flexible sanding sponges or wrap sandpaper around your fingers to follow contours effectively.
When wet sanding, use rubberized cork or foam blocks to avoid warping while maintaining a secure grip throughout your project.
Apply Even Pressure Across Flat Surfaces
Three key principles’ll help you maintain even pressure: consistency, technique, and vigilance. When you’re sanding flat surfaces with sanding blocks, distribute your hand pressure evenly to prevent dips and high spots. Move in long, sweeping strokes along the grain at a steady pace, avoiding localized pressure that creates uneven surfaces.
| Pressure Technique | Result | Common Mistake |
|---|---|---|
| Moderate, consistent | Uniform surface | Varying hand force |
| Long, sweeping strokes | Even wear pattern | Short, jabbing motions |
| Regular flatness checks | Quality control | Skipping inspections |
| Prompt sandpaper replacement | Effective sanding | Using worn paper |
Regularly inspect your work for flatness and imperfections. Replace worn sandpaper immediately, as ineffective paper compromises your results. By maintaining steady pressure and checking progress frequently, you’ll achieve professional-quality, evenly sanded surfaces.
Hand-Sand With Smooth, Rhythmic Sweeping Motions
Hand-sanding requires you to master smooth, rhythmic sweeping motions that build on the even pressure principles you’ve already learned. Work slowly with long, flowing strokes that follow the wood grain, maintaining consistent speed throughout each pass. This approach prevents erratic movements that create uneven surfaces and varying scratch patterns.
As you sand, incorporate varying pressure—applying more force at the stroke’s start and easing up toward the end for smooth shifts. Wrap your sandpaper around the block firmly, but don’t lock your movements into rigid patterns.
Regularly lift your sanding block between strokes to prevent material buildup that causes flat spots. These deliberate, measured motions enhance your finish while preserving the wood’s natural integrity, delivering professional results every time.
Detect Uneven Spots With Angled Light
How can you identify imperfections that your hand motions might’ve missed? Position an angled light source at 45 degrees to your wood surface. This technique reveals dips and high spots through shadow casting, exposing unevenness your eyes alone won’t catch.
| Inspection Step | Purpose | Benefit |
|---|---|---|
| Position light at 45° | Cast shadows on surface | Reveal hidden imperfections |
| Check grain reaction | Guide sanding technique | Improve final results |
| Inspect consistently | Monitor material removal | Prevent future problems |
Hand-sanding offers significant advantages when combined with this detection method. Regularly examine your work under angled light throughout the process. This prevents inconsistencies and maintains wood shape integrity. After dust removal, inspect again to confirm evenness. Your methodical approach guarantees professional-quality results and catches problem areas before they become costly mistakes.
Sand Curves and Intricate Details Smoothly
You’ll want to use flexible foam pads and sanding sponges that conform to curved surfaces, ensuring even pressure across contours.
Wrap sandpaper directly around your fingers for precise control in tight corners, and fold paper strategically to access detailed areas without distorting the wood’s shape.
For complex profiles, employ small sanding blocks or custom-shaped backing materials that follow the grain’s natural curves, maintaining consistent contact throughout.
Flexible Blocks For Curves
Curved surfaces and intricate details demand tools that conform rather than force. Flexible sanding tools like foam pads adapt to your wood’s shape, enabling effective flexible sanding without compromising the profile. For tight corners and detail work, wrap sandpaper around your fingers or small blocks for precise pressure control.
| Tool Type | Best Use | Grit Range |
|---|---|---|
| Foam Pads | Curved surfaces | 80-150 |
| Folded Paper | Detail work | 120-220 |
| Traditional Blocks | Flat areas | 60-120 |
| Finger-wrapped | Tight corners | 150-320 |
Position your sanding block slightly narrower than your sandpaper width for comfortable gripping. This design facilitates maneuvering around intricate shapes. Combine flexible blocks with traditional methods to maintain even pressure across irregular surfaces, preventing distortion. Check progress frequently with raking light to spot imperfections before advancing to finer grits.
Finger-Wrapped Sanding Techniques
When traditional blocks can’t reach tight corners and intricate details, wrapping sandpaper directly around your fingers gives you the precision control you need. This technique lets you maintain curves and contours without distortion, accessing areas that standard tools simply can’t navigate.
Start by folding your sandpaper to enhance flexibility, allowing you to move through complex profiles more easily.
Apply even pressure throughout the process—this is crucial for preventing uneven surfaces and achieving a smoother finish on intricate areas.
As you work, regularly inspect your progress with raking light to reveal imperfections. This highlighting technique guarantees you’re maintaining an even surface as you progress through finer grits.
Your finger-wrapped sanding approach combines tactile feedback with control, delivering professional results on detailed woodwork.
Custom-Shaped Backing Materials
While finger-wrapped techniques work well for tight spots, custom-shaped backing materials give you the consistent pressure needed across curved surfaces and complex profiles. You’ll achieve superior results by tailoring your backing to match your wood’s contours precisely.
Consider these effective approaches:
- Cut rigid foam insulation or MDF blocks to fit specific curves and intricate areas
- Use flexible sanding pads or sponge blocks for better conformity without distorting wood
- Craft homemade blocks from cork or rubber for cushioning with firm backing support
- Make sure custom blocks are slightly narrower than your sandpaper for comfortable handling
- Apply even pressure throughout detailed shapes for uniform smoothness
This methodical approach eliminates uneven wear patterns and delivers professional-quality results on even your most challenging woodworking projects.
Progress Through Grits for Finer Finishes
To achieve a truly smooth, professional finish, you’ll progress systematically through increasingly fine sandpaper grits rather than jump straight to your target grit.
Start with 80-120 grit coarse sandpaper, which effectively smooths out rough surfaces and imperfections. Next, shift to 150-180 medium grits, which remove scratches left by coarser paper and create an even base.
Finally, apply 220-320 fine grits for refined finishing. Throughout progressing through grits, sand with the wood grain consistently to prevent visible scratches.
Between each stage, dampen the wood surface to reveal missed spots and uneven areas. This methodical approach guarantees you’re ready for final finish application, delivering results that look professionally executed rather than rushed or uneven.
Fix Common Hand-Sanding Mistakes on the Fly
Even the most meticulous woodworker encounters imperfections during hand-sanding, but you can correct them immediately by staying vigilant and adjusting your technique on the fly.
Identify and address mistakes quickly:
- Use angled light to spot uneven areas before they compound into larger problems
- Apply a light hand when shifting between problem zones to avoid over-sanding
- Replace dull sandpaper immediately, as worn grit produces uneven finishes
- Switch to finer grits for blending shifts where excess material’s been removed
- Use sanding sponges or wrapped sandpaper to access tight corners with precise control
Consistent pressure distribution prevents most mistakes from occurring.
Consistent pressure distribution across your work surface prevents most sanding mistakes before they start.
When you do notice irregularities, adjust immediately rather than continuing with your current approach. This proactive strategy keeps your surface smooth and your workflow efficient.
Control Dust and Stay Safe While Sanding
Three essential protections—a dust mask, safety goggles, and proper dust control—form the foundation of safe sanding. You’ll shield your airways and eyes from fine wood particles that become airborne during the process.
Attach a vacuum cleaner to your power sander or regularly sweep your workspace to minimize dust accumulation. This keeps visibility clear and reduces inhalation risks. Consider using zinc-stearated sandpapers, which reduce clogging and suppress dust effectively.
Position a tarp or drop cloth beneath your work area to catch debris and prevent contamination of surrounding spaces. These practical measures work together seamlessly.
Implementing robust dust control techniques protects your health while creating a cleaner, more efficient sanding environment.
You’ll experience improved visibility, reduced cleanup time, and peace of mind knowing you’re working safely.
Prepare the Surface for Staining or Varnishing
Before you apply any stain or varnish, you’ll need to prepare your wood surface thoroughly. This final preparation stage guarantees a flawless finish that’ll enhance your wood’s natural beauty.
Start by cleaning it thoroughly to remove all dust and debris. Then progress through sandpaper grits, finishing with 180 to 220 grit extra fine grit sandpaper for ideal smoothness. Always sand in the direction of the wood grain to prevent visible scratches. Use aluminum oxide sandpaper for effective material removal on raw wood.
Sand progressively through finer grits in the direction of wood grain, finishing with 180-220 grit for ideal smoothness.
Key preparation steps:
- Sand with progressively finer grits
- Sand in the direction of the grain consistently
- Use aluminum oxide sandpaper for raw wood surfaces
- Finish with 180 to 220 grit paper
- Wipe with a tack cloth to eliminate dust
This meticulous approach creates the perfect foundation for your stain or varnish application.
Why Hand-Sanding Delivers Superior Results
While power sanders speed up the initial preparation work, hand-sanding is where you’ll truly refine your surface to perfection. At this final stage, you’ll eliminate machine-made scratch patterns that power tools can’t address, creating grain-aligned markings invisible under finishes.
Hand-sanding gives you superior control over curves, corners, and delicate areas where machines falter. You’ll feel imperfections as you work, ensuring thorough defect removal before finishing.
Custom sanding blocks enhance effectiveness by providing tailored support for specific shapes, facilitating even results across varied surfaces.
Using proper grit progression with consistent pressure, you’ll achieve the smoother surface that distinguishes quality woodwork.
Your tactile feedback during hand-sanding elevates the project’s overall quality, transforming good preparation into exceptional results.
Frequently Asked Questions
What Is the Trick to Hand Sanding?
You’ll achieve even hand sanding by maintaining consistent pressure, sanding with the grain, and using a sanding block to keep surfaces flat. You’ll also inspect regularly with angled light to catch imperfections early.
What Is a Common Mistake When Sanding?
You’ll think uneven pressure doesn’t matter, but it creates grooves. Instead, you’ll apply consistent, light pressure across the entire surface, letting the sandpaper do the work without forcing it.
What Is the Golden Rule of Sanding?
You’ve got to sand with the grain of the wood—that’s your golden rule. It’ll prevent visible scratch marks and give you a smoother, more professional-looking finish every time.
How to Sand Wood Evenly?
You’ll sand wood evenly like a conductor orchestrating smooth strokes. Use a sanding block, progress from 120 to 220 grit, follow the grain’s direction, and regularly dampen surfaces to reveal imperfections before adjusting your technique.
Conclusion
You’ll discover that hand-sanding demands patience where machines promise speed, yet you’ll achieve a finish that no power tool can match. While you’re investing time, you’re gaining control—precision that transforms rough wood into silk. You’ve learned the techniques, mastered the grits, and respected the grain. Now you’re ready to sand confidently, knowing that your careful effort will reveal the wood’s true beauty beneath.