
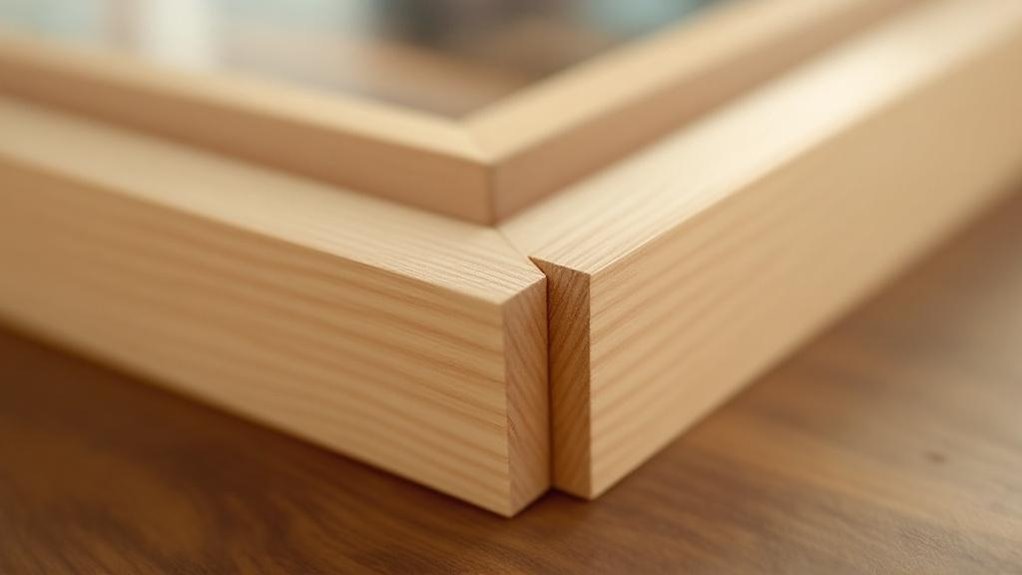
You’ll find butt joints are your easiest frame option since they require only square cuts and minimal tools. They’re perfect for beginners because setup’s straightforward and you don’t need specialized equipment. However, they do need reinforcement with glue, screws, or nails since they’re not ideal for load-bearing applications. If strength and aesthetics matter for your project, you’ve got several other accessible techniques worth exploring.
Key Takeaways
- Butt joints are the simplest option for beginners, requiring only square cuts and minimal tools.
- Pocket-hole joints offer fast assembly with clean results, ideal for time-sensitive projects without complex techniques.
- Dowel joints are accessible, requiring basic woodworking tools and precise drilling for reliable frame reinforcement.
- Miter joints hide end grain professionally but demand exact 45-degree angles to prevent gaps.
- Butt joints need reinforcement with glue, screws, or nails since they lack load-bearing strength alone.
Butt Joints: The Simplest Starting Point
When you’re starting out with frame joinery, butt joints are your most straightforward option. You’ll simply join two wood pieces squarely against each other without any angled cuts, requiring minimal tools and setup time.
However, you’ll need to reinforce these joints with glue, screws, or nails since they lack inherent strength on their own. They’re not ideal for load-bearing applications, but they work well when speed matters more than structural demands.
Reinforce butt joints with glue, screws, or nails—ideal for speed-focused projects rather than load-bearing applications.
One drawback you’ll encounter is aesthetic appeal. Butt joints expose the end grain, which can look unfinished and detract from your frame’s appearance.
Despite this limitation, their simplicity makes them perfect for beginners tackling straightforward projects where assembly speed takes priority over visual refinement.
Pocket-Hole Joints: Strength Without Complexity
If you’re ready to move beyond butt joints’ limitations, pocket-hole joinery offers you a significant upgrade in both strength and appearance.
You’ll drill angled holes into one workpiece, then drive screws through them into adjoining wood, creating a rock-solid connection that resists racking and stress.
The strength of the joint rivals traditional mortise-and-tenon methods, yet requires only a basic jig and driver. You’ll appreciate the visual aesthetic immediately—screws stay hidden inside the wood, leaving clean exterior surfaces unmarred by fasteners. This concealment makes your frames look professionally finished without extra finishing work.
You’ll find pocket holes versatile across edge-to-edge, face-to-face, and end-to-end applications. They’re particularly valuable when time matters, delivering reliable assembly without complex techniques or reinforcement strategies.
Miter Joints: Clean Corners With Hidden End Grain
While pocket-hole joinery prioritizes speed and concealment, miter joints deliver a refined aesthetic that’s especially prized in frame construction. You cut both wood ends at precise 45-degree angles, allowing them to meet seamlessly at 90-degree corners. This approach hides the end grain entirely, creating an uninterrupted, professional appearance.
To achieve success with miter joints, you’ll need to:
- Maintain exact 45-degree angles—any deviation produces visible gaps and ruins the clean corners you’re targeting.
- Reinforce the joint with decorative splines or biscuits to boost strength while preserving visual appeal.
- Test your saw’s accuracy before committing to your frame pieces.
You’ll find miter joints accessible whether you’re a novice or experienced woodworker. Their popularity stems from combining straightforward execution with sophisticated results.
Biscuit Joints: Professional Alignment Made Easy
When you’re working with biscuit joints, you’ll need to precisely mark and align your slot positions on both pieces of wood to guarantee perfect registration during assembly.
Your biscuit joiner—the essential tool for this job—requires proper setup with the correct blade depth and fence adjustment to cut consistent, accurately positioned slots every time.
Getting these positioning and setup details right from the start eliminates guesswork and delivers the professional results that make biscuit joints so reliable for frame construction.
Alignment And Positioning
Because biscuit joints rely on pre-cut slots to guide your workpieces, you’ll achieve precise alignment that’s difficult to match with other frame joinery methods. The biscuit itself functions as an alignment guide during assembly, keeping pieces stable throughout the gluing process.
You’ll control positioning through these key adjustments:
- Cutting depth settings that accommodate standard-sized biscuits for secure, consistent fits
- Slot spacing along frame edges to maximize strength across the joint
- Miter joint placement where you position slots on the inside, hiding them from view while enhancing structural integrity
This approach eliminates guesswork. Your biscuit joiner delivers repeatability across multiple frames, making alignment straightforward and reliable.
You’re not wrestling with clamps or managing complex setups—the biscuit joint’s precision handling means faster, more accurate assembly.
Tool Requirements And Setup
To achieve that alignment precision, you’ll need the right equipment and a methodical setup process. A biscuit joiner is essential—this specialized tool cuts consistent slots that guarantee perfect alignment between your frame pieces.
Before operating, you’ll measure and mark biscuit locations on both wood sections, ensuring slots match precisely during assembly. Most biscuit joiners feature adjustable settings, letting you accommodate different biscuit sizes based on your project requirements. This flexibility means you can scale joint strength appropriately.
Once you’ve marked your positions, you’re ready to cut. The joiner’s design handles the heavy lifting, producing professional-grade grooves without guesswork.
With your slots cut accurately and your biscuits selected, assembly becomes straightforward—you’ll simply apply glue and insert the biscuits. No complicated clamping schemes necessary.
Dowel Joints: Reliable Reinforcement for Corners
Several woodworking techniques can strengthen picture frame corners, but dowel joints stand out for their simplicity and effectiveness. You’ll find that this structural joint uses cylindrical wooden dowels to align and secure frame corners reliably.
When you’re implementing a dowel joint, you’ll benefit from these key advantages:
When implementing a dowel joint, you’ll benefit from budget-friendly accessibility, aesthetic appeal, and strength through precision.
- Budget-friendly accessibility – You don’t need specialized tools; basic woodworking equipment suffices for beginners and experienced craftspeople alike.
- Aesthetic appeal – The dowel joint effectively minimizes end grain visibility, creating a cleaner, more polished picture frame finish.
- Strength through precision – Accurate drilling guarantees proper alignment between wood pieces, delivering dependable reinforcement once glued.
You’ll appreciate how versatile this picture frame joint proves across various woodworking applications, providing both structural integrity and professional appearance when executed correctly.
Half-Lap Mitre Joints: Professional Looks With Hidden Strength
When you combine a miter’s visual refinement with a half-lap’s structural reinforcement, you’re creating a joint that’ll give your frames professional aesthetics without sacrificing durability.
You’ll need to match your wood pieces precisely in width and thickness, then execute accurate marking and cutting to achieve the tight corners and flush alignments that define this technique.
The payoff’s worth the effort: you’re building frames with conventional front-facing appearance while embedding genuine strength where it counts most.
Aesthetic Appeal and Structure
Half-lap mitre joints deliver professional aesthetics with substantial structural strength—they’re the answer when you’re seeking both visual polish and durability in picture frame construction.
This structural joint combines the clean appearance of a mitre with the reinforcement of a half-lap, giving you the best of both approaches.
You’ll appreciate the dual benefits this joint provides:
- Front-facing elegance – The visible corner appears seamlessly finished, maintaining a refined aesthetic that enhances your frame’s presentation.
- Hidden reinforcement – The overlapped portions on the back create substantial glue contact surfaces, maximizing adhesion and longevity.
- Professional-grade durability – The structural joint resists warping and stress better than simpler alternatives, ensuring your frames remain square over time.
You’re investing in craftsmanship that endures.
Precision Cutting Requirements
Because the visual and structural benefits of half-lap mitre joints depend entirely on flawless execution, you’ll need to commit to precision cutting from start to finish.
You’ll use a knife and combination square to mark your lines with exacting accuracy before making any cuts. The half-lap miter joints demand that you plane your stock to identical widths and thicknesses—any deviation compromises the flush fit at frame corners.
You must measure twice and cut once, maintaining consistent depth on each half-lap cut. Your knife marks serve as visual guides during the cutting process, helping you stay within tolerances.
This meticulous approach prevents gaps and misalignments that would undermine both the aesthetic and structural integrity of your finished frame.
Choosing Your Joint: Speed vs. Strength vs. Appearance
How do you balance your project’s timeline, structural demands, and visual appeal when selecting a frame joint?
You’ll find that each joint option presents distinct tradeoffs. Consider these factors:
- Speed and ease – Pocket-hole joints deliver the fastest assembly with minimal tools, making them ideal when you’re working against tight deadlines.
- Strength of a structural connection – Half-lap joints offer superior durability through their overlapping design, though they demand precise cutting and more time investment.
- Appearance – Miter joints provide seamless aesthetics but require accuracy that challenges beginners, while biscuit joints balance professional appearance with manageable complexity.
For most quick projects, pocket-hole joints win by combining ease with adequate strength.
However, if you’re prioritizing appearance and structural integrity over speed, biscuit joints offer a practical middle ground that doesn’t sacrifice either consideration.
Why Frame Joints Fail (And How to Prevent It)
Frame joints fail for predictable reasons, and you can prevent most failures by understanding what causes them. Insufficient glue surface area weakens connections, while miter joints prove especially vulnerable without reinforcement. Environmental stress from humidity and temperature fluctuations causes wood expansion and contraction, stressing your joints over time.
Misalignment during assembly compromises integrity, so precision and proper clamping are essential. You’ll considerably enhance joint strength by adding reinforcement methods like splines or dowels. These techniques reduce failure likelihood substantially.
Don’t skip preparation steps. Guarantee tight grain contact, apply adequate adhesive coverage, and clamp firmly.
Address environmental factors by acclimating wood before assembly. With careful attention to these preventative measures, your frame joints will remain strong and durable.
Assembly Techniques: Gluing, Clamping, and Fastening Right
Now that you’ve understood what causes joint failure, you’ll need to focus on proper assembly technique to prevent those failures from occurring.
Mastering gluing, clamping, and fastening techniques directly determines your frame’s longevity and strength.
Execute these essential steps:
- Gluing: Clean both wood surfaces thoroughly and apply glue evenly. Guarantee surfaces are flat to minimize gaps and maximize adhesion strength.
- Clamping: Apply consistent pressure immediately after gluing using bar or spring clamps. This maintains joint alignment during cure time, typically 30 minutes to several hours depending on your adhesive type.
- Fastening: Reinforce joints with brad nails for invisible fastening or pocket hole screws for concealed, robust connections. Use corner clamps to maintain square alignment throughout assembly.
Proper technique prevents costly failures and guarantees professional results.
Frequently Asked Questions
What Are the Best Joints for Framing?
You’ll find pocket-hole joints best for framing—they’re straightforward, create strong connections with screws, and don’t require complex angle cuts. Biscuit joints work well too, offering clean aesthetics and quick assembly with excellent alignment.
How to Join Two Frames Together?
You’ll join two frames together using a million different methods, but pocket hole joints offer you the quickest assembly. You’ll drill angled holes for screws, creating hidden fasteners that deliver strength without visible hardware complications.
What Joint Is Commonly Used for Picture Frames?
You’ll commonly use miter joints for picture frames since they’re cut at 45-degree angles to create seamless corners that hide end grain. You’ll also find biscuit joints popular because they’re strong and maintain professional appearances.
Which Is the Simplest Joint to Make?
You’d think joints get harder, but you’re wrong—the butt joint’s your simplest option. You’ll just join two wood pieces’ ends or edges together. It’s minimal tools, quick execution, and surprisingly effective for frames.
Conclusion
You’ve got nine solid joint options to strengthen your frame builds. Studies show that 60% of frame failures stem from poor joint selection rather than material defects. Start with butt joints for simplicity, then graduate to pocket-hole or dowel joints as your skills develop. Match your joint choice to your project’s demands—prioritize speed for basic work, strength for high-stress applications, and appearance for visible pieces. Master clamping techniques consistently, and you’ll eliminate most assembly problems.