
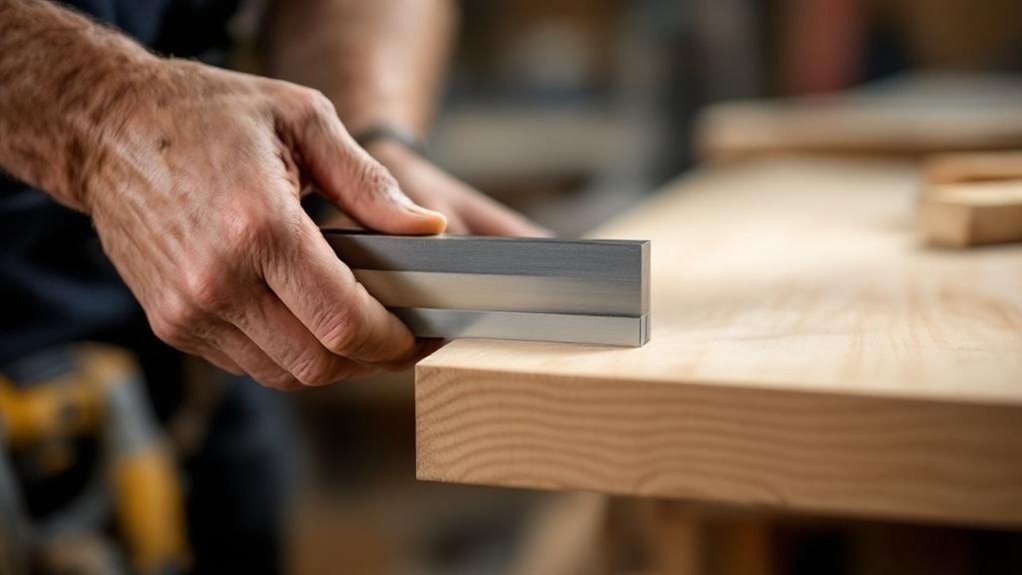
You can’t achieve professional-quality joinery without squares—they’re the difference between guesswork and repeatable precision that prevents costly rework. Even a 1/8-inch deviation over 9 inches dramatically affects your project’s overall dimensions. Combination squares verify blade angles, fence alignment, and workpiece positioning, serving as primary instruments for accuracy. Try squares excel with smaller workpieces, while double squares handle tight spaces. Understanding which square fits your specific task guarantees you’ll uncover the techniques that transform your woodworking results.
Key Takeaways
- Squares eliminate guesswork by providing dependable, repeatable accuracy that transforms layout work into professional-quality, controlled processes.
- A combination square verifies blade angles, fence alignment, and workpiece positioning, serving as the primary instrument for precision setup.
- Knife marks on squares create definitive grooves that resist blurring, ensuring reliable reference points for accurate cuts and joinery.
- Even small deviations—like 1/8-inch over 9 inches—dramatically affect overall dimensions, making squares essential for preventing costly rework.
- Etched markings on quality squares resist wear and offer superior clarity compared to stamped alternatives, maintaining accuracy over time.
How Squares Prevent Misaligned Joints and Costly Rework
When you’re assembling woodworking projects, even minor deviations from 90-degree angles can cascade into significant problems. Squares are used throughout your woodworking process to maintain precise alignment, directly preventing costly rework. A deviation as small as 1/8 inch over 9 inches dramatically impacts your project’s overall dimensions and component fit.
By checking for square regularly with a try square or combination square, you’ll identify misalignment early before errors compound. This proactive approach catches deviations before they compromise structural integrity. Misaligned joints weaken over time, necessitating expensive repairs or complete replacements.
When you integrate squares into your layout and assembly workflow, you guarantee all components fit seamlessly together. This precision eliminates measuring errors that typically plague projects, delivering professional results while protecting your investment in materials and labor.
How Squares Ensure Perfect Right Angles Every Time
Perfect right angles—the foundation of quality woodworking—aren’t achieved by guesswork; they’re verified through deliberate tool use and proven mathematical principles.
You’ll rely on tools like a combination square or checking square to confirm 90° angles with precision. These instruments feature fixed stocks and movable blades, enabling you to mark and verify consistent angles across every workpiece.
You can also employ the Pythagorean theorem—checking measurements of 3, 4, and 5 units—to mathematically validate your angles’ integrity.
However, you must regularly test your squares for accuracy, as even 1/8 inch deviation over 9 inches compromises project quality. This vigilance guarantees your joints fit securely, your cuts remain clean, and your completed work meets professional standards.
Types of Squares: Combination, Try, and Double Explained
Now that you understand how squares verify right angles, you’ll find that selecting the right square type dramatically improves your accuracy and efficiency.
Combination squares function as multipurpose tools, offering depth gauging, marking, and miter capabilities for versatile woodworking applications. They feature etched graduations for enhanced readability and excel in larger layout tasks.
Try squares, conversely, target smaller workpieces with lightweight, durable construction that enhances portability. Their fixed design emphasizes stability for critical squaring operations on compact projects.
Double squares, particularly four-inch variants, prove invaluable in confined spaces, delivering precision measurements for intricate work.
Each type addresses specific needs: try squares prioritize small-scale accuracy, while combination squares handle broader measuring and marking demands. Understanding these distinctions guarantees you’ll deploy the appropriate tool for every woodworking task.
The Anatomy of a Combination Square
You’ll find that a combination square’s head provides multiple functions—it acts as a depth gauge, marking gauge, miter square, and try square simultaneously, while its sliding ruler serves as both straightedge and level.
Your precision work depends on verifying the square’s accuracy using reference standards and checking techniques, such as observing for rocking in the head and confirming flat contact against your workpieces.
Quality models deliver measurement accuracy within 0.01 inches over full extension, achieved through forged steel construction, machined contact faces, and finely etched markings that maintain performance over time.
Versatile Head Functions And Design
The combination square’s head is engineered as a multipurpose tool that transforms a single instrument into several distinct measuring and marking devices. You’ll find it functions as a depth gauge, marking gauge, miter square, and try square, eliminating the need for multiple tools on your workbench.
The head design includes a built-in level for checking plumb and level surfaces, while a sharp awl enables precise marking for accurate line drawing. You can release the sliding ruler to use it independently as a straightedge, expanding the combo square’s versatility for layout tasks.
Quality construction matters considerably for accuracy. You should verify your square’s 90° angle using a reference square or backlight before starting projects.
Smoothly-machined contact faces and finely etched markings on premium models guarantee you’ll achieve reliable measurements consistently throughout your woodworking projects.
Precision Testing And Accuracy Verification
Owning a versatile combination square means nothing without verifying it’ll actually deliver the accuracy you need on your projects. You should test quality squares along their entire length, as even a 1/8-inch deviation over 9 inches compromises your work’s integrity.
Start by checking the head face for imperfections that could skew measurements. Examine the edge you’re measuring against to confirm it’s genuinely flat. Lock the sliding ruler firmly and verify it doesn’t slip or creep during use.
High-quality squares feature forged or tempered steel with finely etched markings, but manufacturing tolerances can still occur. Perform these verification tests before relying on any square for critical woodworking tasks, ensuring precision throughout your project.
Why a 12-Inch Combination Square Belongs in Your Shop
You’ll find a 12-inch combination square indispensable for tackling multiple woodworking tasks simultaneously, from depth gauging and marking to miter and try square functions.
This tool delivers the precision you need for accurate layout work and joint preparation, directly impacting your project’s structural integrity.
You’ll also rely on it for critical machine setup, ensuring your equipment remains properly calibrated for consistent, professional results.
Versatility Across Multiple Tasks
One tool that consolidates multiple functions into a single, reliable instrument is the 12-inch combination square. You’ll find it invaluable for marking gauges, depth measurement, and miter verification without requiring separate tools cluttering your workspace.
The sliding ruler opens up to serve as both a straightedge and measuring device, adapting to your immediate needs. When you’re laying out joints or setting up machinery, this combination square delivers the precision you demand.
Its graduated ruler enables you to check mortise depths accurately and create consistently straight lines across your workpieces. By eliminating the need for multiple specialized tools, you streamline your workflow and reduce the time spent searching for the right instrument, ultimately enhancing your productivity on every project.
Precision For Layout Work
While consolidating multiple functions streamlines your workflow, the real payoff comes when you’re marking out joints and verifying angles—where precision directly impacts your project’s success.
A 12-inch combination square delivers the accuracy you need for critical layout work that determines your project’s integrity.
You’ll rely on the finely etched markings to draw exact square and 45° lines with confidence. The sliding ruler locks securely, eliminating measurement drift during marking operations.
When you’re establishing router setups or gauging mortise depths, this square’s precision guarantees your dimensions remain consistent throughout fabrication.
The combination square’s graduated ruler becomes indispensable for verifying squareness in workpieces, catching irregularities before they compound into larger problems.
This level of precision transforms your layout work from guesswork into dependable, repeatable accuracy that defines professional-quality results.
Essential Machine Setup Tool
Every woodworking machine—from table saws to drill presses—demands accurate setup to produce quality work, and a 12-inch combination square serves as your primary instrument for achieving this precision.
You’ll rely on combo squares to verify blade angles, fence alignment, and workpiece positioning before cutting. The sliding ruler extends for measuring depth gauges and clearances, while the fixed head guarantees perpendicular checks against machine tables.
With finely etched markings and durable steel construction, these squares deliver the repeatability you need for consistent results. By incorporating combination squares into your setup routine, you eliminate variables that compromise cut quality and joinery accuracy.
This disciplined approach transforms machine setup from guesswork into a controlled, reproducible process that elevates your entire woodworking operation.
The 4-Inch Square: When Smaller Is Better
A 4-inch square excels where larger tools can’t reach and precision demands accuracy you won’t compromise. You’ll navigate tight spaces and tackle detailed joinery work with ease that bulkier squares simply don’t offer. Precision double squares, including this compact 4-inch model, deliver the high accuracy your fine woodworking projects require.
| Application | Advantage | Impact |
|---|---|---|
| Tight Spaces | Easy Navigation | Detailed Work Quality |
| Joinery Marking | Angle Precision | Layout Accuracy |
| Portability | Quick Measurements | Workflow Efficiency |
| Small Workpieces | Squareness Checking | Project Success |
| Fine Details | Compact Handling | Professional Results |
You’ll achieve superior accuracy in layouts and measurements without the cumbersome bulk of larger squares. This smaller square notably elevates your smaller-scale project quality, making it an indispensable addition to your woodworking arsenal.
Testing Your Square for Accuracy Before First Use
Now that you’ve selected your 4-inch square for its precision capabilities, you’ll want to confirm it actually delivers the accuracy you’re counting on.
Before first use, tighten the square’s head and check for any rocking motion, which indicates misalignment. Next, verify accuracy by measuring a known straight edge or using the 3-4-5 triangle method to validate right angles.
Visually inspect the head face for imperfections that could compromise measurements; these may require lapping. Test the ruler’s extension by drawing a line along its edge—any deviation signals inaccuracy.
Finally, establish a routine of repeating these accuracy tests throughout your projects. This proactive approach prevents compounding errors and guarantees your square consistently delivers the precision your woodworking demands.
Knife Marks vs. Pencil Lines: Which Marking Method Holds
How do you mark wood for maximum accuracy—with a pencil or a knife? You’ll find that knife marks consistently outperform pencil lines in precision work.
When you use a knife for marking, you create a definitive groove in the wood that won’t smudge or disappear. This clarity proves essential when you’re using a square for marking layouts. The knife’s finer line width enables you to achieve the exactness that detailed woodworking demands, particularly in joinery where component fit directly impacts quality.
Unlike pencil marks that blur easily, knife marks remain sharp and visible throughout your entire process. By pairing a sharp knife with your square, you establish reference points that guarantee accurate cuts and perfectly aligned joints every time.
Using Your Square to Lay Out Perfect Joinery
Perfect joinery demands precision at every step, and your square serves as the foundation for that accuracy. When you’re laying out mortises and tenons, a combination square lets you measure depths and cheeks with exactitude, ensuring parallelism throughout your joints.
A try square simplifies marking cut lines across multiple pieces, dramatically reducing layout time while maintaining consistency. You’ll find that a good square enables you to repeatedly mark identical dimensions, minimizing measurement errors that compound during assembly.
For larger projects, apply the 3-4-5 triangle rule with your square to establish accurate right angles, reinforcing structural integrity. By verifying that all angles measure precisely 90°, you’ll achieve tighter fits and superior joinery results that define quality woodworking craftsmanship.
Reading Graduations: Why Your Markings Matter
You’ll find that etched markings on your square provide superior clarity compared to stamped alternatives, as they resist wear and maintain legibility throughout years of use.
The precision of graduated lines—whether in 1/8″, 1/16″, 1/32″, or 1/64″ increments—directly impacts your ability to execute accurate layouts and cuts that define professional-quality joinery.
Regular inspection of these markings guarantees you’re working from reliable reference points, since even minor degradation in readability can compound into significant measurement errors across your project.
Etched Markings For Clarity
The difference between etched and stamped markings on your square isn’t merely cosmetic—it’s fundamental to measurement accuracy. When you choose a square with etched markings, you’re investing in superior readability that reduces misinterpretation during critical measurements.
Etched markings won’t fade or blur like stamped alternatives, maintaining their sharpness through years of intensive use.
You’ll appreciate how finely etched graduations—particularly in “4r” formats spanning 1/8 in., 1/16 in., 1/32 in., and 1/64 in.—deliver the precision your intricate woodworking demands.
These crisp, permanent markings guarantee you can verify squareness consistently, which directly impacts your joinery quality and overall project integrity. By prioritizing etched markings, you’re securing long-term reliability and confidence in every measurement you take.
Graduation Precision And Readability
Graduation precision—the fineness and clarity of your markings—directly determines whether you’ll catch measurement errors before they compromise your joinery. Your square’s graduations function as your measurement foundation, and readability directly affects accuracy.
Consider these critical factors:
- 1/64″ graduations provide exceptional detail for intricate joinery work
- Etched markings outperform stamped alternatives by maintaining legibility indefinitely
- Fine increments enable consistent repetitive task execution
- Clear graduations reduce calculation errors and hesitation during layout
- High-contrast markings improve visibility in varying workshop lighting conditions
When you select squares with precise, readable graduations, you’re investing in tangible project quality.
You’ll move through layout tasks faster, confident that your measurements align perfectly. Superior graduation precision transforms routine marking into reliable, repeatable accuracy that elevates your entire woodworking practice.
Measuring Mortise Depth: Your Square as a Depth Gauge
When you’re chiseling mortises that must fit precisely with tenons, a combination square becomes an indispensable depth gauge. You’ll fully extend the ruler into the recess, making sure the square’s head sits flush against the wood’s surface for accurate readings. This method eliminates errors caused by uneven surfaces and confirms your mortises meet specified depths—critical for proper joint fit and structural integrity.
Mark your desired depth on the ruler before you begin, creating a visual reference that maintains consistency across multiple mortises. Remember that even a 1/8-inch deviation over 9 inches can compound errors greatly.
Regularly verify your square’s accuracy to secure reliable measurements. This simple technique transforms your combination square into a precision measuring tool that guarantees professional-quality joinery.
Squaring Miter Gauges and Router Fences
Beyond measuring depths within your workpieces, you’ll rely on squares to verify that your shop’s stationary tools themselves are perfectly aligned. Squaring miter gauges and router fences demands precision because even minimal deviations compromise joint integrity.
Squares verify tool alignment—miter gauges and router fences must be perfectly perpendicular because minimal deviations compromise joint integrity.
Here’s how to check the alignment of your critical cutting tools:
- Use a combination square against miter gauge faces to guarantee perpendicular positioning.
- Verify router fence squareness with a try square for consistent routing depths.
- Apply the 3-4-5 triangle method to confirm right angles during setup.
- Monitor that 1/8-inch deviations don’t accumulate across 9-inch cuts.
- Perform regular squareness checks to eliminate cumulative project errors.
This systematic verification prevents cascading inaccuracies, assuring your initial tool setup consistently delivers precise measurements throughout your entire woodworking project.
Long Blades and Protractor Heads for Complex Layouts
Two essential square accessories—long blades and protractor heads—dramatically expand your layout capabilities for intricate cabinetry and joinery work. Long blades, available from 18 to 36 inches, let you mark dadoes and grooves across wider stock efficiently.
Protractor heads provide precise angle measurements from 0° to 180°, with clearly marked 1° increments that guarantee meticulous accuracy for complex joints.
When you combine long blades with protractor heads, you’ll mark angles on expansive surfaces with confidence. This integration improves your workflow by enabling consistent measurements across multiple parts during repetitive tasks like hardware placement on drawer fronts.
The synergy between these accessories eliminates guesswork, assuring your layouts maintain structural integrity and dimensional accuracy throughout sophisticated woodworking projects.
When Should You Use Try Squares Over Combination Squares?
Several situations demand a try square‘s specialized advantages over the broader functionality of a combination square. You’ll find try squares indispensable when precision and portability matter most:
- Smaller workpieces: Their lightweight, compact design lets you work in confined spaces without compromising accuracy.
- Fine woodworking tasks: You’ll appreciate how easily they clamp and manipulate during intricate projects.
- High-precision squaring: They excel when accuracy is crucial to your project’s success.
- Quick measurements: Their straightforward design makes them easier to read and deploy rapidly.
- Durability concerns: Hardened stainless steel construction resists damage and maintains tolerances over extended use.
You should use try squares when you prioritize accuracy over versatility. Their specialized design outperforms combination squares in applications demanding consistent precision and ease of manipulation on smaller projects where dependability is non-negotiable.
Durability and Maintenance: Getting the Most From Your Square
Your square’s longevity depends on the materials used in its construction and the care you invest in maintaining it. Quality squares feature forged or tempered steel, providing exceptional durability and resistance to wear.
However, even premium tools require consistent maintenance to preserve accuracy. You’ll extend your square’s lifespan by regularly waxing the ruler blade and oiling the screw and nut, which enhances smooth movement and prevents corrosion.
Frequent inspections are essential since environmental factors and regular use gradually compromise alignment. You should periodically test your square’s accuracy to catch deterioration early.
When misalignment occurs, minor adjustments like filing the nib inside the housing can restore beam-to-housing angles. By implementing these maintenance practices, you’ll prevent costly woodworking errors and maintain reliable measuring performance throughout your square’s service life.
Building Your Square Collection: Which Tools You Actually Need
Once you’ve established a maintenance routine that keeps your squares accurate and reliable, you’re ready to evaluate which tools deserve a place in your workshop.
You’ll benefit from strategically building a collection that addresses your specific woodworking needs:
- Try squares for checking squareness in confined spaces and smaller projects
- Combination squares functioning as depth gauges and marking tools for versatile applications
- 12-inch combination squares serving as the foundation for measuring and laying out wood dimensions
- Larger fixed squares necessary when assembling bigger workpieces and significant layouts
- Adjustable squares providing flexibility across diverse project scales
You’ll discover that pairing fixed and adjustable squares creates a robust toolkit. A try square to check accuracy complements your combination square’s measuring and laying capabilities.
Pairing fixed and adjustable squares builds a robust toolkit where try squares verify accuracy while combination squares measure and lay out your work.
This balanced approach accommodates varying project demands while maximizing your workshop’s efficiency and precision.
Frequently Asked Questions
What Is the 5’7″ Rule in Woodworking?
You’ll use the 5’7″ rule to verify squareness in woodworking frames. You measure 5 feet on one side, 7 inches on another, then check that your diagonal measures 7 feet, confirming right angles.
What Is the Purpose of Using a Square in Carpentry?
You’ll use a square to verify right angles and mark layout lines precisely. When assembling cabinet doors, you’d check squareness before fastening to prevent misalignment and guarantee proper fitting functionality throughout your project.
How Accurate Is a Machinist Square?
You’ll find machinist squares maintain tolerances within 0.0005 inches over their length. Their hardened steel construction and finely machined surfaces guarantee you’re getting superior accuracy for precision woodworking and metalworking applications.
What Is the Purpose of a Try Square in Woodwork?
You’ll use a try square as your precision compass, marking straight lines and verifying 90° angles. It’s your foundation for checking joints, edges, and workpiece squareness, ensuring your woodworking projects achieve professional accuracy consistently.
Conclusion
Your squares are your workshop’s compass—they navigate you through the wilderness of imprecision toward the promised land of perfect joinery. You’ve learned that investing in quality tools isn’t extravagance; it’s insurance against wandering lost in costly mistakes. You’ll build your collection strategically, maintaining each instrument faithfully. Like a skilled cartographer trusts their instruments, you’ll trust yours to chart accurate paths, transforming raw timber into masterpieces that stand the test of time.