
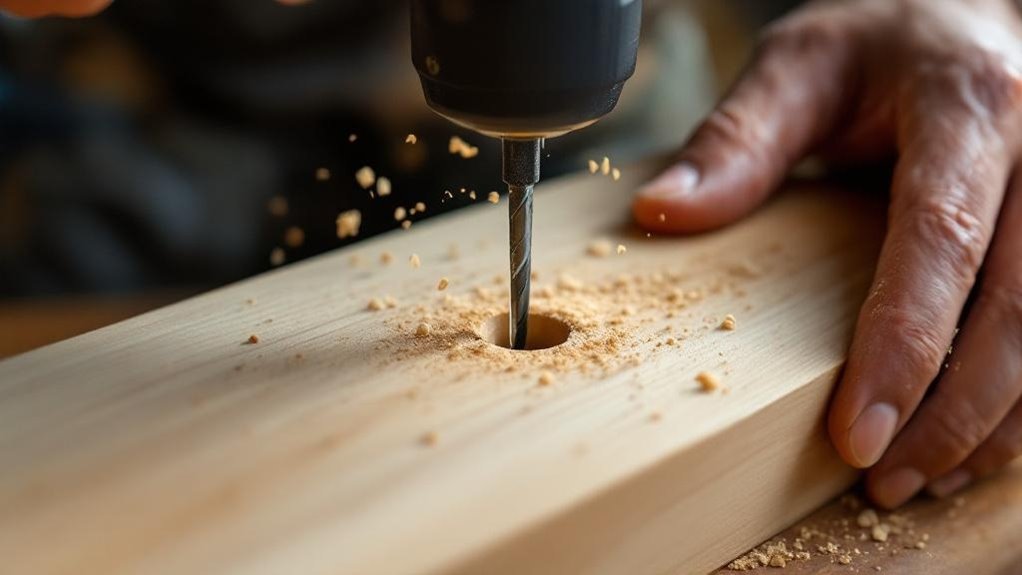
You’ll prevent wood splitting by using pilot holes, which remove material instead of displacing wood fibers across the grain. This fundamental difference reduces the radial compression and circumferential tension that cause splitting, especially near edges and in hardwoods. Pilot holes also guarantee accurate screw placement, facilitate easier disassembly, and strengthen fastening in dense materials. Proper sizing matched to your material’s density is crucial for peak performance and joint integrity. Understanding the mechanics behind this technique reveals why your fastening strategy makes all the difference.
Key Takeaways
- Pilot holes prevent wood splitting by removing material instead of displacing fibers, especially critical in hardwoods and near edges.
- They ensure accurate screw placement and alignment, significantly enhancing the overall quality and precision of woodworking projects.
- Pilot holes reduce driving resistance, making installation easier while strengthening fastening in dense materials for superior joint integrity.
- Proper pilot hole sizing maintains optimal screw holding power while protecting wood integrity and preventing assembly instability.
- They enable easier disassembly without damaging wood, allowing for project modifications and repairs without compromising structural integrity.
What Are Pilot Holes and Why Woodworkers Use Them
Precision and prevention—that’s what pilot holes deliver. You’ll drill small, pre-drilled holes that guide screws into wood, greatly reducing the risk of splitting, particularly near edges or in hardwoods. These holes guarantee accurate screw placement and alignment, which strengthens your joints and elevates overall project quality.
When you create a pilot hole with a diameter slightly smaller than your screw’s diameter, you facilitate a tight fit while protecting your material. This approach prevents stripped screw heads, enabling secure fastening and straightforward future disassembly if needed.
You’ll find pilot holes especially critical when working with dense materials. They alleviate stress and cracking that occur when screws drive directly into tough woods or metals.
Why Wood Splits (And How Pilots Stop It)
Understanding why wood splits requires examining the mechanical forces at play when you drive fasteners without proper preparation. Screws act as wedges, forcing wood fibers apart across the grain—where material’s weakest.
Without pilot holes, you introduce radial compression and circumferential tension that considerably increase splitting risk, especially near board edges.
Pilot holes eliminate this problem by removing material instead of displacing it. You reduce the wedge effect and mitigate radial stress, preserving wood integrity.
For hardwoods, larger pilot holes become essential since dense fibers crack easily under stress when narrow margins remain.
The solution’s straightforward: prepare your wood properly. Pilot holes crush fibers rather than wedging them apart, substantially reducing splits and strengthening your joinery.
You’ll achieve superior results by understanding these mechanical principles.
Choosing the Right Pilot Hole Size for Your Material
Once you’ve grasped why pilot holes prevent splitting, you’ll need to match your hole size to your specific material—because wood’s density greatly affects how it responds to fastener insertion.
For hardwoods, you’ll increase the pilot hole size by 1/64 inch to 1/8 inch larger than the screw’s minor diameter. This adjustment accounts for the material’s density and reduces cracking risk.
Softwoods require less accommodation since their flexibility allows smaller pilot holes, often matching the screw’s minor diameter or just 1/64 inch smaller.
Consider these critical factors:
- Material density determines hole enlargement needs
- Edge proximity requires reduced pilot hole sizing
- Hardwoods need maximum pilot hole adjustment
- Softwoods tolerate tighter hole specifications
Location matters considerably—drilling near edges demands smaller pilot holes to minimize splitting risk.
Understanding these material-specific requirements guarantees you’ll achieve strong, damage-free joints consistently.
Tools You Need for Accurate Pilot Holes
With the right material specifications in mind, you’ll need the proper tools to execute accurate pilot holes consistently.
Invest in quality brad-point drill bits, which minimize splintering and deliver precision. The right drill—whether cordless for mobility or corded for sustained power—accelerates your workflow dramatically.
For delicate projects requiring finesse, hand tools like gimlets and push drills provide superior control. Variable speed settings prove invaluable when you drill a pilot hole, preventing mistakes and ensuring correct depth and angle.
Don’t overlook safety gear; goggles and gloves protect against splinters and debris. Understanding the importance of pilot holes motivates proper tool investment.
These instruments work together to eliminate binding, reduce fastener damage, and guarantee structural integrity in your woodworking projects.
Step-by-Step Process for Drilling Accurate Pilot Holes
Precision begins before you touch the drill—mark your drill spot clearly with a pencil or awl to establish accurate placement and prevent bit wandering.
Mark your drill spot clearly with a pencil or awl to prevent bit wandering and establish accurate placement.
Next, you’ll execute the drilling process systematically:
- Select a drill bit slightly smaller than the screw’s shank diameter.
- Secure your material with clamps to eliminate movement.
- Position the drill perpendicular to the work surface.
- Apply steady, controlled pressure while drilling.
The diameter of the pilot hole directly impacts joint strength.
Maintain consistent depth using a drill depth stop or tape marker to prevent over-drilling, which compromises wood integrity.
Keep the drill perfectly vertical throughout—misalignment weakens joints and causes screw deflection.
These controlled steps guarantee your pilot hole receives the screw securely, maximizing holding power and structural reliability.
Countersinks and Counterbores Explained
After you’ve drilled your pilot hole, you’ll often need to recess the screw head so it doesn’t protrude above the wood’s surface. You’ll use either a countersink bit or counterbore bit to accomplish this fundamental step.
A countersink bit creates an inverted pyramid-shaped recess that allows screw heads to sit flush with the surface of the wood, enhancing aesthetics while reducing snagging hazards.
A counterbore bit, conversely, produces a larger flat-bottomed hole that fully accommodates the screw head, making it ideal for concealed fastener applications.
Selecting the correct bit size guarantees you make the hole precisely without compromising joint strength.
You can even combine both techniques to drill the pilot hole and create professional-looking, structurally sound assemblies that maintain exceptional integrity throughout your woodworking projects.
Common Mistakes That Compromise Joint Strength
Even when you’re familiar with the fundamentals of pilot hole drilling, subtle errors can severely undermine your woodworking joints.
You’ll compromise joint strength through these critical mistakes:
- Using incorrect bit sizes, causing loose screws or splitting
- Drilling insufficiently deep holes, reducing screw holding power
- Maintaining improper angles, resulting in misaligned screws and weak joints
- Neglecting material differences, particularly wood hardness variations
Skipping pilot holes entirely amplifies these risks exponentially.
You’ll encounter splitting wood, complicated screw insertion, and compromised assembly stability.
The pilot hole process isn’t optional—it’s fundamental to durability.
When you fail to account for wood density or drill at incorrect depths, you’re fundamentally guaranteeing joint failure under stress.
Precision in pilot hole execution directly determines whether your screws secure effectively or create weak points that jeopardize your entire project’s integrity.
When Pilots Fail: Diagnosis and Repair
When you’ve invested time in a woodworking project, discovering a failed pilot hole can derail your entire assembly. You’ll need to diagnose the problem systematically.
Check whether misalignment occurred during drilling—screws driven at incorrect angles compromise joint integrity immediately. Inspect hole sizing against your screw diameter; undersized or oversized pilot holes weaken fastening power considerably.
Examine the surrounding material for splitting or crushing, indicators of over-drilling or inadequate hardwood preparation.
To repair, you can relocate screws slightly offset from failed pilot holes, or install larger diameter screws in the same location. Extract damaged screws carefully to prevent further wood damage.
For compromised joints, reinforce them using wooden dowels or epoxy before re-drilling with correct bit specifications. Always account for material density when selecting drill sizes.
Alternative Fasteners: When Type 17 Screws Reduce Pilot Hole Needs
Type 17 screws offer a compelling solution to the pilot hole dilemma by incorporating a sharp tip and cut-out flute design that effectively self-drills as you drive them. This innovative fastener reduces your preparation time markedly while maintaining fastening integrity.
Type 17 screws eliminate pilot hole preparation through sharp tips and flute designs that self-drill while maintaining fastening integrity.
When you’re working with dense materials and hardwoods, Type 17 screws provide distinct advantages:
- Self-drilling capability eliminates pilot hole requirements in standard applications
- Reduced splitting risk in dense materials compared to traditional fasteners
- Accelerated installation speeds for time-sensitive projects
- Enhanced precision without compromised structural integrity
However, you’ll still want to predrill when tackling extremely dense materials or executing fine woodworking. This strategic approach guarantees ideal results while leveraging Type 17 screws’ efficiency benefits.
You’ll streamline your workflow considerably by using these fasteners judiciously, knowing when driving screws requires preparatory drilling versus when self-drilling capability suffices.
Frequently Asked Questions
What Happens if I Don’t Drill a Pilot Hole?
You’ll risk wood splitting, screw misalignment, and stripped threads. You’ll encounter increased radial stress, potential fracture mechanics issues, and require excessive force that can break screws or damage surrounding material.
What Are the Three Most Common Reasons to Use a Pilot Hole?
You’ll prevent wood splitting, guarantee proper screw alignment, and minimize stripping of screw heads. These three benefits protect your materials’ integrity while ensuring secure, durable fastening that you can rely on.
Is It Better to Drill a Pilot Hole in Wood?
Yes, you’ll greatly reduce splitting risks, improve screw alignment, and enhance joint stability when you drill pilot holes. You’ll also experience easier driving and longer tool lifespan.
Can You Screw Into Wood Without a Pilot Hole?
You can drive a screw into wood like a nail through butter, but you’re risking splitting, stripping, and joint failure. Pilot holes aren’t optional—they’re structural necessities ensuring proper fastening integrity and longevity in your projects.
Conclusion
You’ve now learned that pilot holes aren’t just nice-to-have—they’re absolutely crucial if you’re not interested in splitting your workpiece into kindling. By drilling that tiny guide hole first, you’re fundamentally telling the wood grain, “Hey, we’re doing this my way.” Sure, you *could* skip this step and gamble with your project’s integrity, but you’d be choosing chaos over craftsmanship. You’ve got the knowledge now; don’t waste your materials proving Murphy’s Law.