
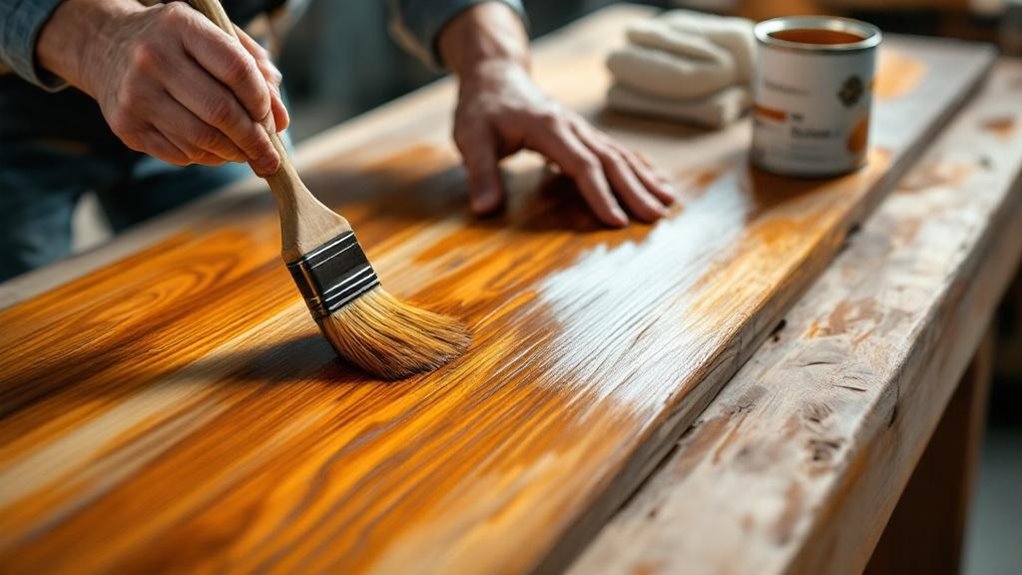
You’ll achieve professional results by prioritizing prep work—sand progressively to 320-grit, fill imperfections with wood filler, and remove all dust with a tack cloth. Select your stain type based on drying needs: oil-based for durability, water-based for speed, or gel for vertical surfaces. Condition the wood evenly, apply thin coats in grain direction, and allow proper penetration time. Seal with multiple polyurethane layers, sanding between each for adhesion. The difference between amateur and polished finishes hinges on patience and methodical technique.
Key Takeaways
- Prepare wood thoroughly by sanding to 320-grit, filling imperfections, and removing all dust with a tack cloth for optimal stain adhesion.
- Choose the right stain type—oil-based for durability, water-based for quick projects, or gel for vertical surfaces—and condition wood accordingly.
- Apply thin, even coats in the direction of grain, allowing 5-10 minutes penetration before wiping excess with lint-free cloths.
- Allow complete drying between coats and lightly sand with 220-grit paper between applications to ensure proper adhesion and smooth finish.
- Apply at least three polyurethane coats in moderate environmental conditions, maintaining patience throughout the process to avoid blotchy, uneven results.
Prep Your Wood for Staining: Sanding, Filling, and Cleaning
The foundation of a quality stain finish starts with thorough surface preparation. Begin by sanding the wood surface with medium grit sandpaper (120-grit), then progress through finer grits up to 320-grit for a smooth, even surface.
Next, fill holes, cracks, and deep scratches with stainable wood filler, guaranteeing it’s flush with the surrounding wood before sanding.
After sanding, you’ll remove all dust and debris using a vacuum and clean cloth to optimize stain adhesion. For porous woods like pine or cherry, apply a wood conditioner to prevent blotchy, uneven absorption.
Allow it to soak for approximately 15 minutes, then remove excess with a clean cloth. This methodical approach guarantees your stain applies uniformly and achieves professional results.
Choose Between Oil-Based, Water-Based, and Gel Stains
Selecting the right stain type fundamentally shapes your project’s outcome, and you’ll find three primary options dominate professional and DIY applications.
Oil-based stains enhance wood grain beautifully but require 4-6 hours between coats, making them ideal for durability-focused work on different wood species.
Water-based stains dry within 2 hours, allowing you to maintain a vivid desired color quickly—perfect for indoor projects requiring fast turnaround.
Gel stains excel on vertical surfaces with even application, though they need 8-24 hours drying time and outdoor top coats.
Preparation is key: oil-based stains work 90% of the time professionally, while water-based options suit lighter colors.
Consider your timeline, wood type, and finish goals before committing to your selection.
Condition the Wood to Prevent Blotchy Absorption
Once you’ve selected your stain type, you’ll need to prepare the wood surface itself—and that preparation begins with conditioning. Wood conditioner seals pores, enabling deeper saturation and preventing blotchiness on porous woods like pine, cherry, and birch.
Apply the correct conditioner type to match your stain:
- Oil-based conditioner for oil stains guarantees compatibility and ideal penetration
- Water-based conditioner for water stains promotes uniform color absorption
- Testing on scrap wood reveals how conditioning affects your specific stain
Using a cloth or brush, apply an even coat of wood conditioner across the entire surface. Let it sit for approximately 15 minutes, allowing proper penetration before wiping off excess product.
This methodical approach ensures that stain absorption remains consistent throughout your project, delivering professional results without frustrating variations in color depth or tone.
Apply Your First Coat of Stain
Before you apply stain, inspect and clean the wood surface thoroughly—dust and debris will compromise adhesion and create an uneven finish. Use a tack cloth to remove lingering particles that a standard cloth might miss.
Select an appropriate applicator: a clean brush, cloth, or sponge. Apply your first coat of stain by working methodically in the direction of the wood grain. This directional approach guarantees consistent color distribution and prevents lap marks.
Allow the stain to penetrate for 5-10 minutes, then wipe away excess stain with a clean cloth. This step prevents blotchy, uneven coloration.
Consult the manufacturer’s recommendations regarding drying time—typically one hour for Varathane stains. Complete drying confirms proper adhesion for subsequent coats.
Most manufacturers recommend applying at least two coats for richer, deeper color saturation.
Deepen the Color With a Second Coat
After your first coat has dried completely—typically one hour for Varathane stains—you’re ready to apply the second coat.
Using the identical application method as your first coat—whether rag, brush, or sponge—maintains consistency in texture and color throughout.
Apply an even coat with methodical strokes, allowing the stain to deepen the color and enhance the wood’s grain. This second application provides a richer, more uniform appearance that elevates the natural color of your wood.
Key steps for best results:
- Wipe off the excess stain immediately to prevent sticky residue and promote even penetration
- Maintain uniform pressure and direction matching your first coat application
- Allow proper drying time between coats for professional-quality results
After application, inspect the surface thoroughly for areas requiring touch-ups, assuring a polished final finish.
Seal With Polyurethane for Long-Term Protection
You’ll apply polyurethane using a high-quality bristle brush, working methodically with the wood grain to achieve an even coat that maximizes protection.
This topcoat hardens into a durable barrier that resists moisture, UV damage, and wear, making it essential for preserving your stained wood’s appearance long-term.
Between coats, you’ll lightly sand with 220-grit sandpaper to promote adhesion and eliminate imperfections before applying additional layers.
Polyurethane Application Methods
Sealing your stained wood with polyurethane requires meticulous attention to preparation and technique. After applying the stain and allowing it to dry completely, you’ll establish a protective top coat through proper polyurethane application methods.
Stir the polyurethane thoroughly—never shake—to achieve even consistency without introducing bubbles. Use a high-quality brush or clean cloth rather than a foam brush, which creates surface defects.
Key application steps include:
- Applying thin, even coats across your project’s surface for professional results
- Sanding lightly between coats with fine steel wool to enhance adhesion
- Allowing ample drying time between applications to maximize durability
Apply at least three coats for ideal protection.
In warm climates, thin the polyurethane by 10% with mineral spirits to slow drying and guarantee smoother application.
Protection and Durability Benefits
Once you’ve mastered polyurethane application, you’ll recognize that this protective layer fundamentally transforms your stained wood’s longevity. Varathane Polyurethane creates a durable shield against environmental threats—moisture, UV light, and scratches—that would otherwise compromise your finish.
This polyurethane barrier actively prevents water infiltration and fading, maintaining your wood’s appearance over years. You’ll appreciate its quick-drying formula, enabling project completion within hours and allowing multiple coats for enhanced protection and durability.
Light sanding between finishes promotes adhesion and creates a smoother surface. Each subsequent layer strengthens your wood’s defense against deterioration.
Avoid These Common Wood Staining Mistakes
You’ll compromise your wood’s surface preparation if you skip sanding grits, as insufficient progression leaves scratches that stain unevenly and become visible through the finish.
Applying thick coats prevents proper wood absorption, resulting in sticky residues and inconsistent color that don’t cure correctly.
Rushing drying time between applications forces you to apply subsequent coats before the previous layer fully sets, causing color inconsistencies and poor adhesion throughout your project.
Skipping Sanding Grits
One of the most consequential preparation errors involves skipping sanding grits, which compromises the wood surface’s receptivity to stain.
You must follow the sequence: 120, 150, 180, 220, and 320-grit. Each progression opens wood fibers progressively, enhancing stain penetration and color depth.
Skipping stages creates an uneven surface that absorbs stain inconsistently, resulting in blotchy finishes.
Here’s what happens when you neglect this process:
- You’ll encounter patchy absorption across the grain pattern, requiring costly re-staining
- Your first coat of stain and finish won’t bond uniformly to improperly prepared wood
- Leftover sanding dust prevents the cloth from removing debris from settling correctly
Sand in the direction of the wood grain at each grit level.
After your final 320-grit pass, use a tack cloth to remove all dust before application.
Applying Thick Coats
Resist the temptation to apply stain in heavy, saturated coats—doing so creates uneven color absorption and extends drying times, leaving you with blotchy, streaky finishes that’re difficult to correct.
Instead, work methodically in small sections, ensuring even application and preventing the stain from drying on the wood, which creates hard lines.
Monitor drying intervals carefully; allow each coat to dry completely before applying subsequent coats of stain. This discipline guarantees uniform color distribution across your wood surface.
When wiping excess stain, use clean, lint-free cloths exclusively to prevent fibers from adhering to the finish and compromising aesthetics.
Successful staining demands attention to detail and patience.
Rush the drying process or application technique, and you’ll compromise your results. Thin, deliberate coats yield superior finishes.
Rushing Drying Time
While thin, deliberate coats form the foundation of quality staining, the timing between applications proves equally critical to your final result. Rushing the drying time by applying additional coats too quickly compromises your finish’s integrity.
When you don’t allow each coat to dry completely per manufacturer specifications, you risk:
- Uneven coloration that betrays your meticulous preparation work
- Poor adhesion between layers, weakening the stain’s durability
- Blotchy patterns that undermine professional appearance
High temperatures and low humidity accelerate drying but can cause the stain to set too rapidly, creating surface imperfections.
Instead, maintain moderate environmental conditions. Always sand lightly between coats to remove imperfections and enhance absorption of subsequent layers. This methodical approach guarantees even coverage and ideal drying, transforming your project into a polished, professional result.
Frequently Asked Questions
How to Stain Wood for Best Results?
You’ll sand progressively from 120 to 320 grit, apply wood conditioner on porous woods, stir stain thoroughly, apply thin layers along grain direction, wipe excess, then allow complete drying between coats.
What Are Common Staining Mistakes?
You’ll encounter problems if you don’t sand properly to 320-grit, skip wood conditioner on porous woods, apply overly thick coats without wiping excess, ignore drying times between applications, or stain in direct sunlight or high humidity.
How Long Do You Leave a Stain on Before You Wipe It Off?
You’ll leave oil-based stains on for 5-10 minutes before wiping, while water-based stains need only 2-5 minutes. You should always check manufacturer instructions, as timing directly affects your final color depth and absorption results.
Is It Better to Stain Wood With a Brush or Cloth?
You’ll achieve better results with a cloth for detailed work and intricate surfaces, while you’ll use a brush for covering larger areas quickly. You’re choosing based on your project’s specific needs.
Conclusion
You’ve now mastered the art of wood staining—transforming raw timber into furniture that’ll shine like polished diamonds. By methodically prepping your surfaces, selecting appropriate stain types, and applying protective coatings, you’re creating finishes that’ll withstand time’s wear. Your meticulous attention to conditioning, layering, and sealing techniques guarantees professional-grade results. You’ve eliminated common pitfalls through systematic application. You’re not just staining wood; you’re crafting enduring beauty through precision and patience.