
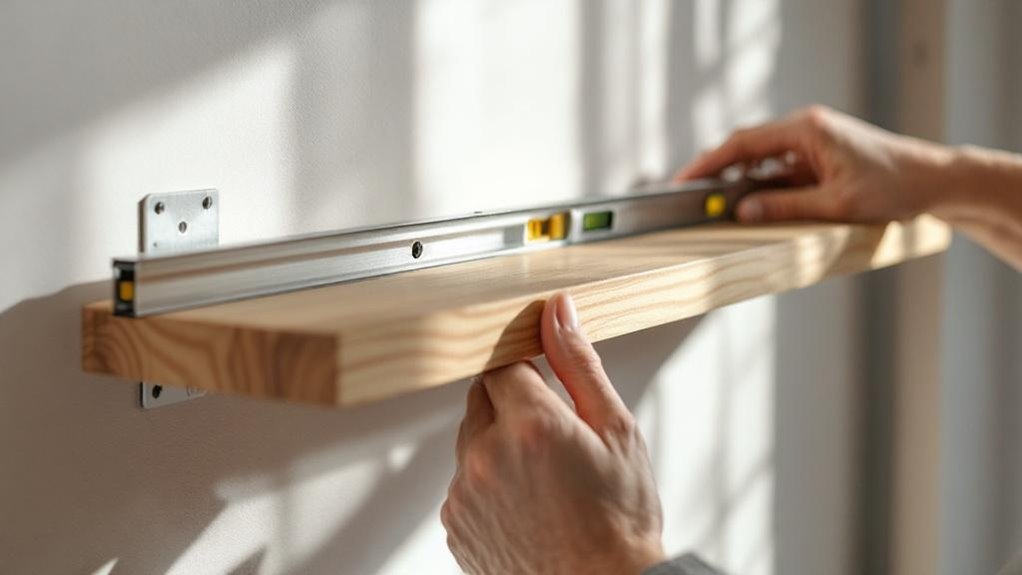
You’ll build a floating shelf by anchoring a concealed support system directly into wall studs, eliminating visible brackets for a minimalist look. Start by locating studs 16-24 inches apart using a stud finder. Attach a 1×2 wall cleat with 2-inch screws, ensuring it’s perfectly level. Secure your solid wood shelf (minimum 1.25 inches thick) onto the cleat. Your shelf will safely hold 45-50 pounds when properly installed. The specific techniques for achieving professional results deserve further exploration.
Key Takeaways
- Use a stud finder to locate wall studs spaced 16-24 inches apart, then secure brackets with 2-inch screws for proper support and stability.
- Select solid wood at least 1.25 inches thick, with depth limited to 8-10 inches depending on intended weight capacity and usage.
- Sand edges with 220-grit sandpaper, apply wood conditioner and stain, then seal with matte polyurethane for professional finishing and durability.
- Install internal 1×2 bracing boards spaced every 16 inches along the shelf bottom, adding a center brace for shelves over 30 inches.
- Properly installed floating shelves support 45-50 pounds per shelf using concealed hardware for a minimalist, modern aesthetic that maximizes vertical space.
Why Build Floating Shelves
If you’re looking to maximize vertical space without sacrificing aesthetic appeal, floating shelves offer a modern, customizable storage solution that outperforms traditional cabinetry in both cost and versatility.
Floating shelves maximize vertical space while offering modern, customizable storage that beats traditional cabinetry in cost and versatility.
DIY floating shelves eliminate unnecessary expenses while delivering professional results.
You’ll appreciate their adaptability across multiple rooms—kitchens, bathrooms, and living spaces all benefit from enhanced organization and accessibility.
These shelves accommodate various sizes, finishes, and materials, allowing you to tailor designs to your specific decor style and functional requirements.
With proper installation at wall studs, you can safely support 45-50 pounds per shelf, making them ideal for books, décor, and practical storage.
Building floating shelves yourself provides a budget-friendly alternative to expensive cabinetry while achieving that sought-after minimalist aesthetic that transforms any room’s visual impact.
Floating Shelves vs. Traditional Shelving
When you’re deciding between floating shelves and traditional shelving, understanding their fundamental differences will help you choose the best option for your space.
Floating shelves mount with concealed hardware, delivering a minimalist aesthetic that traditional shelving can’t match with its visible brackets. You’ll enjoy customizable dimensions and materials with floating shelves, whereas traditional shelving offers limited options.
However, traditional shelving accommodates heavier loads due to robust support structures, while floating shelves have lower weight capacity.
Installation requires precision anchoring into wall studs for floating shelves, making the process more complex than traditional shelving’s straightforward bracket approach.
In smaller rooms, floating shelves create an open, airy feel. Traditional shelves appear bulkier and obstruct views and light.
Your choice depends on your aesthetic preferences, load requirements, and installation capabilities.
Tools and Materials for Floating Shelves
You’ll need to gather essential tools like a stud finder, level, drill, measuring tape, screwdrivers, and wood shims before starting your project.
Your material selection should include 1/2″ sanded plywood for the shelf surface, 1×3 pine boards for the front edge, and 1×2 common boards for wall cleats.
You’ll secure everything with 2-inch screws anchored into studs or appropriate drywall anchors, depending on your wall construction.
Essential Tools Required
Building floating shelves successfully demands five core tools that’ll make the project straightforward and professional-looking.
You’ll need a stud finder to locate wall studs, ensuring your shelves anchor securely to the structural frame. A level keeps your shelves perfectly plumb, while a drill creates holes and drives fasteners efficiently. Your measuring tape guarantees precise dimensions before cutting. A circular saw sizes your shelves accurately, and clamps hold pieces steady during assembly.
You’ll also want a brad nailer for attaching 1×3 boards to the front, providing both stability and a refined appearance. Finally, gather 220-grit sandpaper for smoothing edges before finishing. Stock 2″ screws and wood glue for permanent joints that’ll support substantial weight.
Materials Selection Guide
Selecting the right materials makes the difference between a shelf that sags after a few months and one that holds strong for years. Your material selection guide should prioritize solid wood species over particleboard or MDF. Use premium options like Walnut, White Oak, or Maple for superior durability and aesthetics.
| Component | Material | Minimum Spec | Purpose |
|---|---|---|---|
| Shelf | Solid Wood | 1.25″ thickness | Structural integrity |
| Wall Cleat | Common Lumber | 1×2 | Stud attachment |
| Finish | Wood Conditioner | Pre-stain application | Even color absorption |
| Topcoat | Matte Polyurethane | Quality grade | Protection |
Match your shelf depth to intended use: light-duty shelves stay ≤8 inches, medium-duty ≤10 inches. These specifications guarantee stability and longevity.
Fasteners and Hardware Options
Everything hinges on selecting the right fasteners and hardware—they’re what transform a floating shelf from a decorative accent into a load-bearing fixture.
You’ll want to prioritize secure fasteners like toggle bolts or hidden shelf support brackets that anchor directly into wall studs whenever possible. These options provide superior stability and weight distribution compared to drywall-only installations.
For your fasteners and hardware options, consider wood screws for installing wall cleats, which serve as the structural foundation. A standard drill with a right-angle adapter efficiently drives these screws, while a laser level guarantees precise, plumb installation.
Quality hardware isn’t an afterthought—it’s essential infrastructure. Invest in durable, reliable fasteners that match your shelf’s weight capacity and material specifications.
Locating Studs for Floating Shelf Brackets
You’ll need to locate wall studs accurately before installing your floating shelf brackets, as they’re typically spaced 16 to 24 inches apart and provide the structural support your shelf requires.
A stud finder is your most reliable method, though you can also knock on the wall and listen for a solid thud, or measure roughly 16 inches from an electrical outlet to find the next stud.
Once you’ve identified each stud location, mark them clearly with a pencil to guarantee your brackets anchor directly into the wood and won’t shift or sag under weight.
Stud Finder Techniques And Tips
A stud finder’s accuracy depends on proper technique and methodical verification. You’ll want to run the device horizontally along the wall in a straight line, marking lightly with pencil when it indicates a stud’s presence. Since studs typically space 16 or 24 inches apart, you can measure from your first discovery to locate additional studs for reinforced support.
| Technique | Purpose | Benefit |
|---|---|---|
| Horizontal scanning | Continuous stud detection | Guarantees consistent accuracy |
| Pencil marking | Visual reference points | Prevents location loss |
| Measurement intervals | Predictive stud location | Reduces search time |
Always double-check findings by tapping the wall—solid sounds confirm studs, while hollow sounds indicate empty spaces. This verification method eliminates false positives and ensures reliable bracket placement before installation begins.
Wall Anatomy And Stud Spacing
Three critical factors determine successful floating shelf installation: identifying wall studs, understanding their spacing patterns, and marking their precise locations.
You’ll locate the studs behind your drywall using methodical techniques. Studs typically space 16 or 24 inches apart from center to center, so you’ll measure carefully to identify their exact placement. Here’s your approach:
- Use a stud finder to detect wooden studs efficiently and accurately
- Knock gently on the wall, listening for solid sounds that indicate studs versus hollow spaces
- Mark each stud location with a pencil to guide your drilling
Understanding wall anatomy helps you grasp why studs matter—they’re your mounting foundation. These wooden frames provide the structural support your floating shelf requires.
Don’t skip this critical step; accurate stud identification guarantees your shelf installation succeeds.
Marking Studs For Bracket Installation
Locating studs accurately determines whether your floating shelf will hold securely or fail catastrophically. You’ll use a stud finder to detect wooden studs behind drywall, then verify findings by knocking—solid sounds indicate studs, hollow sounds indicate gaps.
| Detection Method | Reliability | Time Required | Verification |
|---|---|---|---|
| Stud Finder | High | Quick | Knock test |
| Knock Test | Medium | Immediate | Visual confirmation |
| Measurement | High | Moderate | Multiple checks |
| Combined Approach | Highest | Thorough | Most accurate |
Once you’ve located studs spaced at standard 16 or 24-inch intervals, mark their centers precisely with a pencil. Accurate marking studs for bracket installation guarantees your brackets align perfectly with support points. Misaligned brackets compromise stability and weight capacity, so take time measuring and marking each stud location before drilling.
Building Your Ladder Support System
You’ll start by constructing a sturdy frame from 2×4 lumber—the backbone of your ladder support system. Cut the vertical pieces to your desired height, then measure and mark rung locations at 16-24 inch intervals for ideal spacing.
Assemble your ladder support system using these steps:
Secure rungs to vertical supports with wood screws, add diagonal bracing for strength, and use a level throughout assembly.
- Secure rungs to vertical 2x4s with wood screws, ensuring proper alignment for structural consistency.
- Add diagonal bracing between supports to increase strength and eliminate wobbling on longer spans.
- Use a level throughout assembly to verify all components are plumb and straight.
This meticulous approach guarantees your ladder support system provides adequate weight-bearing capacity while maintaining perfect vertical alignment—essential for your floating shelves’ final appearance and performance.
Attaching Supports Securely to Studs
You’ll need to locate wall studs first using a stud finder, then secure your brackets directly into them with 2-inch screws for maximum weight-bearing capacity.
If studs don’t align with your desired bracket placement, you can use drywall anchors as an alternative, though you’ll need to limit the shelf’s load to maintain stability.
Proper leveling of each bracket is essential regardless of your anchoring method to prevent the shelf from tilting or sagging over time.
Locating Wall Studs First
How do you guarantee your floating shelf can handle substantial weight? You’ll locate wall studs first—the structural backbone of your installation. Studs provide the necessary support for weight-bearing applications, so finding them is essential.
Here’s your approach:
- Use a stud finder to locate vertical studs behind the drywall, scanning horizontally across your intended shelf location.
- Measure spacing accurately since studs typically space 16 to 24 inches apart, allowing you to identify adjacent positions once you’ve found one.
- Mark locations precisely with pencil or masking tape to guide your drilling and bracket attachment.
Once you’ve identified stud positions, drill directly into the center of each stud. This placement prevents wood splitting and maximizes load-bearing capacity.
You’ll then secure 2-3 inch screws through your shelf brackets into these studs, creating a rock-solid foundation for your floating shelf.
Securing Brackets Into Studs
With your stud locations marked, it’s time to attach the brackets that’ll support your shelf’s weight. You need to secure each bracket directly into the studs using 2-inch screws, guaranteeing they penetrate deeply for maximum stability. Position your brackets carefully to align with your pencil marks, avoiding over-reliance on drywall anchors that compromise weight capacity.
| Step | Action |
|---|---|
| 1 | Position bracket against stud |
| 2 | Insert 2-inch screw through bracket |
| 3 | Drive screw into stud deeply |
| 4 | Check bracket level |
| 5 | Repeat for remaining brackets |
Drive screws at a slight downward angle to increase holding power. Check your level frequently throughout installation to ascertain even support. Don’t rush this process—proper bracket attachment directly determines your shelf’s safety and longevity. Verify all screws are fully tightened before proceeding to shelf installation.
Using Drywall Anchors Strategically
When studs don’t align with your desired shelf placement, drywall anchors become your secondary anchoring method—but they’re not all created equal.
You’ll need to select anchors specifically rated for your shelf’s weight capacity and guarantee they align perfectly with your bracket holes.
Consider these critical factors when choosing drywall anchors:
- Toggle bolts support considerably more weight than standard anchors, making them ideal for heavier shelves.
- Weight ratings vary by anchor type and material; always verify the manufacturer’s specifications match your load requirements.
- Proper installation demands precise hole alignment with bracket mounting points for maximum stability.
Follow the manufacturer’s instructions meticulously, as installation techniques directly affect performance.
Quality drywall anchors provide reliable support when studs aren’t positioned where you need them.
Preparing and Cutting Your Plywood
Accurate measurements and clean cuts form the foundation of a sturdy floating shelf. Start by marking your desired dimensions on the plywood with a pencil, guaranteeing precision before you begin cutting.
You’ll want to use a circular saw to make clean cuts, keeping the blade aligned with your marked lines throughout the process.
Before cutting, locate wall studs using a stud finder so you can plan your shelf placement and support cleats strategically.
Consider your plywood’s thickness—aim for at least 1.25 inches for durability.
Once you’ve completed your cuts, sand the edges with 220-grit sandpaper to smooth any rough surfaces. This preparation step guarantees your plywood is ready for staining and creates a professional-looking finished product.
Sanding, Staining, and Pre-Treating Wood
You’ll sand your plywood with 220-grit sandpaper to create a smooth surface that accepts stain evenly and enhances the final appearance.
Before staining, you’ll apply a pre-stain wood conditioner to prevent blotchy absorption, especially on softer woods.
You’ll then select your stain color—ranging from light contemporary shades to dark grain-highlighting finishes—and apply it with proper drying intervals before sealing with a matte polyurethane topcoat for protection and durability.
Preparing Wood Surfaces Properly
The foundation of a professional-looking floating shelf starts with proper wood preparation. You’ll achieve ideal results by following a systematic approach that guarantees flawless stain adhesion and finish quality.
Begin your preparation process with these essential steps:
- Sand wood surfaces with 220 grit sandpaper to eliminate rough spots and imperfections, creating a smooth foundation for finishing.
- Apply pre-stain wood conditioner to porous woods like pine or aspen, preventing uneven absorption and blotchiness.
- Allow adequate drying time between applications to assure even coverage without smudging.
After conditioning, you’re ready for stain application. Select your desired color—Provincial or Simply White by Minwax work excellently—based on your aesthetic preferences.
Once staining is complete, permit full drying before applying a matte polyurethane top coat for durability and protection.
Applying Pre-Stain Conditioner
Once you’ve sanded your wood surfaces smooth with 220 grit sandpaper, you’re ready to condition them before staining.
A pre-stain conditioner is vital, especially when working with softwoods like pine and aspen, which absorb stain unevenly and develop blotchy finishes.
Apply the pre-stain conditioner evenly across your wood surfaces using a brush or cloth. Work methodically to guarantee complete coverage.
Allow the conditioner to penetrate for five to fifteen minutes—this timing is critical for ideal results. Once the penetration period ends, wipe away excess conditioner with a clean cloth.
Let the conditioner dry completely before proceeding. Follow the manufacturer’s recommended drying time, typically two to four hours.
Once dry, your wood surfaces are properly prepared for stain application, ensuring a uniform, professional-quality finish.
Staining and Sealing Techniques
After your pre-stain conditioner’s drying period is complete, you’re ready to apply stain to achieve your desired wood color. Select high-quality products like Minwax Provincial or Simply White, testing on scrap wood first to confirm the final appearance.
Apply stain wood evenly using these techniques:
- Use a clean, lint-free cloth to guarantee consistent coverage without streaks.
- Wipe gently after application to prevent excess buildup and blotchiness.
- Allow adequate drying time between coats for uniform color absorption.
Once you’ve achieved your desired shade, seal the surface with matte polyurethane topcoat. This protective layer enhances durability while maintaining your wood’s natural aesthetics.
Apply multiple coats, respecting proper drying intervals between applications for peak results and long-lasting protection.
Adding Internal Bracing to Prevent Flexing
Incorporating internal bracing is vital to maintaining your shelf’s rigidity and preventing unwanted sagging under load. You’ll want to install 1×2 boards along the shelf’s bottom, spaced every 16 inches for peak support distribution. For shelves exceeding 30 inches, add a center brace or vertical supports to maintain stability without compromising the floating aesthetic.
| Bracing Method | Spacing | Best For |
|---|---|---|
| 1×2 Internal Boards | Every 16 inches | Standard support |
| 1×3 Horizontal Brace | Full length | Weight distribution |
| Center Brace/Vertical Support | Midpoint | Shelves over 30 inches |
Secure all bracing with wood glue and brad nails to create a solid, flex-resistant structure. Make certain you regularly inspect your shelf for signs of sagging, especially after heavy loading, and reinforce with additional bracing if needed to guarantee long-term durability.
Installing Your Front Face With Aspen
To achieve a polished, professional look, you’ll install 1×6 aspen planks as your shelf’s front face—a material prized for its superior stain acceptance and clean finishing properties. This step transforms your utilitarian frame into a finished piece.
Begin by cutting aspen planks to your shelf’s exact length for seamless alignment with plywood edges. Sand all edges thoroughly before installation for easy access to refinishing later.
Secure the front face using a brad nailer, which provides stability without compromising aesthetics.
- Cut planks to precise shelf length for perfect edge alignment
- Sand edges before attachment to guarantee professional appearance
- Use brad nailer for secure, inconspicuous fastening
After installation, apply pre-stain wood conditioner for even absorption, followed by your chosen stain. Finish with matte polyurethane for enhanced durability and protection against daily wear.
Securing Shelves to the Wall
Your shelf’s success depends entirely on proper wall anchoring, which begins with locating studs using a stud finder. You’ll drive wood screws directly into studs for maximum load-bearing capacity. Confirm each bracket sits level to prevent uneven installation.
When studs don’t align with your bracket placement, you’ll use drywall anchors as backup support. However, be cautious about weight limits when relying solely on anchors.
For securing shelves to the wall effectively, consider adding middle brackets or support cleats if your shelf exceeds 30 inches in length. Proper installation prevents sagging caused by inadequate supports or uneven surfaces.
Take time to verify levelness and fastener placement before loading your shelf. These steps guarantee stability and longevity.
Using Shims to Level Uneven Walls
Even the most carefully measured walls often hide subtle irregularities that’ll throw off your shelf’s level. Using shims to level uneven walls guarantees your floating shelf sits perfectly horizontal, preventing items from sliding and maintaining structural integrity.
Start by locating the wall’s highest point where you’ll mount the shelf. Then follow these steps:
- Identify low spots and cut wooden shims to match the required thickness for compensation.
- Insert shims behind brackets at problem areas, adjusting positions until your level tool confirms perfect alignment.
- Secure brackets tightly against the wall while maintaining shim placement.
After installation, recheck the shelf’s level once more. Shims may compress slightly under weight, so verification prevents future settling and guarantees lasting stability.
Mistakes to Avoid During Installation
Because improper installation techniques can undermine even the best floating shelf design, you’ll want to sidestep several critical pitfalls.
| Mistake | Consequence | Solution |
|---|---|---|
| Skipping stud location | Shelf failure | Use stud finder on every stud |
| Relying solely on drywall anchors | Sagging or collapse | Anchor into every stud minimum |
| Neglecting leveling | Uneven appearance | Verify with level tool |
| Exceeding weight capacity | Detachment risk | Follow manufacturer guidelines |
| Inadequate shelf spacing | Poor accessibility | Maintain 12-18 inch clearance |
You’ll secure mounting brackets into every stud to prevent catastrophic failure. Always use a stud finder—don’t estimate positions. Level your shelf meticulously before final fastening. Never exceed weight limits regardless of bracket quality. Space multiple shelves appropriately to maintain functionality and visual balance. These preventative measures guarantee your floating shelf performs reliably for years.
Curing Time and Load Testing Before Use
Patience during the curing phase directly determines your shelf’s structural integrity.
You’ll need to allow wood glue at least 24 hours to cure fully before applying any weight. During this curing time, maintain consistent clamping pressure to guarantee even bonding throughout the joint.
After curing completes, conduct systematic load testing:
- Start with lightweight items and gradually increase the load to assess stability.
- Monitor for sagging or deflection, which indicates inadequate support or installation issues.
- Observe all connection points for movement or stress signs.
If you notice any instability during testing, reinforce the shelf immediately.
Properly sealing and finishing your shelf afterward enhances durability by preventing moisture damage that compromises load-bearing capacity over time.
Styling and Maintaining Your Floating Shelves
Your floating shelf’s long-term performance depends on two critical practices: regular maintenance and thoughtful styling. Dust your shelves consistently to prevent buildup and maintain aesthetics.
When styling floating shelves, balance heavier items with lighter decor to avoid exceeding weight capacity. Use decorative baskets or boxes to organize smaller items while preserving a clean appearance.
For maintaining floating shelves, periodically inspect bracket and screw integrity, tightening any loose components to guarantee safety.
Coordinate your shelf’s color palette and materials with your room’s existing decor. Incorporate plants or artwork strategically to enhance visual interest while keeping the display intentional and organized.
This combination of regular upkeep and deliberate curation preserves both the structural reliability and visual appeal of your floating shelves long-term.
Frequently Asked Questions
How to Make a Floating Shelf Yourself?
You’ll cut 1/2″ sanded plywood to size, locate wall studs, install 1×2 cleats with 2″ screws, attach a 1×3 pine front board with wood glue, then stain and mount securely.
Is It Cheaper to Make Floating Shelves or Buy Them?
You’ll save money building floating shelves yourself. DIY projects cost $50–$100 in materials versus $100–$300 for store-bought options. You’ll customize dimensions and finishes while reducing expenses on pre-made brackets and hardware.
How Do You Support Floating Shelves?
You’ve got to nail this like you’re building a fortress. Secure mounting brackets directly into wall studs using 2-inch screws, or use toggle bolts if studs aren’t available. Add wood cleats for enhanced weight distribution and stability.
What Are the Common Mistakes With Floating Shelves?
You’ll compromise stability if you don’t locate wall studs, use inadequate fasteners, or skip leveling brackets. You’ll risk failure by overloading shelves or neglecting proper depth considerations for your items.
Conclusion
You’ll appreciate that floating shelves don’t require advanced carpentry skills. Many homeowners worry about weight capacity, but you’re securing brackets directly into wall studs, which safely support 25-50 pounds per shelf. Proper installation—using shims for level surfaces and allowing adequate curing time—ensures durability. Your shelves won’t sag or fail if you’ve followed the load-testing procedures. You’ve now got attractive, functional storage that maximizes space without visual clutter.