
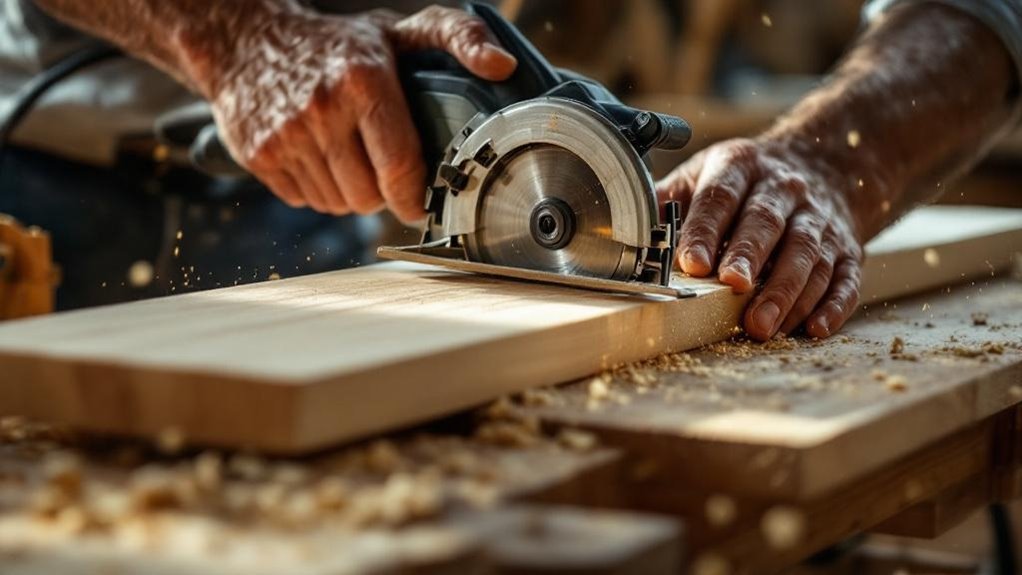
You’ll cut wood straight every time by mastering three core techniques: select a corded sidewinder saw with a 7-1/4″ blade for precision control. Set up three to four support blocks near your cut line for stability. Mark your line sharply with a metal straight edge, accounting for blade thickness. Align your blade tooth precisely with the marked line before starting. Maintain steady forward pressure, keep both hands firm on the saw, and let the blade finish completely. These fundamentals compound greatly when you understand how your specific saw behaves.
Key Takeaways
- Use a sharp blade suited to your material and mark cut lines precisely with a metal straight edge.
- Position three to four support blocks near the cut line on both sides for maximum stability.
- Align the blade tooth with your marked line at a 1/16 to 1/8 inch gap before starting.
- Maintain steady forward pressure, firm two-handed grip, and keep your eyes focused on the cut line throughout.
- Allow the blade to complete the cut fully before lifting to prevent splintering and misalignment.
Choose the Right Circular Saw for Straight Cuts
Selecting the right circular saw is fundamental to achieving straight cuts, and you’ll want to prioritize a corded sidewinder model with a 7-1/4″ blade positioned on the right side. This configuration provides superior visibility of your pencil lines and excellent control during freehand cutting.
Sidewinder saws rank among the essential tools for woodworking because they’re lightweight and maneuverable, making them ideal for precision work.
However, if you’re tackling thicker materials, consider worm-drive saws instead. Though heavier, these powerful tools deliver greater torque for demanding cuts.
Regardless of your choice, guarantee your blade is sharp and appropriate for your material. A dull blade causes uneven cuts and strains your motor unnecessarily.
Familiarize yourself with your saw’s cutting path on scrap wood before starting larger projects.
Set up Your Workspace With Support Blocks
Three to four support blocks positioned on either side of your cut line are essential for stabilizing wider boards and preventing your saw from cutting into the work table. These tools create a secure foundation for accurate cuts.
Cluster your support blocks closely to the cut edge to maximize stability during the cutting process. Make sure they’re constructed from sturdy materials that’ll withstand wood weight and maintain alignment.
Before you start cutting, verify that all blocks are level and secure—uneven surfaces compromise cut accuracy.
- Position blocks within inches of your cut line for ideal support
- Use solid wood or steel blocks to resist deflection
- Check levelness with a spirit level to confirm proper alignment
Adjust your saw setup only after confirming block placement and board stability, establishing a controlled cutting environment.
Mark Your Cut Line With Precision
You’ll want to use a metal straight edge—like a 3-inch steel ruler—paired with a sharp pencil to mark your cut line with precision. Reference points such as cypress marks help you maintain straightness and keep your line reliable throughout the marking process.
Sharp, clearly visible markings make all the difference in achieving an accurate final cut, so take time to guarantee your lines are well-defined before you begin sawing.
Metal Straight Edges Matter
Because a circular saw blade has thickness, the cut line you mark determines your final accuracy. You’ll need a metal straight edge—like a 3-inch steel ruler—to guarantee perfectly straight lines. This tool eliminates guesswork and establishes reliable reference points for your cuts.
Here’s what you’ll accomplish with a metal straight edge:
- Guide a sharp pencil to create fine, precise lines that visualize your exact cutting path
- Reference cypress marks on your material as dependable plotting points for consistent alignment
- Position your cut line to the right of the marked line, accounting for the blade’s circular cutting characteristics
Maintaining this precision transforms your cutting accuracy dramatically. The straight edge becomes your anchor throughout the marking process, preventing the common mistakes that occur when you rely on freehand lines alone.
Sharp Pencil Lines Work
A sharp pencil creates the fine, precise lines that separate accurate cuts from wasted material. You’ll want to mark your cut line with a sharp point rather than a dull one, as even slight deviations result in inaccurate cuts.
When you’re plotting your cuts, reference existing marks or points on your wood to establish clear starting positions. Use your metal straight edge as a guide while marking, ensuring your pencil line stays true and consistent.
Before you begin cutting, align your marked line carefully with your blade, checking the positioning multiple times. This verification step guarantees you’re on track throughout the entire process. Precision during marking prevents costly errors and produces the straight cuts you’re after.
Reference Points Guide Accuracy
Marking your cut line with precision requires that you build upon existing reference points rather than starting from scratch. You’ll enhance accuracy by leveraging cypress marks and other reliable visual guides already present on your workpiece. These established points serve as anchors for plotting straight lines, reducing measurement error and ensuring consistent results.
Reference points streamline your marking process:
- Cypress marks provide natural alignment guides that you can trust for establishing baseline references.
- Edge alignment uses your board’s existing edges as guides for extending perpendicular or parallel lines.
- Visual landmarks on the wood surface help you maintain line consistency across longer distances.
Position your metal straight edge between these reference points, then connect them with your sharp pencil. This method eliminates guesswork and produces the precise lines you need for accurate cuts.
Align Your Blade Before You Start
Position the front of your saw’s sole plate on the board’s near edge, then align the blade tooth precisely with your cut line.
You’ll want to maintain a consistent 1/16 to 1/8 inch gap between the blade and the board at startup for a clean entry into the material.
Keep your eyes focused on the cut line as you start the saw to enhance tracking and prevent deviations.
Positioning The Sole Plate
Before you power on your saw, you’ll want to align the blade with your cut line by positioning the sole plate carefully. This foundational step determines your cut’s accuracy.
Position the front of the sole plate directly on the board’s edge to establish stability. Align the blade tooth precisely with your marked cut line—this visual confirmation prevents misalignment before you begin.
Maintain these critical spacing details:
- A 1/16 to 1/8 inch gap between blade and board at startup prevents binding during engagement
- Your body positioned steadily behind the saw enables precise micro-adjustments once cutting starts
- Visual alignment confirmed by looking down the cut line ensures the saw tracks your intended path
Once positioned correctly and the saw starts, commit to steady forward pressure without repositioning—maintaining kerf alignment prevents costly miscuts.
Tooth-To-Line Alignment
With your sole plate positioned and your body steady behind the saw, you’ll now confirm that your blade tooth aligns precisely with the marked cut line.
Position the blade tooth directly on your pencil line, maintaining a 1/16 to 1/8 inch gap between the blade and the board’s edge. This spacing prevents binding while guaranteeing accuracy. Before cutting your workpiece, practice alignment techniques on scrap materials to understand how minor adjustments affect results.
| Alignment Element | Requirement | Purpose |
|---|---|---|
| Blade Tooth Position | Directly on marked line | Guarantees accurate cut path |
| Gap Distance | 1/16 to 1/8 inch | Prevents blade binding |
| Practice Material | Scrap wood | Tests adjustment sensitivity |
Maintain visual contact with the cut line throughout the cut, adjusting the saw’s angle as necessary to correct any deviations from your intended path.
Five Mistakes That Ruin Straight Cuts
Even though you’ve prepared your materials and selected your saw, you’ll still ruin a straight cut if you make any of these five common mistakes.
First, you’ll create deviations by failing to mark your cut line precisely with a sharp pencil and straightedge.
Second, misaligning your blade tooth with the cut line at the start compounds errors throughout the entire board.
Third, moving the saw while it’s stopping shifts the blade and ruins your kerf alignment.
Fourth, you’ll experience flexing and jagged edges when you don’t provide adequate support:
- Use 3-4 support blocks on either side of your cut line
- Position blocks to prevent board deflection
- Distribute weight evenly across supports
Finally, inconsistent pressure and speed cause your blade to wander. Maintain steady hand positioning and controlled body adjustments throughout the cut for precision.
Start Your Cut: Slow and Straight
Now that you’ve avoided the common pitfalls of straight cutting, you’re ready to initiate your cut with precision. Position the saw’s sole plate at the board’s near edge, aligning the blade tooth with your cut line. Maintain a 1/16 to 1/8 inch gap between the blade and board at startup—this prevents binding and guarantees smooth engagement.
Pull the trigger to full speed before gently pushing forward, allowing the blade adequate time to bite into the wood effectively.
Keep your eyes trained on the cut line throughout the process, watching for any deviation from your intended path. Apply consistent, moderate pressure and speed, making subtle position adjustments as needed to maintain a straight trajectory. This methodical approach establishes a solid foundation for accurate cuts.
Why the First 5–6 Inches Determine Everything
The first 5–6 inches of your cut aren’t just a beginning—they’re the blueprint for everything that follows. You’re establishing the trajectory and alignment that will govern the entire cut. Position your blade 1/16 to 1/8 inch away from the board’s edge to allow micro-adjustments while maintaining precision.
During these critical inches, you’ll engrave a kerf—a precise groove—that guides your blade through the remainder of the cut. Maintain steady, consistent pressure and speed to let the saw do the work without forcing.
Focus intensely on your cut line and your body positioning. These moments demand your complete attention because:
- A slight deviation now compounds exponentially over longer distances
- The kerf acts as a self-guiding channel for subsequent cuts
- Correcting trajectory mid-cut wastes material and effort
Get these first inches right, and you’ve already won half the battle.
Keep Your Eyes on the Line Throughout
How do you maintain a straight cut after those critical first inches? You’ve got to keep your eyes locked on the cut line throughout the entire sawing process.
Continuously monitor the blade’s position relative to your marked line, making subtle adjustments as needed. If the saw drifts off course, don’t jerk it back. Instead, gently guide it using body positioning and steady pressure to realign with the line.
Start just to the right of your marked line—this compensates for the saw’s natural tendency to cut slightly wider than the blade itself.
Position your starting cut just to the right of the marked line to account for the saw’s natural kerf width.
Regular practice builds muscle memory, training your hands and eyes to work together. This awareness develops over time, resulting in increasingly straighter cuts.
Don’t Stop Mid-Cut: And Here’s Why
When you stop mid-cut, you lose continuous blade engagement with the material, which disrupts the cutting momentum and causes the blade to shift in the kerf.
This misalignment creates a kickback risk when you restart, as vibrations throw the blade off track and force it to violently re-engage with the wood.
You’ll maintain straighter cuts and safer operation by letting the blade pass completely through before lifting the saw away.
Maintaining Blade Engagement
Stopping mid-cut disrupts blade engagement and creates misalignment in your kerf, which directly compromises the accuracy of subsequent cuts.
You’ll find that maintaining continuous blade motion prevents this degradation and guarantees your saw operates at peak efficiency.
Keep these key principles in mind:
- Maintain consistent forward pressure throughout your entire cut to prevent the blade from wandering or binding
- Back the blade slightly away from the cut line before restarting, allowing smoother re-entry into the material
- Never lift pressure when stopping; this stabilizes the blade’s position and prevents kickback
Complete blade engagement keeps your teeth operating effectively.
When you maintain motion without pausing, your blade finds its natural cutting path, resulting in cleaner cuts without burning or tearing the wood.
Preventing Kickback Risks
Because blade binding happens rapidly and unpredictably, you must maintain continuous forward motion throughout your cut—any interruption disrupts the kerf alignment and creates conditions for kickback.
If you need to pause, keep your hands firmly on the saw until it completely stops, then gently back it up slightly before restarting. This prevents the blade from re-engaging unexpectedly with the wood.
Starting your cut with the blade tooth positioned slightly away from your cut line prevents binding and establishes a smooth initial path.
Steady, controlled advancement minimizes resistance and reduces blade binding risk.
Consistent pressure and deliberate movement—not speed—determine cutting safety and quality.
If You Must Stop, Back Up and Realign
Interrupting a cut doesn’t mean you’ve lost your line— you can recover it with proper technique. When you stop mid-cut, resist the urge to reposition your saw. Instead, back the blade up slightly before restarting. This movement prevents kickback and allows smoother re-engagement with the wood.
Realign your blade precisely with the previous cut line to maintain accuracy and avoid deviations. Before advancing further, make physical contact with fresh wood to assess stability.
Realign your blade with the original kerf line, then assess wood stability before recommitting to the forward stroke.
Follow these critical steps:
- Back the saw up gradually without forcing it through resistance
- Visually align the blade’s teeth with your original kerf line
- Feel the wood’s resistance before recommitting to the forward stroke
Practicing this recovery method builds muscle memory, dramatically improving your consistency and precision over time.
Press Down: But Don’t Muscle It
The difference between a clean cut and a ruined one often comes down to pressure control rather than raw strength. You’ll achieve better results by letting the saw do the work instead of forcing it through the material.
Apply consistent, moderate pressure downward without leaning into the tool. Excessive force causes inaccurate cuts and increases kickback risk. Instead, use proper body positioning to support the saw and control its speed naturally.
Keep your supporting hands steady throughout the cut, ensuring they don’t interfere with the blade’s path. Focus on maintaining consistent pressure rather than muscling through.
As you gain experience, you’ll develop better feel for the tool’s response, and your cuts will become noticeably smoother and more precise.
Let the Blade Drive Straight Through
You’ll maintain a steady forward momentum throughout your cut, resisting the urge to pull back even when the blade encounters resistance.
Keep consistent pressure moving through the wood rather than stopping midway, which disrupts the blade’s path and creates ragged edges.
Let the saw complete its stroke fully, allowing the blade to exit cleanly on the far side of your workpiece.
Avoid Pulling Back During Cuts
Resist the urge to pull back once you’ve engaged the blade with the wood. Pulling back disrupts the blade’s optimized cutting path, causing uneven cuts and increasing kickback hazards. Instead, maintain steady forward pressure throughout the entire cut, allowing the saw to work through the material consistently.
Keep these principles in mind:
- Monitor your cut line – Watch the blade’s trajectory with your eyes while sustaining constant pressure to guide the saw straight.
- Maintain momentum – Don’t stop mid-cut; let the blade’s design work for you by pushing through without hesitation.
- Trust the tool – The blade’s engineering drives it straight when you apply consistent forward force.
Practice on scrap wood first. Building this habit reinforces proper technique and eliminates the instinct to pull back, ensuring straighter cuts every time.
Maintain Consistent Forward Pressure
Maintaining a steady forward pressure is what transforms pulling back resistance into active cutting control. You’ll allow the blade to naturally drive straight through the wood when you apply consistent, measured force along the cut line. This pressure keeps the saw engaged with the material, preventing it from wandering or binding.
Grip the saw firmly with both hands to exert the necessary pressure while minimizing deviations. Lean slightly into the cut, using your body weight to help push the saw smoothly forward. Avoid jerky motions or excessive stopping, as these disrupt the blade’s trajectory and produce uneven cuts.
Once you establish a stable cutting rhythm, the saw follows a straighter path more easily. This consistency dramatically enhances cut quality and precision.
Let The Blade Finish Completely
One of the most critical mistakes you can make is lifting the saw before the blade exits the wood completely. Premature lifting causes splintering, veers your cut off course, and compromises straightness.
You’ll maintain a properly aligned kerf by letting the blade finish its pass through the material.
Here’s what happens when you follow through:
- The blade completes its cut without interruption, producing clean edges and smooth shifts
- Forward pressure remains constant, reducing kickback risk and enhancing overall cut quality
- The kerf stays aligned throughout, preventing the blade from wandering mid-cut
Develop this habit consistently. Each complete blade pass teaches you the saw’s behavior and characteristics.
Over time, you’ll build muscle memory that makes straight cuts second nature, transforming your woodworking precision and confidence.
Practice Cuts to Learn Your Saw’s Behavior
Before you tackle your actual project, run several test cuts on scrap wood to understand how your specific saw behaves. Pay close attention to how the blade tracks through different materials and observe its alignment when you start near the board’s edge.
Experiment with varying speeds and pressures to see how they affect cut accuracy and straightness. You’ll likely notice your saw tends to veer left or right—this is normal. Identify these tendencies and adjust your technique to counteract them.
Use practice sessions to develop muscle memory for stable body positioning and consistent hand pressure. These repetitions train you to maintain control throughout the entire cutting process, translating directly to straighter cuts on your actual workpiece.
Keep Your Cord Clear While Cutting
Your saw’s power cord can sabotage even your most careful cutting technique if you don’t manage it properly. A tangled or poorly positioned cord disrupts your workflow and compromises accuracy.
Keep your cord organized using these practical strategies:
Keep your cord organized with practical strategies: route it away from cuts, maintain slack, and check regularly for tangles.
- Route the cord away from your cutting path, securing it with clips or channels to prevent snagging.
- Maintain sufficient slack to avoid tension that pulls your saw off-line during cuts.
- Check regularly for tangles and debris that could interfere with saw operation.
Position yourself strategically relative to the cord, adjusting your stance to eliminate tripping hazards. This awareness prevents accidental cord pulls that derail your cutting line.
Frequently Asked Questions
What Is the Best Tool for Cutting Wood Straight?
You’ll achieve the straightest cuts using a corded sidewinder circular saw, specifically the Makita with a 7-1/4 inch blade. Its right-side blade placement enhances visibility and cut tracking for maximum precision.
How to Cut Wood Very Straight?
You’ll tickle that wood into submission by marking precise lines with a metal straight edge and sharp pencil, then maintaining consistent pressure and speed while your saw blade naturally settles into tracking straight.
How to Make Sure You Cut Straight?
You’ll guarantee straight cuts by marking your line with a sharp pencil and metal straight edge, positioning the saw blade right of the line, maintaining consistent pressure, and keeping your eye contact steady throughout the cut.
How to Make a Straight Cut on a 2×4?
A carpenter mistakenly positioned the blade’s left side on the cut line, resulting in a crooked cut. You’ll make straight cuts by marking your guideline, positioning the blade’s right tooth 1/16 inch from it, and maintaining consistent forward pressure.
Conclusion
You’ve mastered straight cuts—ironically, the hardest part wasn’t learning these techniques. It’s resisting the urge to white-knuckle your saw into submission. You’ll discover that the less you force it, the straighter your cuts become. Your blade doesn’t need your muscle; it needs your restraint. You’ve invested time studying angles, workspace setup, and blade alignment, yet your breakthrough arrives when you finally let go and trust the tool you’re holding.