
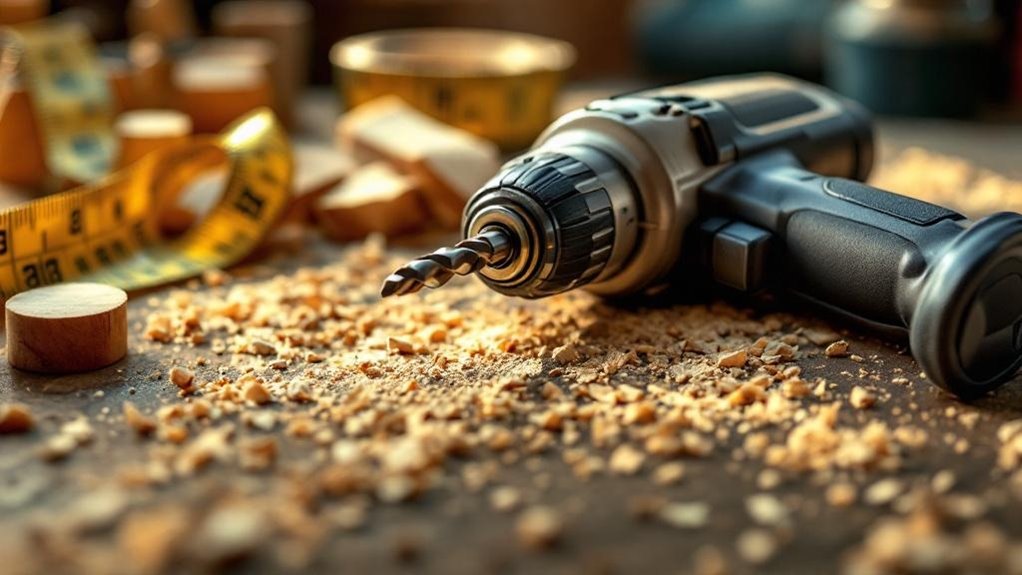
You’ll choose the right power drill by matching its specifications to your actual project needs rather than buying the most powerful option. Consider whether you need cordless mobility or corded unlimited runtime, select a 1/2-inch chuck for versatility, and prioritize adjustable torque and speed settings for precision. Weight matters too—aim for under three pounds to reduce fatigue. Balance performance with your budget: entry-level drills handle basic tasks, while mid-range models ($100–$250) offer serious hobbyists better value. Understanding how each feature impacts your specific woodworking will reveal which drill truly belongs in your shop.
Key Takeaways
- Cordless drills offer mobility for woodworking projects, while corded models provide unlimited runtime for heavy-duty tasks without battery concerns.
- Select 1/2-inch chuck drills to accommodate larger bits and use brad-point or Forstner bits for cleaner holes in various wood species.
- Match drill speed to wood type: 1,500-2,000 RPM for softwood, 1,000-1,500 RPM for medium-density wood, and 600-1,000 RPM for hardwood.
- Choose lightweight drills under 3 pounds with ergonomic design and adjustable torque settings to prevent fatigue and damage to delicate wood.
- Invest in mid-range cordless drills ($100-$250) with 18V+ lithium-ion batteries and higher amp-hour ratings for superior torque and extended runtime.
Power Drill Fundamentals for Woodworking
When you’re selecting a power drill for woodworking, you’ll want to prioritize features that deliver precision and control.
Among the power drills available today, cordless models with lithium-ion batteries stand out for their lightweight construction and extended runtime, reducing fatigue during lengthy projects.
Cordless lithium-ion drills offer lightweight performance and extended runtime, significantly reducing fatigue on demanding woodworking projects.
Look for adjustable torque settings that let you drive screws without damaging wood through overdriving.
Variable speed settings also matter—higher speeds work well for softer woods, while lower speeds prevent heat buildup in denser materials and maintain accuracy.
An ergonomic design with a comfortable grip is essential for minimizing hand and wrist strain during prolonged use.
This design feature directly improves your control and precision.
Finally, choose brad-point bits specifically engineered for woodworking; they cut smoothly without requiring starter divots, ensuring clean, accurate holes every time.
Corded vs. Cordless: Which Drill Wins for Your Shop?
How do you decide between corded and cordless drills for your woodworking? Consider your specific needs and work environment.
Corded drills deliver unlimited runtime and consistent power for extended heavy-duty tasks without battery depletion concerns. They’re ideal when you’re tackling prolonged projects that demand unwavering performance.
Cordless drills offer superior mobility, letting you maneuver freely around your shop without power cord constraints. High power 18V or 20V battery models provide excellent torque for drilling tough wood and handling larger fasteners effectively.
Weight matters too. Corded drills weigh more without batteries, enhancing stability during precision work.
Ultimately, your choice depends on project duration, frequency of use, and task complexity. Assess whether unlimited runtime or unrestricted movement matters most for your woodworking endeavors.
Impact Drivers vs. Standard Drills: Do You Need Both?
You’ll find that impact drivers and standard drills serve distinct purposes—impact drivers deliver high torque through rapid impacts for driving fasteners, while standard drills offer precise torque control and variable speeds for drilling holes and delicate work.
Your project requirements should dictate tool selection; impact drivers excel when you’re fastening large screws into hardwoods, whereas standard drills prove invaluable for drilling pilot holes and working in tight spaces where precision matters.
Investing in both tools maximizes your shop’s efficiency, as you’ll complete fastening tasks faster with an impact driver while maintaining the accuracy and control that only a standard drill provides for varied woodworking applications.
Power and Torque Differences
One of the most notable distinctions between impact drivers and standard drills lies in their power delivery and torque output.
Impact drivers deliver substantially higher torque—up to 1,500 in-lbs—enabling you to drive large fasteners through tough materials without pilot holes. Standard drills, by contrast, typically generate around 500 in-lbs of torque, making them better suited for precision drilling and light screw driving.
You’ll find that modern cordless drills feature adjustable torque settings, allowing you to handle both drilling and driving tasks.
However, they won’t match a dedicated impact driver’s sheer power. If you’re working with dense hardwoods or heavy fasteners frequently, owning both tools markedly improves efficiency and reduces screw head stripping risks while maintaining project versatility.
Project-Specific Tool Selection
Whether you need both tools depends entirely on your woodworking projects and budget constraints.
If you’re frequently driving fasteners into hardwoods, an impact driver’s superior torque and clutch features prevent screw stripping while delivering faster results than a standard drill.
However, if you’re primarily drilling precision holes for doweling and assembly work, a quality drill handles most tasks efficiently.
For serious woodworkers tackling diverse projects, owning both tools maximizes efficiency—each optimized for its specific function.
You’ll drive screws faster with an impact driver while maintaining drilling accuracy with a dedicated drill.
Budget-conscious builders should consider a high-torque drill with adjustable settings as a compromise.
While it won’t match an impact driver’s speed and power, it’ll manage most woodworking applications adequately, keeping your investment manageable.
Efficiency and Dual Functionality
Since most woodworking projects involve both drilling and fastening, understanding when each tool excels helps you work smarter.
You’ll maximize efficiency by pairing a standard drill with an impact driver, each serving distinct purposes:
- Standard drills handle precise pilot holes and smooth drilling through various materials.
- Impact drivers drive screws rapidly into hardwood with minimal user fatigue.
- Combined approach reduces project completion time remarkably.
- Compact modern designs make carrying both tools practical and convenient.
This dual-functionality strategy transforms your workflow.
While a standard drill provides precision when you need it, your impact driver powers through heavy-duty fastening tasks where a drill struggles.
The result? You’re not switching between compromises—you’re deploying the right tool for each job, enhancing both speed and quality throughout your woodworking projects.
Chuck Size: Why This Specification Actually Matters
Your drill’s chuck size directly determines which bits you can use and how securely they’ll hold during operation. Most power drills feature either 3/8-inch or 1/2-inch chucks, with the larger size accommodating heavier-duty applications and more specialized drill bits.
A 1/2-inch chuck offers superior versatility for woodworking projects, allowing you to work with larger bits and handle demanding tasks with confidence. You’ll also benefit from improved accuracy since proper chuck size prevents bit slippage during drilling.
When selecting your drill, match the chuck size to your intended drill bits. Keyless chucks enhance this convenience further, enabling quick bit changes without tools.
This specification isn’t merely technical—it directly impacts your project success and drilling efficiency.
Speed and Torque: Matching Settings to Wood Types
You’ll need to adjust your drill’s speed and torque settings based on the wood type you’re working with, as softwoods and hardwoods respond differently to power delivery.
Softwoods like pine work best with faster speeds and lower torque (15-18 range), while dense hardwoods require slower speeds and higher torque (25-30 range) to drive screws effectively without damage or stripping.
Mastering these adjustments guarantees you maintain precision and control across all your woodworking projects.
Speed Settings For Wood Types
When you’re matching your drill’s speed and torque to different wood types, you’re taking control of the drilling process itself. Understanding proper speed settings for various materials guarantees clean, precise results every time.
- Softwoods like pine and cedar: Use 1,500 to 2,000 RPM for efficient drilling without excessive friction.
- Medium-density woods like oak and maple: Apply 1,000 to 1,500 RPM with higher torque to prevent splintering.
- Hardwoods like walnut and cherry: Lower speeds of 600 to 1,000 RPM with high torque minimize heat and preserve bit sharpness.
- Specialized drill bits: Select brad-point bits for softwoods to achieve cleaner holes.
Adjusting your clutch settings gives you precise torque control, preventing overdriving in softer woods while maximizing power where you need it most.
This systematic approach transforms your drilling accuracy considerably.
Torque Adjustment Best Practices
Mastering torque adjustment transforms how effectively your drill performs across different wood types.
For softwoods, you’ll want to set lower torque values to prevent screw stripping and maintain precise control over pilot holes.
Hardwoods demand higher torque settings to overcome material resistance and deliver adequate driving power without compromising the wood or bit.
To drill safely, always consult your drill’s manufacturer guidelines for torque and speed recommendations specific to each wood type.
Combining variable speed settings with torque adjustments creates a customized drilling experience that minimizes tear-out and extends bit longevity.
This strategic approach guarantees smooth operation, consistent results, and protection for both your materials and equipment throughout your woodworking projects.
Battery Voltage and Runtime for Extended Projects
Since extended woodworking projects demand sustained power without frequent interruptions, selecting the right battery voltage and capacity becomes critical to your success.
High voltage batteries—18V and 20V models—deliver superior torque for demanding tasks. You’ll benefit from lithium-ion technology, which extends battery life considerably compared to older Ni-Cad options.
Consider these essential factors:
- Higher amp-hour (Ah) ratings provide extended runtime, reducing recharge interruptions
- High voltage correlates with increased power for hardwood drilling
- Battery weight impacts fatigue during lengthy sessions
- Lithium-ion chemistry enables faster charging between projects
Hardwood drilling consumes battery energy considerably faster than softwood work. You’ll want adequate capacity reserves to maintain productivity.
Balance voltage requirements against your project’s specific demands—heavier batteries offer more power but may cause user fatigue on extended jobs.
Weight and Balance: Comfort During Long Drilling Sessions
You’ll discover that a drill weighing under 3 pounds greatly enhances your control and reduces fatigue during extended woodworking sessions. A lighter tool makes maneuvering considerably easier, especially when working overhead or in tight spaces.
Balance matters equally. Well-balanced drills distribute weight evenly between the handle and head, preventing wrist strain and improving precision. You’ll notice the difference immediately when the weight feels centered in your hand.
Ergonomic designs featuring contoured grips conform naturally to your palm, supporting comfort during prolonged use. Rubberized handles prevent slippage and maintain your grip security throughout demanding projects.
Additionally, adjustable torque settings reduce unnecessary strain by preventing overdriving. You’ll work more efficiently when your drill matches your comfort requirements, allowing you to focus entirely on your craftsmanship rather than physical fatigue.
Precision Features That Prevent Costly Mistakes
Comfort during drilling sessions matters, but what truly protects your woodworking investment is a drill equipped with precision features that guard against damage.
You’ll want to prioritize these capabilities:
- Adjustable torque settings that prevent screw overdriving into delicate wood
- Variable speed controls that optimize rotation based on material type
- Built-in LED lights that illuminate work zones and guarantee accuracy
- Keyless chucks enabling rapid bit changes without workflow interruption
These precision features work together to minimize costly mistakes.
Adjustable torque stops you from damaging expensive hardwoods, while variable speeds deliver cleaner holes. LED visibility prevents misaligned drilling, and efficient bit changes keep your momentum steady.
Adjustable torque protects hardwoods, variable speeds ensure cleaner holes, and LED visibility prevents misalignment while keeping your workflow efficient.
When you invest in a drill with these capabilities, you’re protecting both your projects and your time.
Selecting Drill Bits for Different Wood Species
The right drill bit can make the difference between a clean hole and splintered wood, so it’s essential to match your bit to the wood species you’re working with.
| Wood Type | Recommended Bit | Benefit |
|---|---|---|
| Softwood (Pine, Cedar) | Twist or Brad-Point | Clean, precise holes |
| Hardwood (Oak, Maple) | Sharp Brad-Point | Reduces tear-out |
| Soft Wood, Large Holes | Spade Bits | Fast drilling |
| Various Woods, Flat Bottom | Forstner Bits | Cabinetry projects |
| Hardwood, Large Holes | Forstner Bits | Clean results |
For softwoods, twist bits or brad-point bits deliver clean, precise holes without splitting. Hardwoods demand sharper brad-point bits that effectively minimize tear-out and create cleaner entry and exit points. While spade bits excel at drilling larger holes quickly in softer woods, they’ll produce rough edges in hardwoods. Forstner bits create flat-bottomed holes ideal for cabinetry and furniture work across various wood types. Always prioritize matching your drill bit size and type to your specific wood species, ensuring accurate results and preventing material damage.
Ergonomic Grips and Handles: Real Comfort Counts
Once you’ve selected the right bit for your project, how you hold and control your drill becomes just as important. Ergonomic grips fundamentally transform your drilling experience by reducing hand fatigue during extended woodworking sessions.
Quality handles feature:
- Rubberized surfaces that prevent slipping and enhance grip security
- Contoured designs that naturally fit your hand’s shape
- Adjustable positioning to accommodate different hand sizes
- Well-placed trigger controls for maintaining comfortable speed adjustments
These design elements work together to minimize repetitive strain injuries while maximizing control and precision. You’ll maintain steadier drilling angles and better screw-driving accuracy when your drill fits properly.
Comfort directly impacts productivity—you’ll accomplish more work with less physical stress. Investing in a drill with superior ergonomic grips isn’t optional; it’s essential for serious woodworking projects where long hours of use demand reliable comfort and performance.
How to Match Drill Power to Your Project Scope
Matching your drill’s power to your project scope requires evaluating three critical factors: torque, power source, and speed settings.
| Project Type | Torque Needed | Best Power Source | Ideal Speed |
|---|---|---|---|
| Light woodworking | Low-medium | Cordless | High |
| Medium framing | Medium-high | Corded or cordless | Medium |
| Dense hardwood | High | Corded | Low |
| Precision joinery | Medium | Cordless | Variable |
Higher torque prevents stripping when driving larger screws through dense materials. Cordless drills offer portability for workshop mobility, while corded drills deliver consistent power for demanding tasks. Match speed settings to wood density—faster speeds work well for softwoods, but slower speeds give you better control in harder materials, reducing heat and damage. This strategic approach guarantees your drills perform at their best across varying project demands.
Common Drill-Selection Mistakes and How to Avoid Them
Why do so many woodworkers end up with drills that don’t match their actual needs?
You’re likely making critical mistakes during selection that compromise both your projects and your wallet.
Here’s what to avoid:
- Choosing high-torque drills blindly – You’ll overdrive screws and damage materials; select adjustable torque settings instead for precision control.
- Ignoring chuck size compatibility – A 1/2-inch chuck gives you access to larger drill bits for versatile woodworking tasks.
- Overlooking battery technology – Lithium-ion batteries provide longer runtimes and lighter weight than outdated Ni-Cad options.
- Neglecting ergonomic design – A comfortable grip and lightweight construction prevent hand fatigue during extended projects.
Finally, invest in specialized brad-point or spade drill bits rather than generic twist bits.
They’ll yield cleaner holes and reduce material damage, elevating your overall craftsmanship.
Budget vs. Performance: Finding Your Sweet Spot
You’ll find that entry-level drills handle basic tasks adequately, but mid-range models ($100-$250 with lithium-ion batteries) deliver the torque and battery life that make detailed woodworking projects less frustrating.
Premium tools from DeWALT or Milwaukee cost more upfront, yet they pay dividends through superior durability, precision, and reduced tool replacement over time.
Your choice depends on whether you’re tackling occasional projects or committing to serious woodworking—and whether you’re willing to invest now to avoid future frustration and downtime.
Entry-Level Drill Capabilities
Three key factors—voltage, weight, and price—define what entry-level cordless drills can deliver for your woodworking projects. You’ll find that 12V to 18V models provide sufficient power for fundamental tasks without unnecessary expense.
Entry-level drill capabilities include:
- Drilling holes through softwood and hardwood with consistent precision
- Driving screws into various materials using adjustable torque settings
- Operating for extended periods with reliable battery performance
- Maintaining control and comfort through lightweight design around 3 pounds
Budget-friendly options between $60 to $150 offer solid performance for basic woodworking.
Look for keyless chucks for quick bit changes and ergonomic designs with rubberized grips. These features enhance usability and reduce hand fatigue during prolonged use, making your entry-level drill investment worthwhile.
Mid-Range Power Features
As your woodworking projects grow more ambitious, mid-range power drills deliver the performance boost you’ll need without excessive cost or complexity. These heavy duty tools strike the ideal balance for serious hobbyists.
| Feature | Entry-Level | Mid-Range | Advantage |
|---|---|---|---|
| Voltage | 12V | 12V-18V | Extended runtime and power |
| Motor Type | Brushed | Brushless | Efficiency and durability |
| Chuck Size | 3/8″ | 1/2″ | Greater bit compatibility |
| Torque Control | Limited | Adjustable | Precision and screw control |
Mid-range drills feature brushless motors that enhance efficiency and battery longevity. You’ll appreciate adjustable torque settings for controlling power across different wood types, preventing material damage. The standard 1/2-inch chuck accommodates a wider variety of bits for diverse applications. Prioritize ergonomic design and balanced weight distribution—these factors reduce fatigue during extended sessions, allowing you to work comfortably and maintain better control throughout your projects.
Premium Tool Investment
While mid-range drills offer solid performance for growing projects, premium models like the DEWALT 20V MAX and Milwaukee deliver measurable advantages that justify their higher price tags. Your premium tool investment pays dividends through superior engineering and reliability.
Premium power tool features include:
- Brushless motors providing extended battery life and smoother operation
- Multiple torque settings for precision control in delicate woodworking tasks
- Ergonomic designs reducing fatigue during extended use sessions
- Extensive warranties protecting your investment long-term
You’ll experience noticeably improved performance on intricate projects where budget drills falter. Premium models withstand heavier demands without compromising quality or consistency.
While the upfront cost exceeds budget options, you’re acquiring durability and efficiency that compound over years of use. This strategic investment eliminates frustration and delivers professional-grade results for serious woodworkers prioritizing both capability and longevity.
Cordless Drill Models: What Woodworkers Actually Recommend
When you’re selecting a cordless drill for woodworking, you’ll find that experienced woodworkers consistently recommend a few standout models based on performance and design.
| Model | Voltage | Key Advantage |
|---|---|---|
| DEWALT DCD701F2 | 12V Max | 30 holes per charge |
| Milwaukee 3401-22 | 12V | Compact size (5¼”) |
| Milwaukee 3601-22CT | 18V | Higher performance |
| Li-On Cordless Drills | Variable | Efficient, minimal recharging |
| General Purpose | 12-18V | DIY projects capability |
For woodworking and DIY projects, you’ll want to evaluate voltage ratings carefully. The DEWALT excels in ergonomics and battery efficiency, while the Milwaukee 3401-22 dominates tight spaces. If you tackle demanding tasks, the 18-volt Milwaukee delivers superior power. You’ll appreciate Li-Ion technology’s sustained productivity. Each cordless drill model serves specific needs—choose based on your project scope and workspace constraints.
Safety Essentials Before Your First Hole
Before you pick up your drill, you’ll need to prioritize protective gear, conduct thorough pre-drill safety checks, and master proper technique fundamentals to work confidently and safely.
Your eyes, hands, and long hair require specific protection through goggles, gloves, and secure styling, while your workspace demands cleanliness and adequate lighting to eliminate hazards.
Finally, you’ll verify your drill bit’s secure installation in the chuck and familiarize yourself with your model’s manual to establish a foundation for injury-free woodworking.
Protective Gear Requirements
Since you’ll be operating a powerful tool that generates debris, noise, and dust, you’ll need proper protective equipment before you start drilling.
- Safety goggles shield your eyes from flying particles and debris that drilling produces.
- Hearing protection like earplugs or earmuffs prevents noise-induced hearing loss during extended use.
- Gloves protect your hands from sharp bits and rough materials, but avoid loose-fitting styles that catch in the drill.
- Dust mask or respirator prevents inhalation of fine particles and fumes when drilling wood or metal.
Don’t overlook these essentials. They’re your first line of defense against injury.
Invest in quality gear that fits properly and remains comfortable during longer projects. You’ll work more confidently and safely when you’re properly protected.
Pre-Drill Safety Checks
To prevent accidents and guarantee accurate results, you’ll need to perform several critical safety checks before you power on your drill.
First, inspect your power cord for damage and verify the drill’s overall condition. Check that your drill bits are sharp and appropriate for your woodworking material—small drills particularly require proper bit selection for precision work.
Secure your workpiece firmly with clamps to prevent movement during drilling. Clear your workspace of clutter and ensure your clothing and hair are secured away from rotating parts.
Familiarize yourself with your drill’s user manual to understand its specific features and safety settings.
Finally, confirm that all guards are in place and functioning correctly. These pre-drill checks establish a foundation for safe, accurate woodworking.
Proper Technique Fundamentals
Mastering the fundamentals of drill operation is essential for safe, precise woodworking results. Proper technique transforms drilling holes from a risky endeavor into a controlled, accurate process.
Follow these critical steps when drilling holes:
- Position yourself with feet shoulder-width apart, maintaining steady balance and control throughout the operation.
- Grip the drill firmly with both hands, keeping your body aligned with the bit’s axis to prevent torque-related injuries.
- Start at low speed to establish your guide, then gradually increase speed based on your material’s density and hardness.
- Apply steady, consistent pressure without forcing—let the drill do the work to avoid binding and sudden movements.
Maintain proper posture throughout to minimize fatigue and maximize precision.
Your body mechanics directly impact drilling accuracy and safety.
Proper Drilling Technique for Clean, Accurate Results
Achieving clean, accurate holes requires you to master several fundamental techniques that’ll transform your woodworking results. Start by drilling at low speed to prevent bit wandering and establish a clean entry point.
Use brad-point bits for wood rather than standard twist bits, as their sharp points and cutting spurs create straight holes without pilot holes.
Maintain consistent, moderate pressure while drilling—let the tool do the work to avoid overheating. Keep your drill perfectly perpendicular to the work surface; misalignment ruins joints and fittings.
Always securely clamp your workpiece to prevent shifting during drilling.
Consider using drill stands to guarantee perpendicularity and enhance accuracy. These accessories eliminate hand-angle errors and improve repetitive drilling tasks.
Proper technique combined with the right equipment guarantees professional-quality results every time.
Your Final Checklist: Ready to Buy?
Now that you’ve mastered proper drilling technique, it’s time to confirm you’re selecting the right tool for the job.
Before purchasing, verify you’re addressing these essentials:
- Power source compatibility—determine whether a corded drill’s consistent runtime or a cordless model’s portability suits your workshop setup.
- Torque and speed specifications that match your typical woodworking material densities and project complexity.
- Ergonomic features including comfortable grip design and lightweight construction to prevent fatigue during extended sessions.
- Additional functionalities such as LED lighting for visibility and adjustable clutches for precision screw-driving.
Double-check bit compatibility with wood-specific options like brad-point bits.
This checklist confirms you’re investing in a drill that delivers precision, control, and durability for your woodworking endeavors.
Frequently Asked Questions
What Is a Good Size Power Drill for Woodworking?
You’ll want a drill with a 3/8-inch chuck size for woodworking versatility. Pair that with 12 to 18-volt power and a lightweight, compact design. You’ll appreciate the maneuverability and reduced fatigue during extended projects.
What Is Better, an 18V or 20V Drill?
You’ll find both 18V and 20V drills perform similarly for woodworking. Choose 18V if you prioritize battery compatibility across tools; select 20V if you’re tackling demanding projects requiring peak power performance.
How to Pick the Right Power Drill?
You’ll navigate the drill selection like plotting a course through dense forest. Consider your power source preference, evaluate torque settings for control, prioritize ergonomic design, check chuck compatibility, and select specialized bits matching your woodworking needs.
What Is Better, SDS or SDS Plus Drill?
SDS Plus outperforms standard SDS for most applications. You’ll benefit from its secure fit, faster bit changes, and superior stability during heavy-duty work. Choose SDS Plus unless you’re doing light tasks occasionally.
Conclusion
You’ve now learned that choosing a power drill isn’t actually complicated—it’s surprisingly straightforward once you’ve absorbed pages of specifications, comparisons, and technique guides. You’ll find that the “perfect” drill you’ve researched extensively probably won’t matter nearly as much as simply grabbing one and starting your project. The real lesson? You don’t need the ideal tool; you need to begin drilling. Your newfound knowledge serves you best when you stop overthinking and actually use it.