
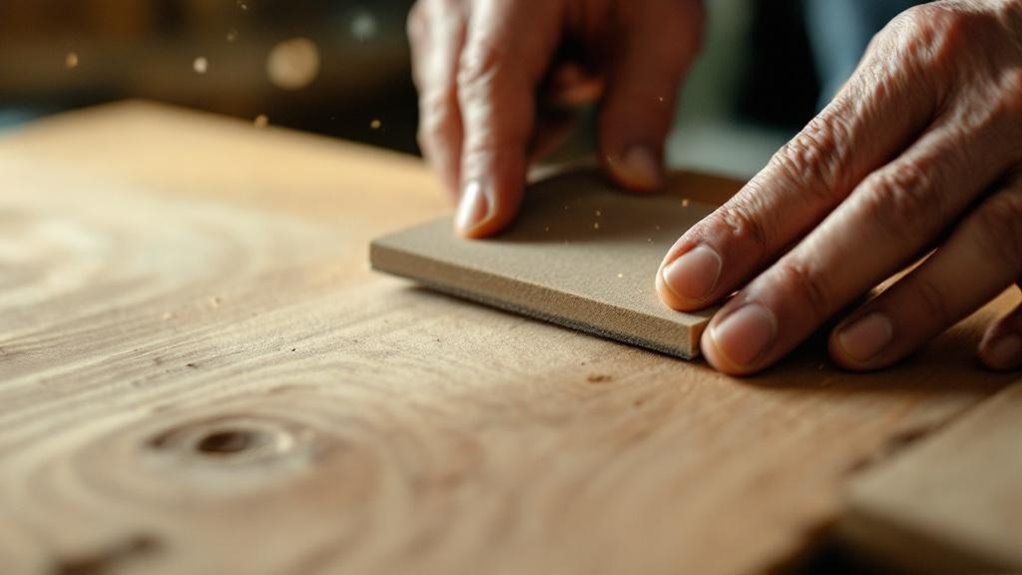
You’ll transform rough wood edges into smooth, professional finishes by combining hand planing, strategic sanding, and meticulous dust removal. Start with coarse grit sandpaper (80-120), progress to fine grits (180-220), and always sand with the grain to prevent tear-out. Use a rigid sanding block matching your edge length to avoid dips. For ideal results, employ block planes or chamfer planes for precision control. Finally, remove all dust with tack cloths and compressed air before applying finishes. Understanding design-specific techniques and common mistakes will elevate your edge-finishing results considerably.
Key Takeaways
- Start with coarse grit sandpaper (40-60) and progress through medium (80-120) and fine grits (180-220) for optimal smoothing.
- Use a chamfer plane with consistent light pressure, working with the grain to eliminate tear-out and maintain surface integrity.
- Select a rigid sanding block matching edge length to prevent dips, and sand with the grain to avoid visible scratches.
- Check for imperfections by running fingers along edges and inspecting under bright lighting to detect bumps or inconsistencies.
- Remove all dust using tack cloths, compressed air, and damp cloths before applying finishes to ensure superior adhesion and appearance.
Why Sharp Edges Are a Safety and Finishing Problem
When you’re handling wooden furniture or working with woodworking projects, sharp edges can pose serious safety risks. You’ll increase the likelihood of cuts and injuries during everyday handling and use.
Beyond safety concerns, sharp edges compromise both aesthetics and functionality. They’ll disrupt the visual flow of your piece, making it appear unfinished and poorly crafted, which greatly impacts perceived quality.
Sharp edges compromise aesthetics and functionality, disrupting visual flow and creating an unfinished, poorly crafted appearance that impacts perceived quality.
Sharp edges also create practical finishing problems. When you apply wood stain or paint, these edges catch excess material, resulting in uneven application and unattractive lines. Additionally, sharp edges hinder proper adhesion of finishes and glues, weakening durability and longevity.
You’ll find that softening edges facilitates easier handling during transport while reducing wood damage. Addressing this issue improves both the safety profile and professional appearance of your woodworking projects.
Smoothing Edges With Block Planes
Block planes offer you precise control for smoothing wood edges into a refined, professional finish. You’ll generate small shavings instead of dust, maintaining visibility and a cleaner workspace.
Adjust blade depth carefully to prevent gouging and guarantee even results.
- Use varying angles to create different edge profiles tailored to your project requirements
- Practice regularly to develop tactile feedback and refine your technique
- Apply fine grit finishing passes after initial planing for superior smoothness
- Work effectively on softwoods with minimal effort and consistent chamfering
- Shift from block planes to large surfaces using broader planing tools as needed
Mastering this tool enhances your ability to eliminate sharp edges while achieving the professional appearance your woodworking demands.
Smoothing Edges With Chamfer Planes
You’ll want to select a chamfer plane with the correct bevel angle for your project—typically 45 degrees for standard applications—and guarantee the blade is sharp to prevent tear-out on grain.
Maintain consistent, light pressure as you guide the plane along the edge, letting the tool’s geometry do the work rather than forcing it through the wood.
Your technique directly determines the uniformity of the chamfer; controlled, deliberate strokes produce cleaner results than hurried passes that risk uneven bevels and surface irregularities.
Technique and Precision
Chamfer planes offer woodworkers a specialized tool designed specifically for creating beveled edges with exceptional control and consistency.
You’ll achieve superior results by mastering fundamental techniques that prioritize precision.
- Work with the grain to eliminate tear-out and maintain surface integrity
- Set your plane blade to remove thin shavings—approximately 1/32 inch—for optimal control
- Maintain consistent pressure and angle throughout each pass for uniform bevels
- Follow up with grit paper and a sanding block to refine the chamfered edge
- Experiment with varying angles to produce distinct visual profiles matching your design intent
You’ll find that combining your plane with progressive sanding techniques creates exceptionally smooth edges.
This methodical approach minimizes rework while maximizing the aesthetic and safety benefits of properly chamfered woodwork.
Tool Selection Matters
Mastering technique gets you halfway to exceptional results—the right tool completes the job. When you’re creating smooth wood edges, tool selection matters considerably, especially on hardwoods where tear-out becomes problematic.
Chamfer planes deliver precision that other tools struggle to achieve, allowing you to control blade depth with exactness and produce consistent angles effortlessly.
You’ll find chamfer planes outperform sanding in both speed and quality. They remove material efficiently while maintaining clean, sharp profiles without the dust and labor-intensive effort sanding demands.
Proper technique paired with a quality chamfer plane enables you to fine-tune edge shapes for both decorative and functional applications.
Whether you’re softening sharp corners or creating aesthetic treatments, selecting a chamfer plane guarantees you’ll achieve professional results that elevate your woodworking projects greatly.
Smoothing Edges With Sanding Blocks
You’ll want to select a rigid sanding block that matches your edge length, ensuring it prevents dips and maintains consistent contact throughout your work.
Apply even pressure across the block’s surface as you move along the wood grain, using controlled strokes that let the tool do the work rather than forcing it.
Start with 80-120 grit sandpaper, then progress through finer grits up to 180-220 to achieve a uniformly smooth surface that’s ready for finishing.
Selecting The Right Block
The foundation of effective edge smoothing lies in choosing a sanding block that balances comfort with control.
You’ll want a tool that fits your hand naturally while delivering consistent pressure across wood surfaces.
Consider these essential selection criteria:
- Flat, rigid base ensuring uniform sanding without dips or inconsistencies
- Adhesive-backed sandpaper for secure grip and simplified replacement
- Ergonomic design reducing hand fatigue during extended sessions
- Comfortable hand-fitting dimensions for smooth, even pressure application
- Flexible or hand-shaped blocks for rounded or contoured edges
Select your sanding block based on your project’s specific edge profiles.
Rigid blocks work best for straight edges, while flexible variants accommodate curved surfaces.
Prioritize grip security and pressure control—these factors directly impact your finish quality and work efficiency.
Proper Pressure And Technique
Successful edge smoothing depends on three critical factors: applying consistent light pressure, sanding with the wood grain, and maintaining proper block angle.
| Grit Range | Purpose | Pressure Level |
|---|---|---|
| 80-120 (Medium) | Initial smoothing | Light, even |
| 120-180 (Medium-Fine) | Intermediate refinement | Light, consistent |
| 180-220 (Fine) | Final finishing | Minimal, controlled |
You’ll make sure your results stay uniform by holding the sanding block at 90 degrees to the edge. Avoid trying to cut through imperfections quickly—this creates dips and uneven spots. Check smoothness every time by feeling the surface with your fingers. Adjust pressure downward if you’re trying to cut too aggressively. Progress through grits systematically, sanding with the grain to prevent visible scratches. This methodical approach guarantees professional-quality edges without damage or inconsistency.
Progressive Grit Advancement Strategy
Because rushing through grit stages produces visible scratches and uneven surfaces, you’ll want to advance systematically from medium to fine grits using your sanding block.
Start with 80-120 grit sandpaper to eliminate initial roughness and establish baseline smoothness. Progress to 180-220 grit, which prepares your surface for finishing applications while noticeably improving tactile quality. Finally, apply 320+ grit for ultra-fine results.
Key progression guidelines:
- Maintain consistent, even pressure throughout the smoothing process to prevent surface dips
- Feel edges regularly between grit stages to confirm advancement quality
- Allow each grit level to complete its intended work before moving forward
- Match sandpaper selection to your wood type and edge profile
- Document which grits you’ve used to avoid repetition
This methodical approach guarantees professional-grade edges with superior aesthetics and durability.
Choosing Between Hand Sanding and Power Tools
When you’re smoothing wood edges, you’ll need to decide whether hand sanding or power tools better suit your project’s demands.
Hand sanding offers superior control and precision, making it ideal for delicate edge profiles and intricate designs where aggressive power tools risk damage. You’ll appreciate its versatility in tight spaces and curved edges without bulky equipment setup.
Hand sanding delivers superior control for delicate profiles and intricate designs where power tools risk damage.
Power tools like random-orbit and belt sanders accelerate material removal for larger projects, greatly reducing labor time. However, they can over-sand if you’re not careful.
Consider combining both methods for optimal results: deploy power tools for initial shaping, then finish with hand sanding to achieve a finer, more polished surface.
This hybrid approach balances efficiency with craftsmanship, protecting your work while delivering professional-quality edges.
Smoothing Large Edges With a Router
A router equipped with a roundover bit’ll efficiently smooth large edges while drastically reducing your sanding workload afterward. This power tool delivers superior results compared to manual methods, especially on expansive surfaces where consistency matters.
Key techniques for success:
- Secure your workpiece firmly on a stable, flat surface to maintain even pressure throughout routing.
- Start with lighter cuts and progressively deepen them to prevent tear-out and guarantee controlled material removal.
- Use templates for curved edges to assure uniform radius consistency across the entire length.
- Feed the router steadily, maintaining proper grip and stance for safety.
- Follow routing with fine-grit sanding to refine surfaces and prepare edges for finishing.
This combination approach yields professional-quality edges efficiently while minimizing preparation time before staining or painting.
The Right Grit Progression for Smooth Edges
You’ll start with coarse grit sandpaper (40-60) to eliminate significant surface irregularities and roughness left from routing.
Progress through medium grit (80-120) to establish a refined surface, then advance to fine grit (180-220) that prepares the wood for finishing applications like stain or paint.
Starting With Coarse Grits
The foundation of achieving smooth wood edges rests on beginning with coarse grit sandpaper—specifically 40-60 grit—which effectively removes roughness and deep scratches that’d otherwise compromise your final finish.
This initial phase demands deliberate technique:
- Apply moderate pressure to strip away surface imperfections without gouging the wood.
- Work systematically across the edge, maintaining consistent contact with the sandpaper.
- Use a tack cloth afterward to eliminate dust particles that interfere with subsequent grits.
- Focus on softening sharp edges while removing material efficiently.
- Inspect progress frequently to avoid over-sanding.
Coarse grit establishes your project’s baseline quality. You’re not achieving smoothness yet—you’re eliminating obstacles.
This preparation stage determines whether finer grits can create the polished result you’re pursuing. Skip or rush this step, and no amount of fine-grit work compensates.
Progressive Refinement Strategy
How do you shift from coarse sanding to achieving genuinely smooth wood edges? You’ll really try using a progressive grit strategy that builders years ago perfected through trial and error.
After your initial coarse work, move to medium grit (80-120) sandpaper for general smoothing that removes previous scratches. Next, go about softening the surface with fine grit (180-220) to prepare for finishing and improve stain adhesion.
Finally, use extra fine grit (320+) for that ultra-smooth, polished appearance. Throughout this progression, always sand with the wood grain to prevent visible scratches.
Regularly feel the surface for rough spots, ensuring consistent refinement across all edges. This methodical approach guarantees professional results without imperfections.
Sand With the Grain to Avoid Visible Scratches
Sanding with the grain is essential for creating smooth, professional-looking wood edges that won’t show visible scratches after finishing. You’ll notice that working along the grain direction makes sanding marks blend seamlessly with the wood’s natural texture, rendering them nearly invisible once you apply stain or paint.
Sometimes I use this progressive approach:
- Start with coarser grits, then progress to finer grits while maintaining grain-aligned strokes
- Regularly inspect the surface to catch cross-grain scratches before they become problematic
- Check your work under different lighting angles to identify hidden imperfections
- Maintain consistent pressure and speed throughout each sanding pass
- Verify grain direction before beginning, as it varies across different wood sections
This method enhances aesthetics while improving finish adhesion, resulting in durable, professional edges.
Light Pressure and Multiple Passes Over Aggressive Strokes
Once you’ve established your grain direction, you’ll want to shift your approach toward light, controlled pressure rather than aggressive sanding strokes. Light pressure prevents indentations and uneven surfaces, promoting consistency across your wood edges.
You’ll achieve better results with multiple passes using fine-grit sandpaper—220 or 320 grit work well—gradually refining edges without risking over-aggressive sanding that rounds or damages them.
Work methodically with light strokes to maintain control and precision, ensuring every section receives even smoothing. Avoiding aggressive strokes reduces grain tearing, which compromises appearance and structural integrity.
This controlled technique takes patience, but the payoff’s substantial: consistent light pressure combined with multiple passes delivers a professional-quality finish that enhances adhesion for stains and paints.
Maintaining Edge Sharpness While Rounding Corners
While you’re rounding corners to soften sharp edges, you’ll need to balance refinement with maintaining the crisp definition that distinguishes a professionally finished piece from an over-smoothed one.
You’ll preserve sharpness by employing strategic techniques and careful monitoring throughout the finishing process.
- Use a block plane for precise chamfering that removes minimal material while retaining edge lines
- Apply fine-grit sandpaper (220-320) with light pressure to soften connections without compromising crispness
- Employ random-orbit sanders with controlled passes, checking frequently to prevent over-smoothing
- Complement power tools with hand sanding for refined details and controlled rounding
- Inspect edges post-treatment to confirm sharpness retention, adjusting methods based on wood grain and application requirements
This balanced approach guarantees you achieve smooth, professionally refined edges without sacrificing definition.
Creating a Safe 1/16 Radius Edge
You’ll achieve a safe 1/16 radius edge through three primary methods: using a small scraper to remove material while maintaining consistent curve, employing a block plane for controlled initial softening, or hand sanding with 220 or 320 grit sandpaper to ease the sharp edge.
The scraper method demands precision and steady hand control, while the block plane offers uniformity through its shaped cut.
Hand sanding provides flexibility and relies on your tactile feedback to guide the smoothing process without over-altering the edge profile.
Scraper Method For Edges
A sharp scraper delivers exceptional control when forming a consistent 1/16-inch radius along wood edges.
You’ll achieve smoother results by positioning the scraper at a slight angle while maintaining even pressure throughout. This approach prevents tearing and chipping that compromises your wood surface.
Before beginning your project, verify your scraper’s edge is properly honed for cleaner cuts. Practice on scrap wood to refine your technique and build confidence.
Key techniques for success:
- Position the scraper at a slight angle to the wood grain
- Apply consistent, even pressure to prevent surface damage
- Check progress frequently to maintain uniformity across edges
- Work gradually to avoid over-scraping localized areas
- Hone your scraper regularly for peak cutting performance
This methodical approach creates safe, splinter-free edges efficiently.
Hand Sanding Technique Application
Hand sanding transforms your scraped edges into consistently smooth, safe surfaces ready for finishing. Start with 220 grit sandpaper, sanding evenly along the wood grain to prevent visible scratches.
Use a sanding block to maintain uniform pressure and avoid dips across the edge’s entire length. Check your progress frequently by feeling the radius—you’ll sense when you’ve achieved the desired 1/16 radius uniformity. Make multiple passes as needed, adjusting pressure accordingly.
Once you’ve established the initial radius, switch to 320 grit sandpaper for finer adjustments and a polished finish. Before tackling your final project, practice this technique on scrap pieces to refine your approach and guarantee you don’t compromise the wood’s structural integrity.
Block Plane Initial Softening
Before you move to hand sanding, use a block plane to establish the foundational 1/16 inch radius that transforms sharp edges into safe, comfortable surfaces.
Position your block plane at a slight angle to the edge, applying consistent, gentle pressure. Work with the grain direction to minimize tear-out and achieve a clean finish.
Make light passes initially, gradually deepening until you reach your target radius—this prevents over-shaving and maintains control throughout the process.
Key techniques for success:
- Angle the plane slightly relative to the edge for ideal cutting geometry
- Apply gentle, even pressure to produce smooth, consistent shavings
- Progress incrementally with multiple light passes rather than aggressive single strokes
- Work directionally with the wood grain to prevent splintering
- Check your progress tactilely after each pass to guarantee uniform radius without sharp spots
Preventing Tear-Out When Sanding Against the Grain
When you’re working with wood that grain runs in multiple directions, you’ll inevitably encounter situations where sanding against the grain becomes necessary.
| Technique | Benefit |
|---|---|
| Lighter touch pressure | Minimizes fiber disruption |
| Finer grit sandpaper (180+) | Reduces tear-out severity |
| Scrap wood testing | Refines your approach |
To minimize tear-out, apply reduced pressure when sanding against the grain. Start with finer grit sandpaper rather than coarse grits, as smaller abrasives create less aggressive cutting action. Before tackling your final piece, test your technique on scrap wood of identical species. This allows you to identify ideal pressure and grit combinations. Alternatively, consider hand tools like block planes or cabinet scrapers for edges, as they’re gentler than sandpaper and won’t tear fibers. These strategies considerably reduce surface damage and deliver superior results.
The Handcrafted Appeal of Hand-Sanded Edges
Beyond simply preventing surface damage, you’ll discover that hand-sanding edges offers a distinctly different aesthetic than machine methods.
When you control the sanding process manually, you create unique variations that showcase genuine craftsmanship. The tactile feedback from block planes and sanding blocks enhances your precision while developing an artisanal finish that machines can’t replicate.
- Micro facets created through chamfering techniques reflect light dynamically across edges
- Minor imperfections add character, demonstrating your intentional artistic choices
- Organic surface quality aligns with traditional woodworking aesthetics
- Hand-tool control produces subtle variations impossible with industrial equipment
- Tactile feedback during sanding improves edge consistency and quality
Hand-sanded edges celebrate the maker’s commitment to quality, transforming functional smoothness into visual interest that distinguishes your work from mass-produced alternatives.
Design-Specific Edge Treatment: Shaker vs. Modern Styles
Your choice of edge treatment dramatically shapes how your finished piece communicates its design philosophy.
Shaker designs demand crisp, minimally softened edges that showcase joinery precision and emphasize functionality. You’ll typically leave edges sharper or apply only subtle softening to maintain visual uniformity and utilitarian clarity.
Modern styles, conversely, welcome pronounced curves and 1/8-inch roundovers that enhance tactile quality and contemporary aesthetics. You’re encouraged to embrace more organic, flowing edges that celebrate artisanal characteristics and artistic expression.
Your decision hinges on intended use and personal preference.
If you’re crafting Shaker pieces, prioritize cleanliness and uniformity through careful sanding and minimal rounding. For modern work, you’ll invest in more expressive edge treatments that reflect daring forms and flowing design principles.
How to Check for Uneven Edges After Sanding
How can you be certain that your sanding work has produced truly uniform edges? You’ll need to employ multiple verification methods to confirm quality results.
- Run your fingers lightly along edges to detect bumps or inconsistencies through tactile feedback.
- Inspect edges under bright lighting to reveal shadows that expose imperfections invisible to touch alone.
- Apply a straightedge or flat surface to identify height variations; gaps indicate unevenness.
- Wipe edges with a tack cloth to remove dust, then re-examine for clearer finish visibility.
- Use calipers or precision measuring tools to validate edges meet specified dimensional standards.
Combine these techniques systematically. Start with tactile and visual inspection, then progress to straightedge testing.
Finally, employ precision instruments for critical measurements. This layered approach guarantees your edges achieve project specifications and professional smoothness.
Five Mistakes That Leave Edges Rough or Uneven
Even after meticulous sanding, you can still end up with rough or uneven edges if you don’t avoid these five common pitfalls.
First, skipping proper grit progression leaves rough shifts between coarse and fine surfaces.
Second, sanding against the grain creates cross-grain scratches that amplify under stains and finishes.
Third, neglecting edge-softening tools like block planes or chamfer tools produces inconsistent shaping.
Fourth, failing to clean dust and debris before finishing traps imperfections that showcase uneven edges.
Finally, over-relying on power tools without manual refinement sacrifices precision and control.
Each mistake compounds the others, undermining your work’s final appearance.
Combining systematic grit progression, correct grain direction, proper tool selection, thorough surface cleaning, and strategic hand-tool work guarantees genuinely smooth, professional edges.
Cleaning Dust After Edge Sanding for a Perfect Finish
One of the most overlooked steps separating amateur results from professional finishes is thorough dust removal after edge sanding.
You’ll want to employ multiple cleaning methods for ideal results:
- Use a tack cloth to capture fine particles that standard cleaning misses.
- Deploy compressed air on crevices and hard-to-reach recesses.
- Wipe surfaces with a damp cloth to eliminate residual debris.
- Apply mineral spirits for removing oils that inhibit adhesion.
- Inspect under bright lighting to confirm complete cleanliness.
Skipping this vital stage compromises your finish quality. Dust particles trap under stain or paint, creating visible imperfections and reducing durability.
A properly cleaned surface guarantees superior paint or stain adhesion, resulting in a smoother, more durable, and professionally finished edge. You’ll notice the difference immediately when applying your topcoat.
Frequently Asked Questions
How to Get Smooth Edges on Wood?
You’ll create smooth wood edges by using a block plane for gentle chamfers, then progressively sanding with 80-120 grit, moving to 180-220 grit paper, always following the grain direction for best results.
What Tool Is Used to Smooth Wood Edges?
You’ve got a toolbox full of options to sand away imperfections. Block planes, random-orbit sanders, sanding blocks, chamfer planes, and routers with roundover bits’ll all smooth your wood edges effectively, depending on your project’s specific requirements.
How to Make Wood Extremely Smooth?
You’ll progressively sand with 40-60, 80-120, then 180-220 grit paper along the grain. Follow with hand planes or cabinet scrapers for silky smoothness, then clean surfaces thoroughly with tack cloths.
How to Make Wood Look Like Live Edge?
You’ll preserve approximately 80% of the wood’s natural character by using hand sanding and router work. You’ll select bark-edged slabs, carefully smooth imperfections, then apply epoxy resin to enhance grain while maintaining that authentic, rugged aesthetic.
Conclusion
You’ll find that mastering edge treatment—like Michelangelo revealing form from marble—transforms your woodwork from amateur to professional. Don’t underestimate the final dust removal; it’s the difference between a finish that whispers quality and one that screams neglect. You’ve now got the techniques: block planes for efficiency, strategic sanding sequences, and style-specific approaches. Your edges won’t lie about your craftsmanship anymore.