
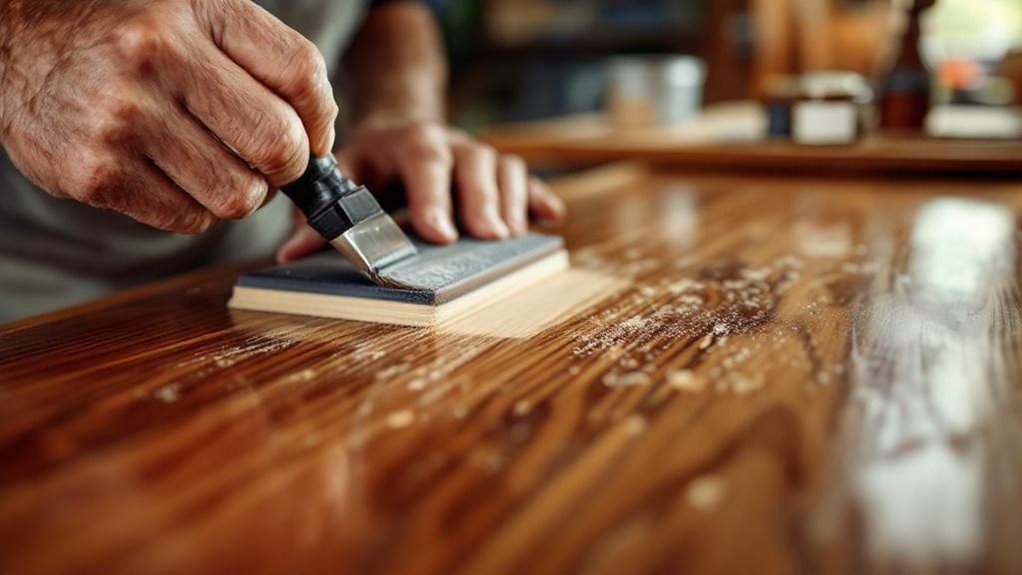
To finish wood for durability, you’ll start by sanding with 120-grit for imperfections, then progress to 220-grit, and vacuum thoroughly with a tack cloth. Choose finishes suited to your wood type and climate—oil-based products for humid environments, water-based for dry areas. Apply thin coats of Danish Oil, Lacquer, or Shellac, sanding between applications. Inspect regularly for wear and recoat every 1–2 years in high-traffic zones. Protective measures like coasters and wax applications extend finish life considerably—though the specifics of each method warrant deeper exploration.
Key Takeaways
- Sand surfaces progressively from 120-grit to 220-grit, then clean thoroughly with a tack cloth for optimal finish adhesion.
- Select finishes matching your wood type and climate—oil-based for humid areas, water-based for dry climates.
- Apply thin coats of Danish Oil, Lacquer, or Shellac to ensure proper penetration and protective barrier formation.
- Perform regular maintenance with gentle cleaning, wax application every few months, and recoating every 1-2 years in high-traffic areas.
- Use UV-inhibitor finishes for outdoor wood and employ protective measures like coasters and furniture pads against damage.
Why Wood Finishing Matters for Longevity
When you finish wood properly, you’re fundamentally creating a protective barrier that guards against the environmental forces that typically compromise wooden structures.
Your coatings shield wood from moisture infiltration, which otherwise causes swelling, cracking, and rot—all destructive processes that markedly shorten lifespan.
Protective coatings shield wood from moisture infiltration, preventing swelling, cracking, and rot that compromise structural integrity and lifespan.
Additionally, protective finishes defend against UV radiation that fades and degrades wood’s appearance and structural integrity.
Temperature fluctuations also pose risks; a quality finish mitigates these effects by reducing stress from thermal expansion and contraction.
By applying the right protection, you enhance both durability and visual appeal simultaneously.
The key to maintaining these benefits requires regular maintenance, with reapplication recommended every 1-5 years depending on climate and exposure conditions, ensuring your wood’s longevity and performance remain ideal.
Prepare Your Surface: Sand, Clean, and Inspect
You’ll start by sanding with a 120-grit belt sander, then progress to 220-grit for hard maple or stop at 150-grit for mahogany to achieve the desired smoothness.
After sanding, you must vacuum away all dust and debris from the wood pores to guarantee a clean surface ready for finishing.
Finally, inspect the wood carefully for knots, blemishes, or imperfections that need additional sanding or filling before you apply any finish.
Sanding Techniques and Grits
Proper surface preparation hinges on selecting the right sanding grit sequence and technique for your specific wood type.
You’ll begin with a belt sander using 120 grit paper to remove larger imperfections. For hard maple, progress through grits up to 220, while mahogany requires only 150 grit to preserve its natural beauty.
Use a felt padded block for hand sanding to maintain even pressure and consistency across your surface.
After sanding, you must vacuum thoroughly to eliminate residual grit from wood pores—this prevents contamination during finishing.
Continue sanding with finer grits throughout your finishing process to achieve glass-like smoothness and peak adhesion for subsequent coats. This methodical approach guarantees your wood finish adheres properly and looks professionally polished.
Cleaning and Debris Removal
After you’ve completed your sanding sequence, removing all dust and debris becomes critical to achieving a flawless finish. Start by vacuuming the surface thoroughly to eliminate sanding grit and particles that’ll compromise adhesion.
Pay special attention to wood grain crevices where debris accumulates.
Next, wipe the surface with a tack cloth to capture remaining fine particles invisible to the naked eye. This debris removal step directly impacts your protective finish‘s quality and appearance.
Before applying any coating, inspect the wood under bright lighting. Look for missed scratches, dust particles, or residual grit.
These imperfections’ll telegraph through your finish, detracting from the wood’s natural beauty. Sand the surface again with progressively finer grits if needed, then re-clean meticulously.
This meticulous preparation guarantees your protective finish adheres properly and looks professional.
Inspection for Defects
Once you’ve cleaned away all sanding dust, conduct a thorough visual inspection under bright, directional lighting to identify surface defects that’ll compromise your finish.
Examine your sanded surface systematically for:
- Cracks and splits that’ll expand under finish coats
- Knots and grain irregularities affecting appearance and durability
- Missed spots requiring additional sanding with appropriate grits
- Gouges or dents needing repair before finishing
- Uneven surfaces indicating inconsistent sanding pressure
Inspect the wood continuously throughout your sanding process, addressing imperfections immediately rather than postponing repairs.
This proactive approach prevents defects from becoming visible under your finish application. Document problem areas, then sand again strategically using finer grits.
Your thoroughness during inspection directly determines the final quality and longevity of your wood finish.
Match Your Finish to Wood Type, Climate, and Durability Needs
Why should you choose one finish over another when so many options exist? Your wood type, climate, and durability requirements determine the best approach.
For harder woods like maple, lighter finishes work well, while softer woods like pine need deeper penetrating oil-based products for enhanced durability.
Climate matters considerably: you’ll want oil-based finishes in humid environments for superior moisture sealing, whereas water-based finishes perform better in dry climates, drying quickly with minimal discoloration.
Outdoor projects demand finishes containing UV inhibitors—polyurethane or marine varnish protect species like teak and redwood from sun damage.
Finish thickness impacts both appearance and protection; thicker applications provide more durability but may obscure natural grain visibility.
Establish maintenance schedules based on your finish type and exposure levels to preserve long-term performance.
Spar Varnish: A Durable Finishing Option
When you’re protecting wood exposed to harsh outdoor elements, spar varnish delivers superior performance that standard finishes can’t match. This specialized formula combines oils and resins to create a flexible, durable protective layer that resists moisture, UV damage, and temperature shifts.
You’ll appreciate spar varnish’s slower drying time, which allows for smoother application and fewer imperfections. Apply thin coats with light sanding between layers for maximum durability.
Key advantages:
- Exceptional flexibility prevents cracking and peeling
- Water-resistant glossy finish enhances natural grain
- Ideal for boats and outdoor furniture
- Minimum three coats recommended for protection
- Superior longevity compared to standard finishes
This investment in quality application guarantees your outdoor wood projects maintain their appearance and structural integrity for years.
Three Finishing Alternatives: Danish Oil, Lacquer, and Shellac
You’ll apply Danish Oil through multiple thin coats—typically hand-rubbing each layer into the wood grain to build depth and luster while allowing proper penetration between applications.
Lacquer’s rapid drying time enables you to apply successive coats within hours and execute seamless repairs by feathering new lacquer over existing finish, though you’ll need 4-6 total applications for complete protection.
Shellac requires you to thin it with denatured alcohol to minimize brush marks and store it carefully in airtight containers, as its natural resin composition makes it susceptible to crystallization and demands strategic reapplication timing based on environmental exposure.
Danish Oil Application Methods
Because Danish oil penetrates wood fibers while building a protective finish, it’s become a popular choice among woodworkers seeking to enhance natural grain patterns without obscuring wood character.
Your application method determines finish quality. Follow this process:
- Flood the wood surface generously with Danish oil.
- Allow 15 minutes for the oil to soak into the grain.
- Wipe away excess oil thoroughly to prevent sticky buildup.
- Apply a minimum of three coats for maximum protection.
- Sand lightly between the second and third coats for smoothness.
You’ll notice the Danish oil enhances wood grain beautifully while providing durable protection.
However, exercise caution during application—the oil generates heat while drying, creating spontaneous combustion risk. Dispose of saturated rags properly in sealed containers.
Depending on moisture exposure and usage, you’ll need periodic reapplication to maintain the protective finish.
Lacquer Drying And Repair
Lacquer’s rapid drying time—typically 30 minutes—sets it apart from Danish oil and shellac, allowing you to apply multiple coats in a single session and particularly reduce project timelines.
You’ll appreciate how this quick drying facilitates efficient workflow on tight deadlines.
Nitrocellulose lacquer excels for furniture finishing because it enables easy touch-ups and repairs. When damage occurs, you can seamlessly blend new lacquer with existing finishes without visible seams.
This advantage proves invaluable for maintaining consistent finish quality over time.
To achieve ideal results, you must work quickly during application to prevent brush marks and guarantee a consistent finish.
Maintain proper temperature and humidity conditions throughout the process, as environmental factors greatly impact final results.
Your attention to these details determines the success of your lacquer finish.
Shellac Mixing And Storage
While lacquer’s rapid drying enables quick project turnaround, shellac offers a different approach to wood finishing that requires proper preparation before application. You’ll mix shellac by dissolving flakes in alcohol to create your desired cut strength. For a pint of 2-lb cut finish, you’ll weigh out 4 ounces of shellac flakes and crush them in cloth before combining with denatured alcohol to expedite dissolution.
Proper preparation guarantees superior results:
- Weigh shellac flakes precisely for consistent mixed solutions
- Crush flakes in cloth to accelerate alcohol dissolution
- Strain thoroughly through paint filters to eliminate impurities
- Store in clean glass jars with detailed labels
- Record cut, color, and mixing date for reference
Straining removes contaminants, enabling smoother application and enhanced aesthetic quality in your wood finishing projects.
Apply Thin Coats for Maximum Protection and Sheen
Thin coats prove essential for achieving a durable, attractive finish on wood.
You’ll want to apply thin coats consistently throughout your project, as this approach prevents sagging, runs, and uneven coverage that compromise durability. Aim for at least three coats, lightly sanding between layers with 320-grit paper to guarantee adhesion and smoothness.
When using water-based poly or varnish, thin your finish with an appropriate solvent to promote better penetration and reduce film thickness that causes peeling.
Allow each coat to dry fully—typically overnight—before applying the next layer.
After your final coat cures completely, buff with ultra-fine steel wool to eliminate fine dust and create a smooth, hand-rubbed luster.
This technique combines protection with an aesthetically pleasing sheen that enhances durability while showcasing your wood’s natural beauty.
Sand Between Coats to Build a Flawless Finish
Sanding between coats creates the foundation for a flawless finish by removing surface imperfections, dust particles, and nibs that’d otherwise compromise adhesion and appearance.
- Start with 220-grit sandpaper after your initial coat
- Progress to 320-grit for final sanding before additional coats
- Light sanding minimizes dust settling on the finish
- Vacuum or use a tack cloth to remove all debris
- Apply at least three coats for peak durability
You’ll notice that sanding between coats substantially improves how subsequent layers bond to the wood. This process eliminates any irregularities and creates a smooth surface that enhances the final appearance.
Sanding between coats substantially improves adhesion and eliminates irregularities, creating a smooth surface that enhances your final finish.
After sanding, always clean thoroughly before applying your next coat. Consistent sanding between applications builds a resilient, professional-quality finish that withstands time and wear.
How Long Does Your Finish Last? Recoating Timelines
Once you’ve perfected your application technique and established a resilient base coat, you’ll need to monitor your finish’s durability over time. Recoating timelines depend on your wood’s location and finish type.
Hardwood furniture requires recoating every 1-2 years in high humidity, while softwood decks need rejuvenation every 2-3 years. Exterior doors and trim benefit from marine varnish every 4-5 years for peak protection.
Oil-based finishes outlast water-based products, offering extended durability despite higher maintenance demands. However, they show wear more visibly.
Watch for warning signs: when water no longer beads on surfaces, your finish has deteriorated and needs reapplication.
Combination stain-sealer products simplify maintenance but require more frequent recoating cycles than traditional finishes, making them less suitable for long-term protection strategies.
Keep Moisture and Sun From Destroying Your Finish
You’ll want to incorporate UV inhibitors into your finish to prevent sunlight from degrading your wood’s fibers and causing fading or discoloration over time.
Apply a film-forming finish like polyurethane or marine varnish to create a waterproof barrier that shields your wood from moisture damage.
Using multiple thin coats rather than thick layers gives you better durability against both environmental factors, as thick finishes tend to crack and peel prematurely.
UV Inhibitors Protect Wood Grain
Because ultraviolet radiation breaks down wood finishes faster than any other environmental factor, UV inhibitors are essential for protecting outdoor wood surfaces.
You’ll find that quality wood finish products contain specialized UV absorbers designed to shield your wood grain while preserving its natural beauty and texture.
UV inhibitors work by absorbing harmful radiation before it penetrates the finish, preventing thermal degradation that causes cracking, peeling, and color loss.
When you select finishes with both moisture resistance and UV inhibitors, you’re protecting against dual threats that compromise outdoor furniture durability.
Premium outdoor finishes combine these protective technologies:
- Absorb ultraviolet radiation effectively
- Prevent color fading and discoloration
- Reduce thermal cracking and peeling
- Maintain wood’s natural grain appearance
- Extend finish lifespan considerably
You’ll maximize your wood finish’s longevity by choosing products specifically formulated with robust UV protection.
Moisture Barriers Prevent Wood Damage
While UV inhibitors shield your finish from sun damage, moisture barriers are equally critical in preventing water from penetrating wood and causing swelling, cracking, and rot.
You’ll choose between two primary approaches: film-forming finishes create a protective waterproof layer that sits atop the wood, effectively blocking moisture intrusion. Alternatively, penetrating finishes absorb into the grain, enhancing natural beauty while offering water resistance suitable for outdoor applications.
You must prioritize regular maintenance to keep your moisture barriers effective. When water stops beading on the surface, that’s your signal to refinish. This proactive approach prevents water from soaking deep into the wood.
Maintain Your Finish: Simple Steps to Extend Its Life
Once you’ve applied your wood finish, the work isn’t finished—it’s just beginning. You’ll need to actively maintain your investment through consistent care and strategic protection.
To extend your finish’s lifespan, you should:
- Gently wipe surfaces with a damp cloth and mild soap solution, avoiding harsh chemicals that degrade the finish.
- Apply wax coating every few months for enhanced protection and luster, but don’t overapply.
- Use coasters, placemats, and furniture pads to prevent scratches that compromise finish integrity.
- Inspect regularly for wear signs like water spots or fading, reapplying every 1-2 years in high-traffic areas.
- Choose UV-inhibitor finishes for outdoor wood to combat sun damage and moisture.
Maintaining cleanliness prevents dirt accumulation that dulls your finish. Regular inspections catch deterioration early, allowing timely reapplication before significant damage occurs.
Frequently Asked Questions
What Is the Best Wood Finish for Durability?
You’ll achieve maximum durability by applying oil-based polyurethane or spar varnish. You’re creating a hard, protective film that resists water, UV damage, and wear. You’ll need multiple coats for ideal longevity.
Will WD-40 Preserve Wood?
You shouldn’t rely on WD-40 for wood preservation. While it’ll temporarily repel moisture and evaporate quickly, it won’t provide lasting protection. You’ll need dedicated wood sealants, varnishes, or penetrating oils for durable, long-term results.
How Do Amish Finish Furniture?
You’ll hand-rub a million coats of oil-based varnish and tung oil onto your wood, allowing complete drying between applications. This penetrating finish technique creates that signature Amish luster while protecting against moisture and UV damage exceptionally.
Is It Better to Oil or Varnish Wood?
You’ll achieve superior durability with varnish, which resists moisture and UV damage better than oil. However, you can combine both—apply oil first for natural beauty, then seal with varnish for ideal protection and appearance.
Conclusion
You’ll protect your investment by starting right—sanding smooth versus leaving rough surfaces. You’ll choose wisely—spar varnish over lacquer for exterior work, Danish oil over shellac for interior pieces. You’ll sand between coats, building protection; you’ll monitor moisture and UV exposure, preventing damage. You’ll maintain regularly, extending life; you’ll neglect maintenance, shortening it. Your wood’s durability depends on this balance: meticulous preparation paired with consistent upkeep.