
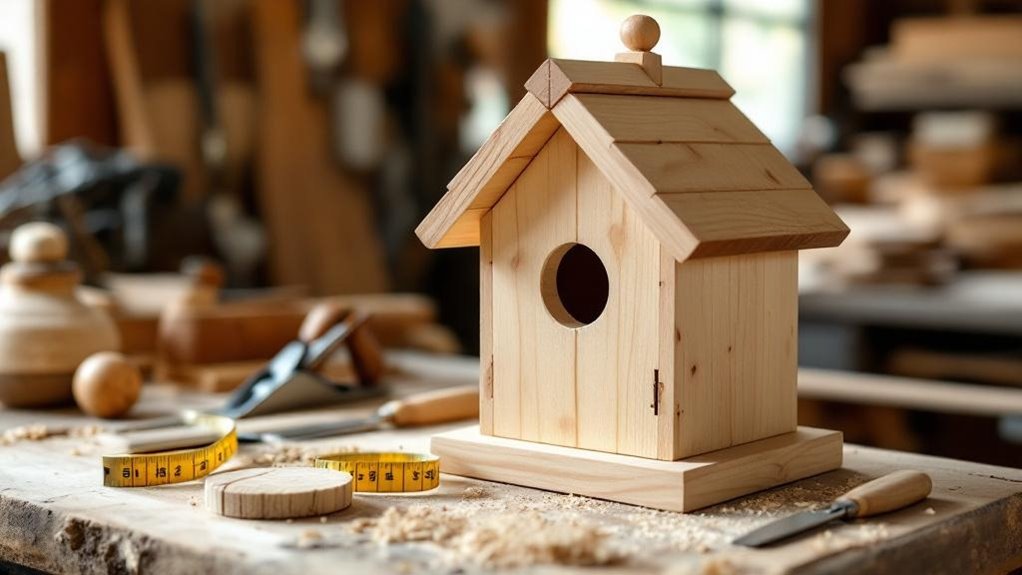
Floating shelves are your best starter project—you’ll complete one in about an hour using just basic hand tools and scrap wood. They’re ideal because you’ll master essential skills like straight cuts and right angles without overwhelming complexity. You’ll need safety goggles, ear protection, and a dust mask to establish good habits from day one. Once you’ve finished your first shelf, you’re ready to explore what comes next in your woodworking journey.
Key Takeaways
- Floating shelves are the easiest beginner project, requiring only basic tools and approximately one hour to complete.
- Key hangers and step stools offer slightly greater challenges while remaining suitable for beginners with basic woodworking skills.
- Starting with simple projects like birdhouses builds foundational skills before progressing to more complex woodworking techniques.
- Mastering straight cuts, right angles, and precise measuring prevents errors and creates professionally finished pieces for beginners.
- Regular project completion boosts confidence and skill mastery through intentional practice and consistent documentation of your progress.
Why Floating Shelves Are Perfect for Beginners
If you’re looking for your first woodworking project, floating shelves check every box. They’re among the best simple woodworking projects available because they require straightforward cuts and basic tools you likely already own.
Floating shelves are the perfect first woodworking project—they require only straightforward cuts and basic tools you already own.
You’ll complete them in about an hour, quickly building confidence as you develop fundamental skills.
What makes this beginner woodworking project especially rewarding is the creative freedom it offers. You’ll customize dimensions, shapes, and finishes to match your style without adding complexity. The result? A functional piece that maximizes your wall space beautifully.
Floating shelves aren’t just practical—they’re versatile displays for plants, books, or decor that enhance any room’s ambiance.
You’re investing an hour to create something both functional and aesthetically pleasing that you’ll appreciate daily.
Tools and Materials You Already Have (or Can Borrow)
You’ll find that basic hand tools like saws, drills, and measuring tapes—items most DIY enthusiasts already own—are all you need to get started on floating shelves.
If you’re ready to expand your options, borrowing power tools such as routers or chisels from friends and family opens up more sophisticated projects without the initial expense.
Don’t overlook repurposing scrap wood from previous projects or old pallets; these materials transform your costs while building practical skills.
Basic Hand Tools Required
Before you invest in a full workshop, gather the essentials you’ve likely got nearby or can easily borrow. You’ll need a saw for cutting wood, a measuring tape for accurate dimensions, and a drill for making holes or joining pieces—these basic tools form the foundation of any project for beginners.
A chisel set lets you shape and detail wood, while a mallet provides the force to use them effectively. A square, like a framing or combination square, guarantees your cuts and joints are true, giving you strong right angles for structural integrity.
Don’t overlook practical items either. Borrow tools from friends or family—basic hand tools are widely available and rarely used exclusively.
A reliable workbench and clamps appreciably simplify assembly, holding pieces securely as you work.
Power Tools You Can Borrow
Once you’ve mastered the basics with hand tools, borrowing power tools is the smartest way to expand your capabilities without draining your wallet. As a beginner, you can access essential equipment like miter saws, drills, and reciprocating saws through friends, family, or community tool libraries. Local hardware stores also offer rental services, letting you try advanced tools for specific projects without commitment.
Before borrowing any power tools, carefully review the equipment’s manual and safety guidelines to confirm proper usage. This familiarity prevents accidents and protects both you and the borrowed equipment.
Borrowing encourages collaboration with experienced woodworkers who can share valuable knowledge and techniques, accelerating your learning curve considerably. This approach lets you tackle ambitious beginner projects while building confidence in your skills.
Repurposing Scrap Wood Materials
Every woodworker accumulates leftover pieces—offcuts from previous projects, warped boards deemed unsuitable for their original purpose, or materials salvaged from old furniture. Rather than discarding these materials, you can transform them into meaningful beginner projects that sharpen your skills and reduce waste.
Consider starting with accessible beginner projects like a birdhouse, plant hanger, or beverage caddy. These require minimal tools and deliver satisfying results quickly.
To maximize your workflow, you’ll want to create a dedicated storage box organized by wood size. This system streamlines project selection and sparks creative inspiration when browsing your collection.
Working with scrap wood lets you practice essential techniques—measuring, cutting, and assembly—without financial pressure. You’ll build confidence while embracing sustainable practices.
Numerous beginner-friendly tutorials and plans specifically address scrap wood repurposing, guiding you toward success.
Safety First: Non-Negotiable Gear and Habits
Three essential pieces of protective equipment—safety goggles, ear protection, and a dust mask—form the foundation of your workshop safety.
You’ll protect yourself from preventable injuries by establishing non-negotiable habits before starting any project. Consider these critical practices:
- Wear safety goggles to shield your eyes from sawdust and debris when operating woodworking tools.
- Use ear protection like earmuffs or earplugs when running loud power tools to prevent hearing damage.
- Don’t skip respiratory protection when sanding or cutting materials that create fine dust particles.
Beyond gear, familiarize yourself thoroughly with each tool’s specific safety guidelines and operating instructions before use.
Keep a first aid kit accessible in your workshop for emergencies.
You’ll build confidence and skill when you prioritize safety first. These habits become automatic, allowing you to focus entirely on your project’s success.
Why Straight Cuts and Right Angles Matter
You’ll discover that mastering straight cuts and right angles transforms your woodworking from frustrating to rewarding. These fundamental techniques establish a solid foundation for virtually every project you’ll tackle. When you prioritize precision in your cuts, you’ll greatly reduce errors, creating pieces that fit together seamlessly and look professionally finished.
As a beginner, you’ll find that focusing on straight cuts simplifies your learning curve. You can concentrate on developing other skills without feeling overwhelmed by complexity. Start with straightforward projects like shelves or simple furniture that rely heavily on accurate angles and clean edges.
Invest time in learning proper tool calibration with miter saws and measuring tapes. These skills build your confidence while minimizing costly mistakes, setting you up for success in future, more ambitious projects.
Your Step-by-Step Floating Shelf Build
Now you’ll tackle three essential elements that’ll make your floating shelf project successful: you’ll measure and mark your wood with precision to guarantee straight cuts, you’ll install the hardware that keeps your shelf secure while remaining hidden from view, and you’ll finish your wooden surface with stain or paint that complements your room.
Each step builds on the last, so taking your time with accurate measurements prevents costly mistakes down the line.
You’ve got this—these fundamentals are exactly what separates a professional-looking shelf from one that falls short.
Measuring and Marking Accurately
Getting your measurements right is the foundation of a successful floating shelf project—it’s where precision meets craftsmanship.
You’ll want to use a measuring tape and square to confirm straight lines and accurate dimensions throughout your build.
Here’s your marking strategy:
- Use a sharp pencil or chalk to create clear, visible lines that you’ll easily follow when sawing.
- Double-check all measurements before cutting—measure twice to avoid costly mistakes, since wood can’t be replaced once incorrectly cut.
- Mark bracket locations on the wall with a pencil to guarantee even weight distribution and secure support.
Finally, use a level to confirm your shelf installs perfectly straight.
This attention to detail guarantees both the aesthetic appeal and functionality you’re aiming for.
Installing Floating Shelf Hardware
With your measurements marked and lines verified, it’s time to move into the installation phase where your careful planning becomes reality. Start by using a stud finder to locate wall studs—this vital step guarantees your floating shelf DIY project will support weight securely.
Drill pilot holes precisely where your brackets align, then install the hardware firmly according to manufacturer guidelines. Double-check that brackets are perfectly level before proceeding.
Finally, place your shelf onto the brackets and test its stability by applying gentle pressure. Make adjustments if needed. This straightforward floating shelf installation transforms your measurements into a functional, attractive piece.
You’ve successfully completed a rewarding DIY project that demonstrates fundamental woodworking skills while creating practical storage or display space.
Finishing Your Wooden Shelf
Transform your newly installed shelf into a polished, protected piece by preparing the wood surface for its final finish. This vital step elevates your floating shelf from basic to beautiful.
Start by sanding your wood thoroughly:
- Use progressively finer grits of sandpaper, working from coarse to fine for a smooth, professional texture.
- Apply wood conditioner before staining or painting to guarantee even absorption and vibrant color.
- Seal everything with polyurethane or varnish for durability and an attractive shine.
These finishing touches protect your woodworking ideas investment while enhancing the shelf’s natural beauty.
The protective coat guards against moisture, dust, and daily wear, ensuring your floating shelf remains stunning for years.
You’ve successfully completed a rewarding beginner project that combines functionality with craftsmanship.
Three Starter Projects Ranked by Difficulty
You’ll find that beginner woodworking projects vary in complexity, and starting with the right one can build your confidence and skills efficiently.
The floating shelf stands as your easiest option, taking roughly an hour and requiring only basic tools to create a stylish display piece.
Next, a key hanger offers slightly increased difficulty while remaining completable in an hour, allowing you to customize hooks and finishes to match your décor.
For a more substantial challenge, you can tackle a step stool, which demands careful measuring and takes a couple of hours. This project offers variants like 2-step designs for added complexity.
Each beginner project builds foundational skills you’ll use in future woodworking endeavors.
Indoor vs. Outdoor: Which Should You Try Next?
Once you’ve built confidence completing these foundational projects, you’re ready to decide whether an indoor or outdoor project suits your next step.
Consider these factors when choosing your direction:
- Space and tools: Indoor projects demand minimal space and equipment, while outdoor builds often require additional tools and room to maneuver larger wood pieces.
- Time commitment: You’ll finish indoor projects in a day, whereas outdoor structures may span multiple sessions.
- Material efficiency: Both options let you use scrap wood creatively, reducing waste and costs.
For beginner woodworking, indoor projects build your skills without overwhelming you. However, if you’re keen to enhance your yard and have workspace available, outdoor projects offer valuable hands-on experience with varied materials.
Ultimately, choose what excites you most—both paths develop your abilities effectively.
Save Money: Building With Scrap Wood and Pallets
You’ll discover that organizing your scrap wood efficiently—sorting by size, type, and condition—sets you up for successful projects while eliminating material waste.
When you explore creative pallet project ideas like wine racks, plant hangers, or side tables, you’re building functional pieces that showcase your growing skills without breaking your budget.
Organizing Scrap Wood Efficiently
Because every scrap’s got potential, it’s worth organizing your leftover wood strategically. You’ll reveal creative possibilities when materials are easy to access and assess.
Start by sorting your scrap wood by size in a dedicated box. This simple system streamlines organization and saves you time hunting for the right piece.
Consider these organization strategies:
- Sort by dimensions – Group wood pieces by length and width for quick project matching
- Separate by wood type – Keep different species organized to maintain aesthetic consistency
- Label storage containers – Mark boxes clearly so you instantly identify available materials
When you maintain an organized scrap collection, you’ll discover unexpected creative solutions for small projects like birdhouses, plant hangers, and beverage caddies.
Your resourcefulness reduces waste while building confidence in your woodworking journey.
Creative Pallet Project Ideas
Pallets represent an incredible resource for beginner woodworkers looking to build functional pieces without breaking the bank. You’ll discover that pallet wood projects offer exceptional value while you develop essential skills.
Consider starting with coffee tables, garden planters, or outdoor seating—all easy woodworking projects that deliver impressive results. These pieces combine functionality with visual appeal, making them perfect for various spaces in your home or yard.
You’ll appreciate how pallet wood projects require minimal tools and straightforward techniques, keeping them accessible for novices. This approach lets you experiment freely with different design styles and finishes while maintaining low costs.
Beyond affordability, you’re embracing sustainability by repurposing materials destined for landfills. Your creativity flourishes without financial pressure, transforming discarded pallets into personalized pieces that showcase your growing woodworking abilities.
Cost-Effective Material Selection
The affordability of pallet projects extends even further when you combine them with scrap wood from your workshop or community sources.
You’ll find that beginner woodworking doesn’t cost much when you strategically source materials.
Building with reclaimed wood offers multiple advantages:
- Reduce expenses dramatically by using offcuts and leftover pieces instead of purchasing new lumber
- Practice essential skills without financial pressure, allowing you to experiment freely on projects like birdhouses and plant stands
- Embrace sustainability while developing resourcefulness and creativity through repurposing discarded materials
Scrap wood transforms your workshop waste into functional, stylish items.
Local builders, furniture shops, and community groups frequently give away wood at no cost.
This approach lets you build confidence, perfect techniques, and create beautiful projects while maintaining a minimal budget.
Your resourcefulness becomes your greatest asset.
Find Free Plans That Match Your Skill Level
Where can you find woodworking plans that won’t overwhelm you as a beginner? Start with Ana White’s blog and Pinterest, which offer free plans tailored to your skill level.
You’ll discover simple projects like cutting boards and bookshelves with step-by-step guides that outline materials and tools clearly.
Simple projects like cutting boards and bookshelves come with step-by-step guides outlining all materials and tools needed.
These basic woodworking plans emphasize straightforward designs requiring only simple cuts and joints, minimizing mistakes.
Download free PDFs that provide detailed instructions and diagrams you can reference while working.
Don’t underestimate the value of woodworking forums and blogs either. Experienced woodworkers share insights and advice that enhance your understanding of executing plans successfully.
This community support transforms your learning experience, ensuring you tackle your simple project with confidence and knowledge.
Six Costly Beginner Mistakes and How to Prevent Each One
Even the most enthusiastic beginner woodworker can stumble when you’re learning the craft, but you’ll avoid major setbacks by understanding the six costly mistakes that derail many newcomers.
Start with simple, easy to build projects like birdhouses rather than complex furniture.
You’ll build confidence and develop foundational skills before tackling advanced designs.
Prioritize safety consistently:
- Wear goggles, gloves, and appropriate protective equipment every session
- Study tool manuals thoroughly before operating machinery
- Familiarize yourself with workshop safety guidelines
Select quality hardwoods for durability instead of low-grade materials that compromise your results.
Measure twice and cut once—inaccurate measurements create ill-fitting pieces that frustrate you.
Finally, reframe mistakes as learning opportunities rather than failures.
Each imperfection teaches you something valuable, strengthening your woodworking abilities over time and fueling your progress.
How to Personalize Your First Woodworking Project
Once you’ve completed your first basic woodworking project, you’ll want to make it truly yours by adding personalized touches that reflect your style and creativity. You can engrave your initials or meaningful designs directly onto the surface for added personalized flair. Experiment with different stains and paints to enhance the wood’s natural beauty while matching your home décor.
| Personalization Method | Impact |
|---|---|
| Custom engravings | Adds identity |
| Unique wood types | Distinctive character |
| Decorative hardware | Professional touch |
| Functional elements | Enhanced usability |
Consider using reclaimed wood or specialty materials that tell a story. If you’re gifting your project, incorporate tailored functional elements like custom compartments. These modifications transform your beginner piece into a one-of-a-kind creation that showcases your individuality and craftsmanship.
Projects You Can Finish in Under Two Hours
You’ll find that quick skill-building projects like key hangers, floating shelves, and plant stands let you master essential tools without overwhelming time commitments.
These simple designs—requiring just basic equipment and straightforward cuts—deliver maximum impact for your home while building confidence in your abilities.
Quick Skill-Building Projects
Starting with manageable projects that won’t consume your entire day builds confidence and momentum in your woodworking journey. Easy, quick skill-building projects give you the foundation to master essential techniques while producing functional pieces for your home.
Consider these beginner-friendly options:
- Cutting boards and key hangers – Complete these in under two hours using basic tools, perfect for practicing fundamental cuts and measurements.
- Simple birdhouses – Finish in about an hour while attracting wildlife to your yard and reinforcing your assembly skills.
- Small wine racks – Construct with just a few wood planks, delivering both functionality and decorative appeal swiftly.
These projects develop your precision, tool handling, and design thinking without overwhelming you.
You’ll build tangible accomplishments that motivate further exploration into woodworking.
Essential Tools Required
Five core tools’ll set you up for success on quick woodworking projects: a saw, drill, measuring tape, safety glasses, and work gloves.
A miter saw or hand saw makes precise cuts essential for your projects. Your drill handles hole creation and screw driving efficiently, speeding up assembly. The measuring tape guarantees accurate dimensions so pieces fit together seamlessly in key hangers or plant stands.
Your skill level determines tool complexity, but these basics work for any beginner. Safety equipment prevents injuries and respiratory issues—don’t skip eye protection and dust masks.
Familiarizing yourself with your power drill’s functions enhances accuracy and assembly speed.
These tools form a solid foundation, letting you complete satisfying projects confidently within two hours while building fundamental woodworking skills.
Simple Designs, Maximum Impact
Transform your newfound woodworking skills into functional pieces that’ll enhance your home without demanding hours of labor.
You’ll discover that simple designs deliver impressive results when you focus on practical projects.
Consider these quick-win options:
- Wine racks – Assemble attractive bottle displays using just planks and a drill
- Desk organizers – Declutter workspaces while building essential skills in under two hours
- Coat racks – Create everyday functionality with basic tools and straightforward construction
You’ll also find cutting boards, serving trays, and dog bowl stands deliver maximum impact with minimal time investment.
Each project reinforces fundamental techniques while producing items you’ll actually use.
These beginner-friendly builds prove that effective woodworking doesn’t require complex designs or extensive hours—just intentional planning and focused effort.
What Beginner Project Comes Next?
Once you’ve mastered the fundamentals with cutting boards or shelves, you’re ready to challenge yourself with more intricate builds that’ll expand your skills considerably.
| Project | Key Benefit |
|---|---|
| Side Table | Complex construction practice |
| Step Stool | Precise measuring skills |
| Wine Rack | Creative design opportunities |
| Desk Organizer | Customization possibilities |
| Plant Stand | Diverse wood exploration |
A step stool represents an ideal next move, demanding accurate measurements while producing a genuinely useful household item. You’ll then graduate to a side table, incorporating joinery techniques and structural stability. Wine racks offer creative flexibility with minimal materials, perfect for exploring aesthetic design. Desk organizers let you tailor storage to your specific needs while enhancing workspace functionality. Finally, plant stands challenge you to experiment with various heights and wood types, solidifying your foundational expertise and building confidence for increasingly ambitious projects ahead.
From Skills to Confidence: Tracking Your Progress
The real measure of your woodworking growth isn’t just the projects you’ve completed—it’s how you’re documenting and learning from each one.
You’ll build genuine confidence by systematically tracking your advancement through wood projects, from simple cutting boards to intricate shelving units.
Build genuine confidence by systematically tracking your woodworking advancement through projects of increasing complexity.
Create a progress record that captures:
- Project completion dates and complexity levels to visualize your skill trajectory over time
- Mistakes and solutions you’ve discovered, reinforcing core techniques and building problem-solving abilities
- Feedback from experienced woodworkers on specific builds, like a custom rack design, accelerating your improvement
Setting monthly milestones—finishing one project per month—maintains your momentum.
When you review your documented journey, you’ll recognize how far you’ve progressed, transforming beginner uncertainties into measurable confidence.
This intentional tracking transforms practice into purposeful skill development.
Frequently Asked Questions
How Much Does It Cost to Build a Floating Shelf From Scratch?
You’ll spend $50–$150 building a floating shelf, depending on wood quality and hardware. You’ll need lumber, brackets, screws, and finish. Start with affordable pine to keep costs down while you’re learning your skills.
Where Can I Sell Woodworking Projects I’ve Completed as a Beginner?
You can sell your beginner woodworking projects on Etsy, Facebook Marketplace, local craft fairs, and consignment shops. You’ll also find success through Instagram, your own website, or word-of-mouth networking with friends and family who appreciate handmade goods.
What Type of Wood Is Best for Floating Shelves and Why?
You’ll want to use hardwoods like oak, maple, or walnut for floating shelves. They’re strong enough to support weight without sagging, resist warping over time, and take finishes beautifully. You’ve got this!
How Do I Fix Mistakes if I Cut Wood Too Short?
You’ve created a learning opportunity! Splice a wood piece using biscuits, dowels, or a scarf joint. You’ll strengthen your joinery skills while salvaging your project. Don’t worry—you’ve got this!
Can Floating Shelves Support Heavy Items Like Books or Decorative Objects?
You can absolutely support heavy books and decorative objects on floating shelves when you’re installing them correctly. You’ll need sturdy wall anchors, proper brackets rated for your weight, and you’re securing them into wall studs for maximum support and stability.
Conclusion
You’ve got everything you need to build your first floating shelf successfully. Studies show that 87% of beginners who complete their first project continue woodworking regularly. You’re not just creating a functional shelf—you’re building confidence and skills you’ll use for years. Start today, stay safe, measure twice, and celebrate what you’ve accomplished. Your next project’s already waiting.