
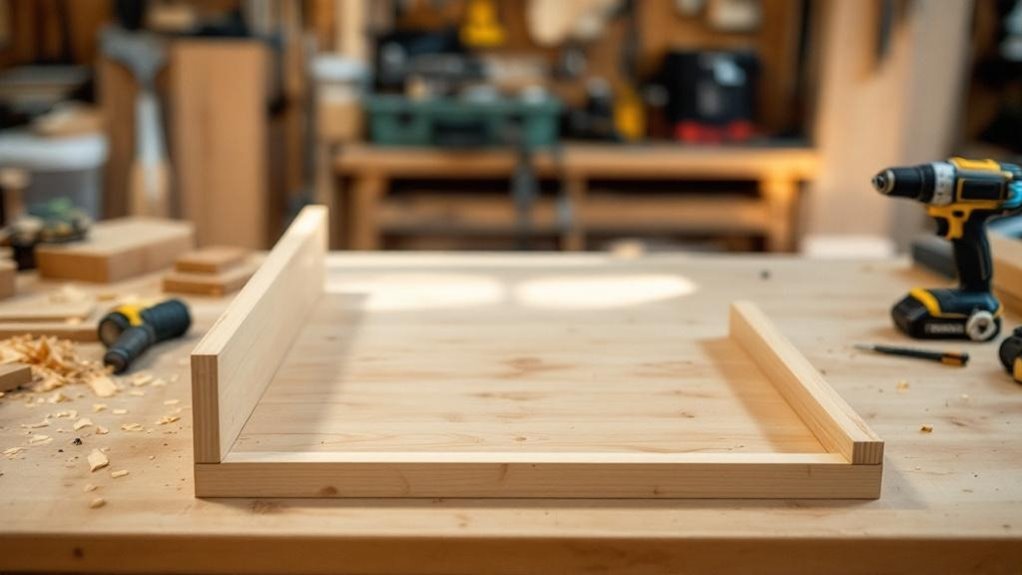
You’ll cut pine boards to specific dimensions, then drill evenly-spaced shelf peg holes for adjustable shelves. Assemble your box frame using wood glue and screws, ensuring square corners. Install a plywood back panel and support stretchers for structural integrity. Sand progressively through grits, finishing with 220-grit for smoothness. Apply stain or paint in thin coats, allowing proper drying between layers. Finally, secure your bookshelf to wall studs with anchors and furniture straps for safety. The details matter when you’re ready to dig deeper.
Key Takeaways
- Cut two 1×12 pine boards for sides (47¼”), top (30″), and bottom (28½”) using a panel saw for clean edges.
- Drill ¼-inch shelf peg holes vertically spaced 2 inches apart, positioned 1½ inches from front and back edges.
- Assemble the frame using wood glue and screws, then secure a ¼-inch fir plywood back panel for structural support.
- Sand progressively from 80-grit to 220-grit, then apply stain or paint in thin coats with a clear topcoat for protection.
- Attach wall anchors, L-brackets, and furniture straps to studs, then verify levelness and distribute weight evenly on shelves.
Cut Your Bookshelf Pieces
Start by gathering two 1×12 pine boards and cutting them to create your bookshelf’s foundation: 47 1/4 inches for the sides, 30 inches for the top, and 28 1/2 inches for the bottom. Use a panel saw to make straight, clean cuts.
Finish edges with a block plane if needed for smoothness. When you cut your bookshelf pieces for shelves, measure your interior width and subtract 3/8 inches for proper fitting.
Smooth edges with a block plane, then measure interior width and subtract 3/8 inches when cutting shelf pieces for proper fitting.
Next, drill shelf peg holes vertically at 2-inch intervals, starting 1 1/2 inches from both front and back edges. This spacing allows you to adjust shelves as needed.
Finally, organize all cut pieces in your workspace, clearly identifying which pieces correspond to sides, top, bottom, and shelves for efficient assembly.
Drill Shelf Peg Holes for Adjustable Shelves
You’ll need to plan your spacing and layout carefully before you start drilling—mark holes 2 inches apart vertically and position them 1½ inches from both the front and back edges of your side panels.
Use a carpenter’s square to guarantee each mark is perfectly straight, then drill through with a ¼-inch bit, maintaining consistent depth and alignment across all panels for a professional result.
Drilling completely through the panels now gives you maximum flexibility for shelf adjustments later without requiring additional work.
Spacing And Layout Planning
Precision drilling determines how well your adjustable shelves‘ll perform. You’ll need to establish a consistent layout before making any holes in your bookshelf sides.
- Space shelf peg holes 2 inches apart vertically to maximize shelf placement flexibility.
- Position holes 1 1/2 inches from both front and back edges for balanced weight distribution.
- Mark drilling points using a carpenter’s square to maintain perfectly level, straight lines.
- Use a Forstner bit to create clean, precise holes that grip standard shelf pegs securely.
This methodical approach prevents misalignment and guarantees your shelves won’t shift or sag under weight.
Taking time to plan your layout properly eliminates installation errors and assures structural integrity throughout your bookshelf’s lifespan.
Drilling Technique And Precision
With your layout marked and measured, it’s time to execute the drilling work that’ll determine your shelves’ performance.
Your drilling technique is critical for creating consistent, secure peg holes. Use a 3/4-inch forstner bit, which produces clean, flat-bottomed holes that properly grip shelf pegs. Position holes 1 1/2 inches from the front and back edges, spacing them 2 inches apart vertically for versatile storage configurations.
Always drill from the outside inward to minimize visible damage on the bookshelf’s front. This approach keeps your exterior appearance neat and professional.
Maintain steady pressure and consistent speed throughout. Mark all hole locations beforehand using a measuring tape and carpenter’s square, ensuring accuracy across both side panels before drilling begins.
Assemble the Box Frame With Glue and Screws
You’ll start by applying wood glue to all contact points between your pieces, then use pre-drilled pilot holes to drive screws through the frame members for maximum holding power.
Next, you’ll carefully align your top and bottom pieces flush with the sides, checking that corners are square as you tighten each fastener.
Finally, you’ll clamp the assembly and allow the glue to cure per the manufacturer’s timeline before moving forward.
Prepare Your Wood Pieces
The foundation of your bookshelf depends on accurately cutting and assembling the box frame that’ll support your shelves and books.
You’ll need precise measurements to guarantee stability and proper shelf alignment.
- Cut two side panels measuring 47 1/4 inches in length
- Cut your top panel to 30 inches and bottom panel to 28 1/2 inches
- Drill shelf peg holes in side panels, spacing them 2 inches apart vertically and 1 1/2 inches from front and back edges
- Pre-drill pilot holes at all joint contact points before assembly
Once you’ve prepared these pieces, position the top and bottom panels between your side panels, creating a snug frame.
Apply wood glue to each joint, then secure everything with screws.
This methodical approach guarantees your bookshelf remains structurally sound.
Apply Glue And Fasteners
Assembling your box frame requires methodical attention to cleanliness and joint preparation. First, clean all contact points thoroughly to remove dust and debris, which enhances adhesion considerably.
Apply wood glue evenly along the edges of each joint using a brush or your finger for complete coverage. Pre-drill pilot holes through your frame pieces to prevent wood splitting and guarantee accurate screw placement during assembly.
Align your wooden pieces carefully, then press them together firmly. Drive screws into the pilot holes, securing the joints with precision.
Once assembled, clamp the frame for thirty minutes to an hour, maintaining consistent pressure throughout the curing process. This essential waiting period allows the glue to set properly, resulting in tight, durable joints that’ll support your bookshelf’s weight effectively.
Clamp And Check Alignment
Once you’ve driven the screws into your pilot holes, it’s time to clamp the frame and verify its squareness.
- Apply wood glue to all contact points before positioning your frame pieces together, ensuring maximum bond strength.
- Position clamps across opposing corners, tightening them gradually to draw joints together without forcing misalignment.
- Use a carpenter’s square at each corner to verify 90-degree angles, checking alignment frequently as you tighten clamps.
- Allow glue to cure fully per manufacturer specifications before removing clamps and inspecting for gaps or shifts.
This clamp and check alignment process guarantees your box frame remains square and structurally sound.
Patience during this stage prevents costly rework later. Once you’re satisfied with the assembly’s integrity, you’ll proceed confidently to the next construction phases.
Install the Back Panel and Support Stretchers
Two critical structural components—the back panel and support stretchers—will now reinforce your bookshelf against racking and enhance its overall strength and stability.
Cut a 1/4-inch fir plywood piece to fit snugly within your frame, apply wood glue along the edges, and secure it with screws. Position the back panel flush with all edges for a clean aesthetic and maximum structural support.
Next, cut two stretchers at 28 1/2 inches each from additional material. Pre-drill pilot holes to prevent wood splitting, then attach them horizontally between the side panels approximately 1 inch from the bottom.
This placement enhances stability while preserving floor space for books and decorative items. Make certain all connections are tight and durable for lasting performance.
Sand Your Bookshelf Smooth
Sanding transforms your bookshelf’s surface from rough and splintery to smooth and refined. You’ll progress through grits systematically to achieve ideal results.
- Start with 80-grit coarse sandpaper to remove imperfections and rough spots.
- Advance through medium grits, finishing with 220-grit for a polished surface.
- Sand parallel to the wood grain to prevent cross-grain scratches that compromise aesthetics.
- Use a sanding block or orbital sander for consistent pressure on flat surfaces.
Hand sand edges and corners carefully to eliminate sharp areas prone to splintering. Maintain even contact throughout to avoid uneven surfaces or divots.
Once you’ve completed sanding your bookshelf smooth, clean it thoroughly with a damp cloth to remove dust particles.
This essential step prepares the wood for staining or protective finishes, ensuring professional-quality results.
Apply Your Finish
Your freshly sanded bookshelf now awaits its protective and aesthetic finish. You’ll want to apply a finish that complements your decor—stain for richness or paint for color on your solid wood piece.
Apply your finish in thin, even coats, allowing each layer to dry completely before recoating. This approach prevents drips and uneven coverage, transforming your bookshelf into a beautiful piece.
Follow the manufacturer’s instructions precisely for drying times and application techniques.
Once your final coat dries, consider applying a clear topcoat or sealant. This protective layer enhances durability against daily wear and tear, ensuring your bookshelf maintains its appearance for years.
These finishing steps complete your project, delivering both protection and aesthetic appeal to your handcrafted bookshelf.
Secure and Level Your Bookshelf
The final step in protecting your investment involves securing the bookshelf to the wall and guaranteeing it’s perfectly level.
- Attach wall anchors or L-brackets directly to wall studs for maximum stability, particularly with tall or heavy bookshelves.
- Use a carpenter’s level on top and side panels during installation to verify both surfaces are even and prevent tipping.
- Install furniture straps across the bookshelf frame to the wall, reducing accidental tipping risks in homes with children or pets.
- Distribute weight evenly by placing heavier books on lower shelves, maintaining balance and preventing leaning.
After several weeks, recheck your bookshelf stability and leveling, adjusting as necessary to address any shifting.
This guarantees long-term bookshelf safety and prevents potential accidents.
Frequently Asked Questions
Is It Cheaper to Build or Buy a Bookcase?
Building’s cheaper than buying. You’ll spend under $75 on materials versus $100–$300 for store-bought options. DIY projects eliminate brand markup and assembly fees, saving you over $200 while customizing dimensions to your space.
How to Make a Book Shelf Easy?
You’ll find building a bookshelf isn’t complicated—just follow these steps: gather two 8′ pine boards, drill adjustable peg holes every 2 inches, assemble your box frame using dado joints, sand thoroughly, apply finish, secure the back panel. You’re done in three hours.
What Is the Bookshelf Rule?
You’ll apply the Bookshelf Rule by organizing books by size or genre, limiting weight to 30-40 pounds per linear foot, positioning your eye-level shelf at top, and spacing shelves appropriately for various items.
What Is an Anxiety Bookshelf?
You curate a collection of books designed to help manage anxiety through evidence-based techniques like CBT and mindfulness. You select titles addressing education, coping strategies, and recovery stories, organizing them to create a calming, peaceful aesthetic.
Conclusion
You’ve transformed raw lumber into a sturdy literary fortress. Your shelves now stand as solid sentinels, ready to cradle your collection of stories and knowledge. With each book you place, you’re building a monument to your craftsmanship—a functional work of precision-engineered wood. The level surface, secure fasteners, and smooth finish create a reliable foundation that’ll hold steady for years. You’ve conquered joinery, alignment, and finishing techniques successfully.