
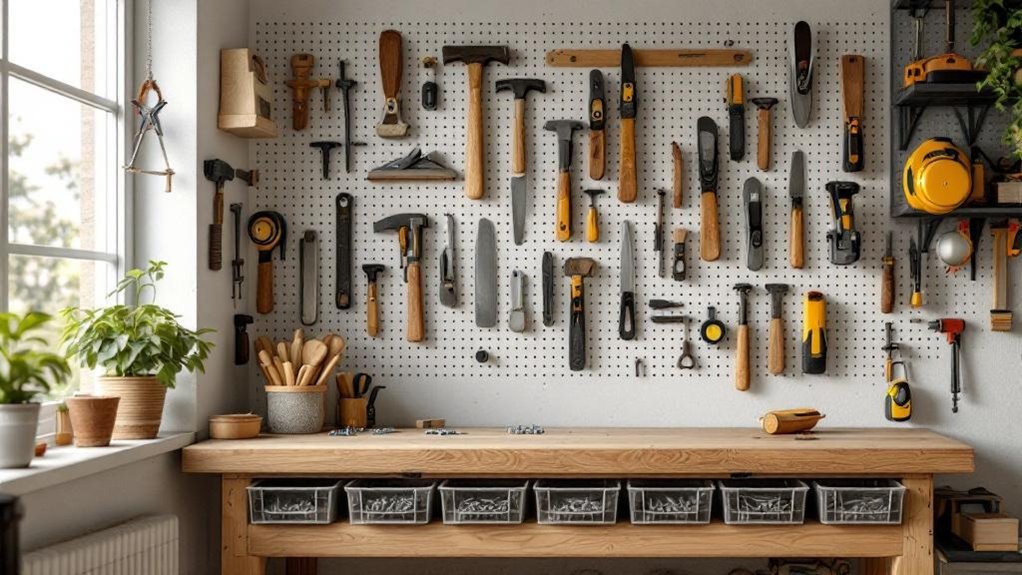
You’ll reclaim productivity by sorting tools into daily, occasional, and donate categories. Position your top 20% of frequently used tools within arm’s reach using wall storage, vertical shelves, or pull-out drawers. Establish dedicated work zones for sanding, assembly, and finishing tasks. Implement cord management systems to eliminate clutter and safety hazards. Create a daily return habit by scheduling cleanup time after each session. These fundamentals transform chaotic shops into efficient workspaces—discover how deeper organization strategies amplify these gains.
Key Takeaways
- Declutter your workshop by categorizing tools into daily, occasional, and donate groups for focused productivity.
- Create dedicated work zones with wall-mounted storage to maximize space and minimize tool search time.
- Position frequently used tools at eye level within arm’s reach using labeled bins and color-coding.
- Install vertical storage solutions like shelves, hooks, and magnetic strips to reclaim valuable floor space.
- Establish daily tool return habits by scheduling cleanup sessions and designing intuitive, visible storage locations.
Start With a Thorough Shop Thinning
Begin by decluttering your workspace with 30-gallon heavy-duty garbage bags and ruthlessly discarding obvious trash—wood chunks smaller than 1 inch, unused tool cases, and other materials you won’t use.
Next, categorize tools you no longer need into groups for donation, sale, or disposal. Strip reusable hardware from outdated jigs to maximize storage efficiency.
Properly handle hazardous materials by locating your local hazardous-waste disposal site. This critical step guarantees a safe working environment.
A thorough thinning process transforms your shop layout and clarifies what tools you genuinely need. You’ll eliminate distractions, reduce clutter, and gain valuable workspace.
This intentional assessment enhances your focus and productivity, allowing you to work more efficiently on your woodworking projects. Your streamlined shop becomes a functional space where creativity thrives.
Sort Tools Into Three Groups: Daily, Occasional, and Donate
Now that you’ve cleared away the clutter, it’s time to organize what remains by dividing your tools into three distinct categories: daily, occasional, and donate.
Your daily tools—those you use regularly—deserve prime real estate in your workshop. Keep them within arm’s reach using accessible tool storage solutions like wall-mounted racks or open shelving to streamline your workflow.
Your daily tools deserve prime real estate in your workshop—keep them within arm’s reach for a streamlined workflow.
Occasional tools warrant labeled bins or drawer storage to maintain order without consuming valuable workspace. Reserve this organization method for implements you use monthly or seasonally.
Finally, donate tools you haven’t touched in over a year or those that’ve become obsolete. This decision declutters your shop and provides value to other woodworkers.
Reassess your collection periodically, ensuring your tool storage aligns with your current projects and evolving woodworking goals.
Plan Your Workshop Layout Without Moving Heavy Equipment
Once you’ve sorted your tools into functional categories, you’re ready to map out your workshop’s physical layout—and you don’t need to move a single heavy item to do it.
Leverage online tools like grizzly.com/workshopplanner to visualize different configurations digitally. Alternatively, photocopy and cut out tool symbols, then arrange them on graph paper to experiment with layouts efficiently.
Apply the 80/20 rule by positioning your most-used 20% of tools within arm’s reach, maximizing workflow efficiency. This strategic approach optimizes space utilization while creating a safer, more ergonomic environment.
Position Your Workbench for Maximum Efficiency
Your workbench’s position is the foundation of workshop efficiency, and it shouldn’t be a one-size-fits-all decision. If you’re handling small to medium projects, position your workbench against a wall to maximize vertical storage space for tools. For larger projects, center it in your work area to access all sides easily and enhance your workflow.
Create a work triangle between key machines—your jointer, planer, and tablesaw—to streamline machining and minimize unnecessary movement.
Apply the 80/20 rule by keeping your twenty percent most frequently used tools within arm’s reach. Place bins containing screws and fasteners near your workbench to eliminate workflow interruptions.
This strategic positioning transforms your work area into a productive, organized space that supports both your projects and your efficiency goals.
Prioritize Your Top 20% of Tools for Quick Access
You’ll dramatically improve your workflow by applying the 80/20 rule—identifying the 20% of tools you use 80% of the time and positioning them within arm’s reach of your workbench.
This strategic placement eliminates wasted time searching for frequently needed items and keeps your most essential tools immediately accessible.
The 80/20 Rule Application
When you’re organizing your workshop, the 80/20 rule cuts through the noise: 20% of your tools handle 80% of your work. You’ll identify your frequently used essentials—primary saws, drills, and measuring instruments—and position them within arm’s reach of your workbench.
This strategic placement eliminates wasted time searching for tools mid-project, keeping your workflow uninterrupted and productive.
Mount these prioritized tools on wall-mounted storage or accessible toolboxes where you can see them instantly. Your workshop layout should reflect actual usage patterns, not aspirational ones.
As your projects evolve, reassess your top 20% regularly. New techniques or materials might shift which tools you reach for most. By maintaining this focused approach, you’ll maximize efficiency and keep your workspace functional rather than cluttered.
Positioning For Immediate Reach
Identifying that top 20% is just the first step—now comes the payoff: positioning those tools so they’re literally within arm’s reach.
You’ll want your primary cutting tools and measuring devices directly on or above your workbench, eliminating wasted motion during projects.
Create a work triangle between your most-used tools to minimize unnecessary movement and maximize productivity.
Implement a labeled storage system using magnetic strips or bins that keep frequently accessed items close to your work area.
This strategic arrangement reduces search time dramatically, allowing you to focus on your craft rather than hunting for equipment.
As your projects evolve, reassess your top 20% regularly and adjust positions accordingly, ensuring your storage system remains optimized for your current workflow.
Carve Out Zones for Different Tasks
You’ll dramatically reduce wasted motion by designating specific zones for sanding, assembly, and finishing within your workshop.
Each zone should contain the tools you’ll need for that task, eliminating the frustration of hunting across your shop mid-project.
Strategic positioning of your work areas creates a natural workflow that keeps you productive and focused on the work itself.
Dedicated Work Zones
By dividing your workshop into specialized areas, you’ll dramatically improve both your efficiency and safety. Dedicated work zones organize your space by function—cutting, sanding, and assembly each get their own designated area.
Position your essential tools and materials within arm’s reach of each zone to eliminate wasted movement. You’ll maintain momentum throughout your projects without constantly searching for supplies.
Use clear labeling and signage so you’ll instantly recognize each zone’s purpose and locate necessary items. Implement storage solutions tailored to each area: tool hangers for cutting stations, bins for sanding supplies, and assembly racks for larger pieces.
Regularly reassess your zones as your workflow evolves. Adjust layouts based on completed projects to guarantee your workspace remains functional and organized, supporting your growing woodworking demands.
Minimize Movement Between Areas
Effective zone designation goes beyond simply dividing your workshop—it requires strategic positioning that minimizes the steps you take between tasks. You’ll reduce fatigue and boost productivity by positioning your cutting, sanding, and assembly work areas strategically throughout your shop.
Apply the work triangle concept by arranging essential machines—your jointer, planer, and tablesaw—in a triangular formation. This layout drastically cuts unnecessary shifts during machining operations.
Within each work area, position your most-used tools within arm’s reach. This 80/20 principle guarantees that the 20% of tools you use frequently stay immediately accessible, eliminating wasted movement.
Vertical storage solutions like wall-mounted racks and hanging organizers maximize space in each zone, further reducing the need to travel for tools.
Regularly reassess your layout based on task frequency to confirm your work areas continue supporting your evolving workflow.
Build Simple Wall Storage Solutions
Transform your workshop by mounting tool storage directly on your walls, where you’ll reclaim valuable floor space and keep frequently used tools within arm’s reach.
Plywood wall units constructed with French cleats offer a straightforward, sturdy solution that supports significant weight while remaining easily customizable. You’ll arrange nails, dowels, or drilled holes to accommodate various tool types, creating a personalized system that adapts to your needs.
This visibility eliminates time wasted searching through drawers or chests—you’ll locate what you need instantly. The beauty of this approach lies in its efficiency and affordability.
You’ll complete construction using minimal materials, making wall storage an economical upgrade that transforms your workspace organization while maximizing every inch of available vertical real estate.
Organize Tools With Pull-Out Drawer Systems
While wall storage excels at displaying frequently used tools, pull-out drawer systems offer superior organization for larger collections and specialized items you’ll need quick access to without constant visibility.
Full-extension slides guarantee you’ll reach every tool without digging through stacked items, markedly reducing search time. You can customize drawer boxes to fit your specific tool sizes and shapes, maintaining a streamlined workspace that accommodates your unique collection.
Quality components from reputable suppliers enhance durability and functionality, making pull-out drawer systems a solid long-term investment.
Regularly reassess your drawer contents based on frequency of use, keeping your most essential tools immediately accessible. This strategic approach maintains workflow efficiency while protecting your tools from damage and disorganization.
Store Sanding and Finishing Supplies Separately
Sanding and finishing supplies require dedicated storage separate from your main tool collection to preserve workspace efficiency and safety.
You’ll want to keep these materials organized in a dedicated cabinet positioned away from heat sources. Store sanding supplies outside your immediate shop area to free up valuable tool storage space and maintain a clear work environment.
Hang abrasive sheets by their sleeves for easy accessibility, and securely store boxed sanding discs to prevent damage. Categorize your supplies into distinct groups—film finishes, stains, and solvents—to streamline project selection.
Date each finishing can for effective inventory management. This systematic approach guarantees you’ll locate what you need quickly while protecting both your supplies and your workshop from potential hazards.
Label Storage So You Find What You Need Fast
You’ll dramatically cut down search time by investing in a quality label maker that clearly marks every storage container, bin, and wall section in your workshop.
Organize your labels by tool category—electrical, plumbing, painting, and hand tools—so you instantly know where everything belongs and can grab what you need without hesitation.
Color-coding your labels adds another layer of visual efficiency, letting you locate frequently used items at arm’s reach and relegating less-used tools to distant storage areas.
Label Maker Investment Pays Off
Because every minute spent hunting for tools is a minute lost from your actual work, investing in a label maker becomes one of the smartest decisions you’ll make for your workshop. A label maker delivers immediate returns by enabling quick identification of storage contents and ensuring tools return to designated locations consistently.
| Category | Storage Type | Label Priority |
|---|---|---|
| Electrical | Bins | High |
| Plumbing | Drawers | High |
| Painting | Shelves | Medium |
| Hardware | Compartments | High |
| Fasteners | Organizers | Medium |
Clear, legible labels transform your workflow efficiency substantially. You’ll spend less time searching and more time creating. Studies confirm that easily identifiable tools cultivate productive environments while promoting workspace discipline and respect for established zones.
Organize By Tool Category
The label maker’s power multiplies when you pair it with a strategic categorization system. You’ll organize by tool category—electrical, plumbing, painting, and woodworking—storing each group in labeled tubs for instant identification.
This method eliminates rummaging through mixed tools and dramatically reduces project downtime.
Implement a color-coding system alongside your labels to enhance recognition further. Use red for electrical tools, blue for plumbing, green for painting, and yellow for woodworking essentials.
Position frequently used categories at eye level within arm’s reach, relegating specialized tools to higher or lower shelves.
Clear labeling prevents items from vanishing into organizational black holes. You’ll know exactly where everything belongs, making cleanup faster and maintaining efficiency across all your projects.
Color-Code For Quick Identification
Every second you spend searching for a tool is a second you’re not working. Implement a color-code system to eliminate wasted time locating items.
Assign specific colors to tool categories: red for electrical tools, blue for plumbing, and green for woodworking equipment. This visual distinction speeds up identification considerably. Label both your storage containers and tool housings with matching colors using a durable label maker that withstands workshop conditions.
Create a reference guide documenting your color assignments and post it prominently in your workspace. This guarantees consistency and helps anyone else accessing your tools understand the system instantly.
As you acquire new tools, update your color-code system accordingly. This ongoing maintenance keeps your workspace efficient and prevents organizational confusion.
You’ll find that this straightforward approach greatly reduces retrieval time and boosts productivity.
Protect Tools From Rust and Corrosion
Rust and corrosion are woodworker’s enemies, quietly degrading your tools’ performance and lifespan if you don’t take preventive action.
Start by storing tools in a climate-controlled environment that minimizes humidity exposure. Place silica gel packets or dehumidifiers in your storage areas to absorb excess moisture and maintain ideal conditions.
Clean your tools immediately after each use, then apply a light coat of oil or wax to create a protective barrier. For rarely used implements, seal them in airtight containers to prevent humid air contact.
Inspect your collection frequently for rust signs, addressing any corrosion promptly with appropriate cleaning methods. This disciplined approach notably extends your tools’ operational life and maintains their cutting effectiveness, protecting your investment in quality equipment.
Go Vertical to Reclaim Floor Space
Your workshop’s floor space is too valuable to waste on tool storage. By going vertical to reclaim floor space, you’ll transform your home workshop into an efficient hub for projects.
Install wall-mounted pegboards or plywood to hang tools vertically, making it easy to locate drills, wrenches, and saws without cluttering your workspace. Consider these strategies:
- Mount heavy-duty wall hooks and magnetic strips at eye level for immediate access to frequently used tools.
- Build customized shelves or cabinets reaching ceiling height to store lesser-used items and keep floors clear.
- Incorporate a French cleat system for smaller tools, allowing reconfiguration as your projects evolve.
Vertical storage enhances visibility, reduces search time, and eliminates floor clutter.
Going vertical transforms your workshop by boosting visibility, cutting tool search time, and reclaiming precious floor space.
You’ll maximize your available workspace while maintaining complete tool accessibility throughout your home workshop.
Keep Hardware and Fasteners Within Arm’s Reach
How much time do you waste searching through drawers for the right screw or nail? You’ll dramatically improve your efficiency by positioning hardware and fasteners within arm’s reach of your workbench.
Store frequently used items in labeled open bins or wall-mounted magnetic strips where they’re instantly visible. This approach eliminates wasted searching time and keeps your workflow uninterrupted.
Apply the 80/20 rule by placing your most commonly used fasteners closest to where you work. Consider stackable organizers or small drawer systems to categorize hardware by size or type. This method allows quick retrieval without fumbling through containers.
Maintain an inventory checklist to track your fasteners and hardware. This simple practice guarantees essential items stay accessible and prevents mid-project supply shortages.
Create a Return System to Maintain Order
You’ll maintain an organized workshop by establishing clear zones where each tool belongs and returning items to their designated spots immediately after use.
This practice prevents tools from scattering across your workspace and eliminates the frustration of hunting for essentials mid-project.
When you commit to this discipline, you’re building a system that keeps your most-used items accessible and your shop functioning efficiently.
Establish Clear Zones
Because a well-organized workshop depends on knowing where everything belongs, establishing clear zones with designated storage locations is vital for maintaining order and efficiency.
Divide your workshop into functional areas based on task types. You’ll create separate zones for hand tools, power tools, finishing supplies, and project work. This strategic organization prevents tool scrambling and reduces downtime.
Here’s how to implement clear zones effectively:
- Assign specific locations for each tool category within designated zones
- Use labeled storage containers or bins to facilitate quick identification and retrieval
- Position frequently used tools at eye level and within arm’s reach
Regularly assess your zones based on actual usage patterns. You’ll notice which areas need adjustments as your woodworking needs evolve.
This adaptive approach guarantees your workspace remains functional and your tools stay accessible when you need them most.
Return Tools Immediately
Establishing clear zones sets the foundation for an organized workshop, but maintaining that order requires an equally important practice: returning tools to their designated spots immediately after use.
You’ll implement a structured return system by assigning specific locations for each tool using shadow boards and labeled bins. This approach eliminates search time and prevents misplacement.
| Tool Category | Storage Method | Location |
|---|---|---|
| Hand Tools | Shadow Board | Wall Unit |
| Power Tools | Labeled Bins | Lower Shelves |
| Accessories | Drawer Organizers | Workbench |
Adopt the “three items rule”: for every new tool you take out, return three tools first. Visual reminders near workstations reinforce this habit. Regularly assess your system, adjusting for new tools and evolving needs. You’ll maintain efficiency and a consistently orderly workspace.
Set Up Cord Management and Power Access
Proper power access and cord organization form the backbone of a safe, efficient workshop.
You’ll considerably improve your workspace by implementing strategic systems that keep cords managed and power tools accessible.
- Install overhead power tracks to position outlets strategically, eliminating floor clutter while maintaining easy access for your power tools and reducing tripping hazards.
- Adopt extension cord management systems like the QuickWinder RAP-100 to keep cords organized and tangle-free, enhancing both safety and workflow efficiency throughout your shop.
- Color-code or label cords to identify tool connections instantly, considerably reducing troubleshooting time and streamlining your setup process.
Always verify that extension cords meet safety standards and possess sufficient capacity for your equipment’s power demands.
Secure cords along walls or ceilings to maintain clear pathways and prevent overload risks.
Choose Modular Storage for Future Changes
Flexibility is your workshop’s greatest asset. Modular storage systems let you reconfigure your setup as your tool collection evolves without overhauling everything. You’ll rearrange storage units based on how often you use each tool, boosting workflow efficiency.
Mix and match components from different systems to create a personalized organization scheme that fits your specific needs. Stackable bins and adjustable shelving adapt to changing project demands, ensuring long-term usability.
A modular design reduces clutter and improves tool visibility, maintaining an organized, efficient workspace. You’ll spend less time searching for tools and more time working.
Make Tool Return a Daily Habit
Returning tools to their designated spots immediately after use is the cornerstone of workshop organization. This practice encourages you to keep your workspace clean and efficient, transforming tool management into a sustainable routine.
Establish these three strategies to solidify this habit:
- Design intuitive storage by placing frequently used tools within arm’s reach, making returns effortless and automatic.
- Implement the “three items in, one item out” rule to reinforce consistent returning behavior and prevent accumulation.
- Schedule cleanup time at each session’s end, dedicating five minutes to returning tools and tidying your workspace.
Visible storage solutions like tool walls serve as constant reminders, making tool return engaging rather than burdensome.
You’ll quickly discover that daily tool return becomes second nature, reducing lost time searching for equipment and maintaining peak workshop productivity.
Frequently Asked Questions
How to Organize Tools in a Workshop DIY?
You’ll organize your workshop by categorizing tools into donate, sell, and keep groups. Install wall-mounted storage with French cleats, position frequently used tools within arm’s reach, and label tubs by category for efficient retrieval.
What Are the Common Toolbox Organizer Mistakes?
You’re making critical mistakes when you ignore wall storage, overcrowd drawers, skip labeling, neglect moisture control, and mischaracterize tools. You’ll waste time searching, damage equipment, and forget essential items when you rely solely on disorganized drawer systems.
How Can I Organize My Tools on a Budget?
You’ll organize your tools affordably by repurposing scrap wood into wall-mounted racks, using labeled plastic bins, installing pegboards, creating plywood drawers, and building multifunctional workbenches with storage compartments.
What to Put in Each Drawer of a Tool Box?
You’ll organize your toolbox by placing frequently used hand tools in the top drawer, small parts and fasteners in middle drawers, and larger power tools in bottom drawers. Label each drawer clearly for easy identification.
Conclusion
You’ve now mastered the art of tool organization—congratulations on joining the elite 0.3% of woodworkers who actually return their chisels to the correct drawer. Your workshop won’t spontaneously transform into a tornado aftermath, your spouse won’t stage an intervention, and you’ll spend less time excavating through sawdust searching for that one wrench. Implement these systems consistently, and you’ll discover your shop’s hidden superpower: functionality. Revolutionary stuff.