
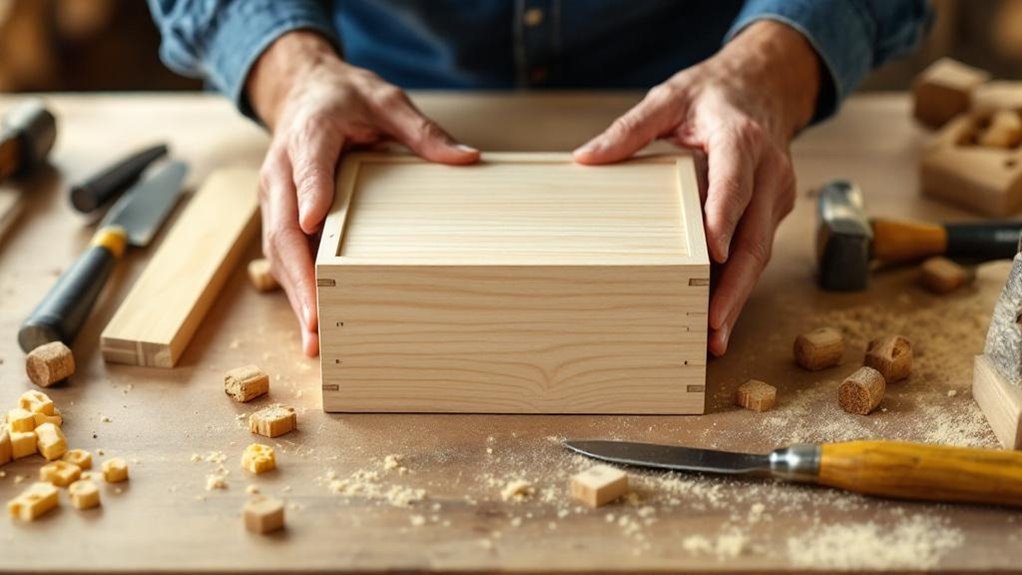
You’ll start by selecting appropriate wood—figured stock for your lid and plywood for the box body to resist moisture. Cut your panels to size using a table saw, accounting for joint overlap. Assemble using butt joints reinforced with dowels or biscuits, applying glue sparingly to avoid squeeze-out. Use clear tape to maintain square corners while curing. Round over edges with a router, then stain and seal with polyurethane. The specifics of lid fitting and avoiding common gap mistakes require closer attention.
Key Takeaways
- Select 1/2 inch wood stock and use a table saw to cut uniform panels, subtracting thickness for proper panel overlap.
- Pre-sand interior edges and apply wood glue to butt joints, reinforcing with dowels or biscuits for added strength.
- Use clear tape and clamps to keep the box square during assembly, allowing glue to cure completely before removing.
- Round over edges with a router for aesthetics and improved handling after assembly is complete and fully cured.
- Apply stain evenly along wood grain, then seal with clear polyurethane or varnish for a durable, finished appearance.
Choosing Your Wood: Lid Stock and Box Body
When you’re selecting wood for your box’s lid, prioritize highly figured domestic or exotic woods that’ll showcase visual appeal—though you can also laminate thinner decorative pieces onto a thicker substrate to prevent wood movement issues.
For your box body, choose plywood or MDF instead of solid wood. These engineered materials resist swelling and shrinking from moisture fluctuations, eliminating wood movement complications that compromise structural integrity.
Your lid stock demands visual sophistication; your box body demands stability. This contrasting approach optimizes both aesthetics and function.
The engineered materials’ dimensional consistency allows you to construct reliable joints using rabbet or spline connections, which enhance both strength and appearance.
Sand the interior surfaces before assembly to achieve a refined finish that complements your decorative lid.
Must-Have Tools for Box Building
You’ll need a table saw to make precise miter and spline cuts that strengthen and refine your box’s corners.
A router table setup lets you round over edges and add decorative profiles that enhance the overall aesthetic.
Clamps paired with specialized jigs keep your joints square during assembly, ensuring the glue bonds create a stable structure.
Table Saw Essentials
Precision cuts form the backbone of quality box construction, and a table saw‘s capability to execute miter and spline cuts with accuracy makes it indispensable for this craft.
You’ll appreciate how quickly you can make repetitive cuts for multiple box components, ensuring consistency across all pieces.
Make sure you invest in high-quality carbide-tipped blades for clean cuts that minimize sanding time and enhance your box’s finish.
A crosscut sled attachment greatly improves both safety and accuracy when handling small pieces, maintaining square corners and preventing kickback.
For advanced finishing work, consider pairing your table saw with a router table.
This combination allows you to round edges and add detailed profiles effortlessly, elevating your box-making capabilities to professional standards.
Router Table Setup
Once you’ve made your precision cuts on the table saw, a router table takes your box to the next level by handling all the finishing work that separates amateur builds from professional-quality pieces.
Secure your router firmly to eliminate vibrations that compromise cut accuracy. Align your fence meticulously to maintain consistent edge contact. Use roundover bits to create smooth, polished edges on lids and sides—this transforms your box from functional to refined.
Here’s what matters most:
- Sharp roundover bits deliver clean profiles without tearout or splintering
- Proper bit height adjustment prevents over-cutting and guarantees uniform curves
- Test cuts on scrap wood catch mistakes before ruining your actual pieces
Apply masking tape along your workpiece edges to protect against dust and minimize chipping.
Check your setup frequently and adjust methodically. This deliberate approach yields professional results every time.
Clamping and Jig Systems
Three essential systems—corner clamps, tape jigs, and dedicated holding fixtures—transform box assembly from a frustrating wrestling match into a controlled, repeatable process.
Corner clamps secure your glued joints at precise 90-degree angles, eliminating drift during the critical drying period. You’ll want at least four to handle all corners simultaneously.
Fabricate a tape jig using clear tape to simplify alignment during assembly. This low-cost solution stabilizes your workpiece and guarantees consistent joint positioning across multiple builds.
Dedicated holding fixtures—whether commercial or shop-made—maintain proper alignment while you work. They prevent shift during clamp tightening, which commonly causes joint misalignment.
Invest in quality clamps sized appropriately for your box dimensions. Proper clamping pressure, combined with strategic jigs, assures professional results and snug-fitting lids every time.
Cut Your Box Panels to Size
You’ll need to measure your box’s length, width, and height carefully, then subtract twice the thickness of your chosen material to account for how the panels will overlap at joints.
Select stock thickness based on your box’s size and intended use—thicker material works better for larger boxes, while thinner stock suffices for smaller designs.
Once you’ve determined your exact panel dimensions, you’re ready to make precise cuts on the table saw.
Measuring and Planning Layout
Before making your first cut, determine your box’s exact dimensions—length, width, and height—and account for wood thickness, especially if you’re planning rabbet joints that’ll require specific edge cuts.
Set up your work bench with measuring tools and mark your panels carefully. You’ll need to measure twice before cutting to minimize costly errors. Use a table saw for accuracy, ensuring straight edges that align perfectly during assembly.
Consider these critical elements:
- Wood grain orientation enhances visual appeal and prevents your finished box from appearing flat or uninspired.
- Material precision saves expensive wood and frustration when joints won’t fit.
- Planning ahead transforms a chaotic build into a satisfying, professional result.
Account for the saw blade’s thickness when measuring. Position your wood strategically to make maximum use of each board while capturing the grain’s beauty in your final design.
Selecting Appropriate Stock Thickness
Selecting the right stock thickness directly impacts your box’s structural integrity and appearance. For small wooden boxes, I’ve got to recommend 1/2 inch stock, which balances strength and weight effectively.
If you’re building larger boxes, thicker stock becomes necessary for proper support.
Consider using plywood or MDF for your panels—these materials handle humidity changes better than solid wood. You’ll find they reduce warping issues considerably.
When cutting your box panels to size, account for your saw blade’s kerf, typically 1/8 inch, to achieve precise dimensions. Aim for uniform panel sizes throughout; this consistency facilitates easier assembly and alignment.
Ensure your lid stock thickness matches your box sides pretty much perfectly for a snug fit without excessive bulk.
This attention to detail produces a professional-looking, functional finished box.
Picking the Right Joint for Your Skill Level
The joint you choose will determine both your construction process and your box’s final durability.
I’m getting started with woodworking, so you’ll want to match your technique to your experience level and available tools.
For beginners, butt joints offer simplicity, though others have mentioned they lack strength.
Butt joints offer simplicity for beginners, though they lack the strength of more advanced joinery techniques.
Rabbet joints would make excellent alternatives for small boxes, providing hidden edges and straightforward assembly.
If you’re seeking professional results without specialized equipment, consider these approaches:
- Achieve invisible connections using Miller Dowels for a clean, grain-free finish
- Utilize lock miter bits to simplify mitered corner assembly at any skill level
- Master spline joints once you’ve invested in proper jigs for accurate cuts
Select the joint matching your current capabilities while building toward more advanced techniques.
Build Your First Box With Butt Joints
You’ll start by cutting your pieces to size, ensuring they fit snugly at the corners where they’ll butt against each other.
Before assembly, you should pre-sand the inside edges of each piece, since accessing these areas becomes difficult once you’ve glued the box together.
Then you’ll apply wood glue to the joints, clamp them firmly while the adhesive dries, and consider reinforcing them with screws or dowels for added durability.
Cutting Your Box Pieces
Start by measuring and marking your wood to the desired box dimensions, ensuring each piece is square and uniform for proper alignment.
You’ll want precision here—I’m going to emphasize that inconsistencies compound during assembly.
Use your table saw to make clean, precise cuts for butt joints where edges meet at right angles. Set your blade accurately and make multiple test cuts on scrap wood first.
Key considerations as you cut:
- Sharp blades produce cleaner edges that’ll bond better with adhesive
- Consistent measurements guarantee snug joints without frustrating gaps
- Square cuts eliminate alignment headaches during dry-fitting
Sand all edges thoroughly before assembly to smooth any roughness from sawing.
This improves adhesive contact and creates professional-looking joints.
Take time here—proper preparation prevents problems later.
Assembling With Glue
Before you apply any glue, sand the interior surfaces of your box pieces to achieve a smoother finish—this step determines your final appearance and can’t be corrected after assembly.
Next, apply clear tape at the corners to assist with alignment and stability during assembly.
Position your pieces carefully, ensuring edges are well-aligned for a clean fit. Apply wood glue to the butt joints, then use clamps to hold everything together tightly while the adhesive sets. Clamps eliminate gaps and guarantee strong bonds.
Once the glue cures, reinforce the joints with dowels or wooden biscuits for enhanced strength. This approach compensates for butt joints’ inherent weakness, creating a sturdy box that’ll withstand regular use.
Sanding Before Assembly
Sanding the interior surfaces of your box pieces before assembly is non-negotiable—it’s your only opportunity to smooth hard-to-reach areas that’ll be inaccessible once the joints are glued and clamped.
Start with coarse sandpaper and progressively move to finer grits, creating that silky-smooth surface that elevates your finished product.
Pay meticulous attention to:
- Edges and corners that splinter easily, compromising your box’s professional appearance
- Interior surfaces where glue residue collects, creating visible blemishes
- Joint contact points where unevenness weakens structural integrity
This preparation step serves dual purposes: it eliminates rough spots and potential glue interference while ensuring superior joint fit during assembly.
Thorough sanding prevents frustration later when you discover inaccessible imperfections. Your diligence here directly translates to a stronger, more refined wooden box.
Level Up: Miter Joints for a Polished Finish
Forty-five-degree angles are your gateway to professional-looking boxes that hide end grain and create seamless corners.
You’ll want to invest time in building jigs that maintain square edges throughout assembly, ensuring structural integrity and visual precision.
Invest in quality jigs to maintain square edges during assembly, ensuring both structural integrity and visual precision in your work.
Consider using a lock miter bit, which simplifies setup and produces strong, interlocking joints with minimal effort.
For additional reinforcement, incorporate biscuits into your mitered corners—they improve alignment and keep corners flush and square during clamping.
When constructing your lid, add a rabbet joint to the mitered edges.
This creates a seamless shift that hides raw edges and greatly elevates your box’s overall finish.
The combination of these techniques transforms your work from functional to genuinely polished.
Hide Your Edges With Rabbet Joints
A rabbet joint builds on the miter’s promise by concealing raw edges where your lid meets the box sides. You’ll cut a notch along the edge of both components, allowing them to interlock seamlessly while hiding end grain that would otherwise mar your finished piece.
Using a table saw or router, you can execute this joint efficiently regardless of your skill level. The key’s matching the cut’s depth and width to your material’s thickness—precision guarantees structural integrity.
- Transform rough edges into seamless connections
- Achieve a gallery-quality, professional appearance
- Protect against visible wood grain imperfections
Sand the rabbet edges thoroughly before assembly to eliminate roughness. This prevents unsightly blemishes from compromising your box’s polished finish and confirms every detail reflects your craftsmanship.
Sand Your Box Before You Glue
Before you apply glue to your wooden box components, you’ll want to sand all interior surfaces and edges thoroughly. This pre-assembly approach guarantees smoother finishes and provides easier access to corners and tight spaces that become problematic post-assembly.
| Grit Range | Purpose | Surface Type |
|---|---|---|
| 80-100 | Initial smoothing | Rough lumber |
| 120-150 | Primary finishing | Interior surfaces |
| 180-220 | Fine polishing | Edges and details |
| 220+ | Final refinement | High-visibility areas |
Round your edges slightly to eliminate splinter risks and enhance aesthetics. After sanding, remove all dust and debris meticulously—contamination compromises glue bonding strength. This preventative step eliminates touch-ups later, saving time while improving your final product’s quality and durability.
Assemble Your Box and Keep It Square
Now that you’ve prepared your components, you’ll need to focus on keeping your box square during assembly.
Maintaining squareness during assembly is essential—proper alignment techniques ensure your box’s structural integrity from start to finish.
Start by using clear tape to align corners before applying glue. This temporary hold simplifies positioning and guarantees accurate miter joints. Once you’ve applied glue, wrap the joints with tape to enhance stability and prevent shifting while the adhesive sets.
Create jigs that assure accurate corner alignment, especially critical for miter joints. This precision prevents costly mistakes.
- Secure all joints with clamps during the drying process—this maintains alignment and squareness until glue fully cures.
- Use clear tape as a temporary positioning aid before committing to glue.
- Wrap miter joints with tape immediately after gluing to eliminate movement.
Remove clamps only after complete glue curing to preserve your box’s structural integrity and square shape.
Round Over Edges With a Router
Once you’ve assembled and squared your box, you’ll want to round over the edges to improve both aesthetics and comfort.
Start by lightly sanding the edges to remove roughness and guarantee a uniform finish. Set up your router table securely, as stability is critical for consistent results. Install a roundover bit and adjust the router’s depth to achieve your desired radius—typically between 1/8 inch and 1/4 inch.
Route all edges methodically, maintaining steady pressure throughout. Always wear safety gear, including goggles and a dust mask, to protect yourself from sawdust and potential kickback.
The rounded edges will transform your box’s appearance while making it considerably more pleasant to handle.
Fit and Attach a Removable Lid
Since your box’s sides must be consistent in thickness for a secure fit, measure them carefully and cut your lid slightly smaller than the inner dimensions—this guarantees a snug, secure seat.
Next, sand the lid’s edges and the box’s inner frame thoroughly for a seamless finish.
Consider these attachment options:
- Rabbet joints hide edge seams while delivering a professional, polished appearance
- Hidden dowels maintain structural integrity while allowing effortless removal
- Sliding grooves enable smooth operation without visible hardware
Round over all edges with your router to enhance aesthetics and improve lift-ability. This final step eliminates sharp corners and creates an inviting tactile experience.
Test the fit repeatedly, making minor adjustments as needed. Your removable lid should slide on and off smoothly without excessive play or resistance, creating a satisfying, professional-quality wooden box.
Stain, Seal, and Finish Your Box
To enhance your wooden box’s appearance and durability, you’ll want to apply a stain that complements the wood grain. Use a brush or cloth to apply it evenly, then let it penetrate before wiping away excess. Allow 24 hours for complete drying before proceeding.
| Step | Material | Time |
|---|---|---|
| Stain Application | Brush/Cloth | 30 minutes |
| Stain Drying | None | 24 hours |
| Sealant Coat | Foam Brush | 20 minutes |
| Curing Period | None | 1 week |
Next, seal your box with clear polyurethane or varnish using a foam brush for smooth coverage. Sand lightly between coats with fine-grit sandpaper to improve adhesion. Allow the sealant to cure for up to a week before using your box, ensuring complete hardening and maximum durability.
Why Your Box Corners Gap: Common Mistakes and Fixes
Several factors commonly cause gaps at your box corners, but most stem from three preventable issues: imprecise cuts, inadequate joint selection, and poor assembly technique.
Box corner gaps stem from three preventable issues: imprecise cuts, inadequate joints, and poor assembly technique.
You’ll achieve better results by addressing each systematically:
- Calibrate your saws properly—misaligned blades create cascading errors that compound across all four corners.
- Upgrade your joints—mitered corners and spline joints dramatically outperform weak butt joints.
- Master your clamping—using jigs during glue-up keeps corners square and aligned.
Additionally, you’ll minimize gaps by pre-sanding parts before assembly to eliminate finish build-up that interferes with fit.
During glue-up, apply just enough adhesive to coat the joint surface; excess glue causes squeeze-out that prevents snug connections.
These precision-focused techniques guarantee your box corners close properly without visible gaps.
Frequently Asked Questions
How to Make a Simple Box Step by Step?
You’ll select figured wood for the lid, cut joints using a table saw, assemble with glue and jigs, route rounded corners, sand thoroughly, and finish with your preferred stain or coating.
How to Make the Wooden Box?
You’ll select figured wood for the lid and plywood for the body, then cut rabbet joints for assembly. You’ll clamp everything square, route rounded corners after assembly, and sand all interior surfaces before final finishing.
What Angle Do You Cut to Make a Box?
You’ll cut 45-degree angles for mitered corners on your wooden box. However, you can skip angle cuts entirely with butt joints, where pieces join at full thickness. A lock miter bit also simplifies the process considerably.
How Do I Make My Own Small Boxes?
You’ll select figured wood for lids and plywood for box bodies. Use butt or mitered joints, create rabbet joints for lids, and sand interior surfaces before assembly. Round edges for refinement.
Conclusion
You’ve now got the skills to build a solid wooden box from start to finish. When Sarah built her first box using butt joints, she discovered that taking time to square her cuts prevented those frustrating corner gaps she’d worried about. Your attention to detail—from selecting quality wood to properly sealing the finish—transforms a simple project into a keepsake your family’ll treasure for years.